Showing posts with label All purpose flour. Show all posts

Thursday, January 1, 2015

Pancakes (The Fluffy Version)

Pancakes (The Fluffy Version) 


Lately this tiredness encompasses me all the time. Actually the reason is because I desperately needed some rest in between a lot of Market Research work and truth be told its not that I didn't get one or 2 days in between projects to rest well but then I realized that I cook with so much enthusiasm on days when I don't have to work that the stress and tiredness is just increasing.

The month of December was super packed. Bidding farewell to Bombay was not just emotional but tiring due to the endless packing  topped with non stop projects.

No sooner had I landed in Calcutta I decided there must be celebrations and so we had a small Lunch where the lovely Pritha from Guilt Free got this fabulous Bacon and Pea Rice. For my part I made a Brioche Rustica following La Cucina's (the book)  recipe and a Fish in Wine sauce with a Caramel Fruit Cake which got satisfactory response. Then came the Bake Sale organized by Kolkata Food Bloggers and I am very happy to share with you the fabulous news that most of my products got sold out within the first few hours itself and I donated the money from my personal Sale for the Cats and Dogs of The City of Joy. I should have known that handling a Bake Sale and non stop work pressure would get too much too handle but cooking is like an addiction which I simply can't put a stop to. I did try and share recipes but I will be honest about the fact that most recipes have been left out this festive season.

Now today its a New Year. Quite frankly I am not much of a believer of a new start just because the year changes. You see its just a day where deadlines still remain, problems are still to be taken care of and your tiredness prevails but with all the hopeful messages on my Facebook Wall I guess I got a bit inspired and decided that I must start the new year with something nice.

Now Pancakes come in many shapes, sizes and forms. I have previously made these fabulous German Pancakes which were thin and slathered with chocolate and a perfect delight and so this time it was time for my old friend, the Fluffy pancakes.


To be fair I have made this kind of Fluffy Pancake after almost 2 years and I must say that having finally found a recipe which suits me perfectly I hope 2015 is just as good. I did put some techniques which I have learnt over the years to good use and the result was fluffy , airy light and tender pancakes

Recipe adapted from All recipes :-

The original recipe promises 12 pancakes but in reality it yielded about 9 pancakes which is good enough

Serves 3 to 4 people

1.5 cups of flour
1 level  tbsp baking powder
1 tbsp white granulated sugar
50gm to 60gm melted butter
1.4 cups of milk
1 large egg
Butter to lightly grease  the pan


Sift the baking powder and flour together and add the sugar. In a separate bowl whisk the egg till its pale and fluffy and add the milk bit by bit whisking it well. Now add the dry ingredients to the wet mixture bit by bit folding it in rather than whisking it and in the end add the melted butter and just fold it in gently and let the batter rest for 10 minutes to 15 minutes.

Grease a skillet and put a ladle of butter letting the bubbles form on one side before flipping it over gently and cooking it till its well set. Enjoy these airy tender and light pancakes soaked in honey or Maple syrup or even Molasses .

Tips


  1. The folding in of the flour gives you extra fluffy pancakes because you don't knock down the air bubbles.
  2. Resting the batter gives a smoother batter 
  3. You have to adjust the heat from medium to low so that the pancakes are golden with a light brown edge. 


Saturday, August 9, 2014

Chocolate Buttercream Sponge Cake

Chocolate Buttercream  Sponge Cake


Edited :-

You must be wondering what this edited bit is. Well this is my gratitude to a lovely lady who is a wonderful teacher. When it comes to baking and cooking in general I cautiously take advice because taste is very subjective so the only way to take another passionate baker's advice is to trust the person and see his reasoning. I am honestly scared of using syrups because it makes my cakes too sweet and I don't care too much for that intense sweet taste but then when a very seasoned baker advised me to soak the cake in syrup I knew I must do it. By this time exactly half my cake was devoured by friends and family who thankfully liked it. In fact the friend even asked for more . So I took my cake out of the refrigerator and let it come to room temperature then put a strip of butterpaper on the cake and brushed the sponges with syrup. Now I used the syrup sparingly yet because the sponge was well made it soaked it up very well. Then I refrigerated it for the cake to set and had  a sliver and even though it was a bit sweet than I would have preferred I would recommend the soaking with syrup because it gives the sponge a delightful flavour. I am have mentioned the steps required to soak the sponge in the recipe so please do use it. Of course I doubled the amount of syrup for the whole cake :) Hope you enjoy this sinful indulgence. before I move on to my experience with the cake here is a sneak peak into this talented lady's facebook page Sinfully Your's  and she takes regular cooking classes in our very own city of Dreams, Mumbai . Contact her for a great learning experience. 

I bake for various reasons. Sometimes I bake because I like the idea of having a moist cake to accompany my tea . Usually these cakes are butterbased moist and delightfully fluffy yet rich enough which does not need any frosting and then there are other times for celebration such as meeting one of my closest friends after a long time.


Such special occasions call for a special frosted cake. Funnily both of us love butter based frosting less cakes but I never leave such opportunities to make a nicely frosted cake and usually frosting for me means a silky smooth buttercream.

So lets move on top the cake

I have already shared the recipe for the fluffy sponge cake for which the technique is as important as the ingredients used.

Here is the recipe for the foam sponge cake

Once you have baked the cake let it cool down completely before slicing it. You need to make four rings.

Now for the buttercream and ganache :-

For the buttery chocolaty buttercream

300gm butter softened at room temperature
150gm dark chocolate chopped well
200gm to 300gm icing sugar
2 to 3 tbsp cocoa powder
A few tbsp of milk to loosen the frosting

For the syrup :-

1/2 cup water
1/2 cup sugar
1 tsp vanilla extract

For the ganache

65gm dark chocolate
90ml to 100ml cream


You should ideally soak the cake with the syrup a day ahead of frosting.  Once the cake cools down completely just soak each ring with about Half a tbsp to 1 tbsp with the syrup and then refrigerate.

The next day simply whip the butter to a smooth fluffy consistency add the sugar bit by bit and keep tasting . Now temper the chocolate by chopping it on a clean water-free surface and melting it on a double boiler and then let it cool down and slowly add this to the fluffed up buttercream beating it constantly so that the fluffiness is not hampered. Keep whisking and add the cocoa powder till you have a beautiful fluffy buttercream frosting.

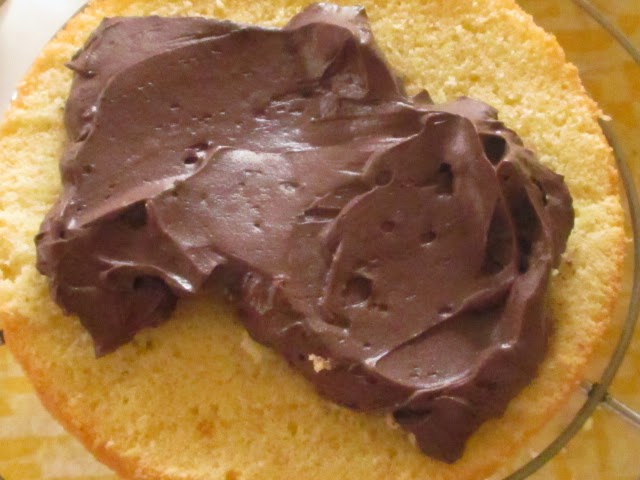
Now spread a thick layer of buttercream on one cake ring and let ti get set in the refrigerator for 15 minutes and do this with all the rings till you reach the final one then give a single coat to the entire cake and let it rest in the refrigerator for 15 minutes.


Now make the ganache by warming up the cream and pouring it over the chopped chocolate and stirring ti till you get a smooth consistency. Let it cool down for 5 minutes and give the cake a coat with the ganache and then decorate if desired.


Let this set in the refrigerator. Decorate with some buttercream and enjoy with friend sand family.

Tip :-

This cake is a buttercream lover's delight so use thick layers so that you use up most of the buttercream leaving about 1 cup for decoration.


Thursday, July 10, 2014

Ciabatta

Ciabatta 


There are times in your life when you need courage and well courage is what I needed to switch from dry yeast to fresh yeast. Well this is mostly because storing fresh yeast can be very problematic but the trick is to cut it into small pieces and wrap it in cling film and store it in the freezer. Well anyway I have been wanting to make an antipasti for which you need the delicious Italian bread called 'Ciabatta' which is a kind of Italian cousin of the very famous Baguette.


Well its actually quite easy to make . What you need is just a bit of planning ahead because you need to create the 'poolish' or starter the night before you want to bake the bread and once you bake this amazing crusty bread with a delicious flavour you can create a fantastic sandwich , tasty appetizers or you can simply sip it in olive oil and it tastes superb.


Anyway moving on to the recipe :-

This makes two medium sized ciabattas and one large ciabatta

The source of my recipe are a few Italian blogs thanks to Google translator and BBC Food

Here is what you need for the overnight poolish

250gm all purpose flour
15gm fresh yeast
190ml lukewarm water
Pinch of sugar

For the final dough

250gm all purpose flour
190ml lukewarm water
10gm fresh yeast
12gm salt
Pinch of sugar
1 tbsp olive oil
Milk for brushing
Extra flour for sprinkling

For the overnight poolish

Proof the yeast by dissolving the sugar with 4 tbsp lukewarm water (Remember that yeast beign a living creature can die if the water is too hot. Ideally the water should feel just mildly warm where you can dip your fingers and comfortably keep it dipped) and then adding the crumpled yeast . Stir and let it sit for 5 minutes to 10 minutes. It will form bubbles which is the sign that it will work and you can move ahead . Mix the yeast with the flour and then slowly add the lukewarm water and mix with your clean hands . The dough will be wet and stick and it is supposed to be that way. Keep working with the dough till you see a shine and then cover with a cloth and let it rise for 13 hours to 18 hours.

After 18 hours of rise 


For the final dough

The dough once it has been transferred to an oiled bowl 


Proof the yeast and then add the yeast to the flour and then add the poolish and then slowly add the water and finally the salt and make a dough. It will be sticky and its supposed to be that way. keep kneading till the dough leaves the sides of the bowl and then oil your hands and grease a bowl with olive oil and knead the dough and transfer to oiled bowl and let it rise for another hour and then gently transfer this on to a heavily floured work surface and let it rise for another half an hour and then cut it into three equal pieces and gently stretch with your hands and transfer onto the baking tray lined with parchment paper and sprinkle some flour on it .

Before the loaf goes in the oven 


Let it rise for another half an hour and brush with milk (this helps in browning) and then preheat oven to 240 C and bake for half an hour reducing the temperature to 220 C after 15 minutes of baking. If you have a convection oven bake at 220C for half an hour. Take it out of the oven and then cool on a wire rack. You must let the bread cool completely before you slice it.


Thursday, May 8, 2014

Sour Cream Sandwich Bread


Sour Cream Sandwich Bread 


There was a time when making a sandwich at home required buying bread and other ingredients , assembling them and eating it, given the bread would be bought from bakeries but once you have made your own bread successfully there is no looking back. Like my friend Karen says, its therapeutic and I say its an addiction and well you get the best flavours and taste.


So when I decided to make a sandwich I had to pre-plan it from at least 4 days before. First and foremost there was the search for the perfect recipe though but wait the sandwich is yet to be made because first comes the bread. Well to be honest when it comes to bread I don't have to read too many articles and recipes to know where to find the perfect recipe. You see the first time I ever baked bread it came out top notch and perfect and I had nothing to do with it, it was all because of my Bread God Dan Lepard's recipe. His recipes are perfect , so whenever I bake my bread I just follow his recipe and add a little of what I call 'Manjari proof' thing in the end.


So Mr. lepard says this is the 'proper British sandwich bread' and I say it comes out marvellous. It calls for sour cream and so lets begin with the sour cream . You can easily buy your own but believe me making sour cream substitute at home is easier than any other dish. And there is no need to try and make this healthy with wholewheat flour because if you really want healthy bread make a wholewheat bread . I have one in my Cakes and Bakes :)


 For the sour cream :-

200ml cream
2 tbsp vinegar (I used apple cider vinegar)

Just mix the cream with the vinegar and keep it in the hottest part of your home and let it ferment for 24 hours to 48 hours and you shall have thick sour cream substitute. Then chill this for a day and you are sandwich ready. I took advantage of the horrible summers in India and my sour cream was ready after overnight fermentation which I chilled for the entire day before using. After using the amount of sour cream required for the bread you shall still have some sour cream. Use it for salads, soups etc. The amount left is too little for cakes.


Recipe Source : Dan Lepard's Sour Cream Sandwich bread

What you need for a good loaf which yields enough slices for 6 sandwiches is :-

125ml chilled sour cream
550gm all purpose flour
150ml cold water
100ml boiling water
2 tsp dry active yeast
2 tsp castor sugar
2 tsp salt
25gm butter (all of which you shall not require)
Milk for brushing


Start by boiling the water. Take a big bowl and add your sour cream, cold water and then add the hot water , salt sugar and yeast. See the recipe did not call for proofing of the yeast and I haven't done it but I am guessing this first step proofs the yeast. After 5 minutes stir well and add the flour and use your clean hands to make the dough and cover and leave for 10 minutes. After 10 minutes butter your hands and knead the dough for 1 minute and leave for 10 minutes covered with the cloth. Repeat its  process twice. Now knead it well and tightly roll it like a scroll and butter your baking pan and leave the dough inside the pan covered with cloth  and let it rise for the next 1 hour to 1.5 hours till it has doubled in size. Brush with milk. This brushing of milk is what I call the 'Manjari proofing' because if you don't there is a chance that the top becomes too dark. This gives a nice brown crust on top and a shine.

Preheat oven to 200 C and bake for 30 minutes to 45 minutes. I personally required 39 minutes. Let it cool in the pan for 2 minutes and then take it out and let it cool on the rack for at least 2 hours to 3 hours and when it has become completely cool only then should you slice it. If you try slicing ti earlier your bread will crumble.


Make a nice sandwich. I shall make it tomorrow because ' Tomorrow is another day'  :)


Wednesday, April 23, 2014

Milk Bread

Milk Bread 


My father has always maintained that no other bread tastes as good as the humble milk bread. While I do not accept his thoughts on bread because I love whole wheat bread and some other breads as well on a hot summer's day I make a batch of milk loaves for my father who loves fresh soft milk bread with copious amount of butter spread on it and sugar sprinkled on it. And it becomes a heavenly  treat with fresh cream on top


The truth is that, once you start making bread it is only through your experience that you come to know of certain important aspects which no recipe talks about.


For instance the first time I had baked a bread I had thoroughly searched the internet for recipes and most of them scared me until I stumbled upon Dan Lepard's artisan bread. It was well explained and my bread had come out perfect, yet after my experience with a couple of other breads it was only practice which made me realize that while the success of a bread baked at home depends largely on the right recipe so does some other factors. So, most people face a problem of the bread not rising but did you know that is bread is proofed beyond requirement it will rise and then start expanding but you need not worry because there is a solution. You simply punch it down knead and let it rise :)


Milk bread is one of the easiest breads one can bake and the ingredients are very easily available and stocked by most homes and so it usually saves you the trouble of going out to gather ingredients.

Here is what you need for the recipe :-

For the recipe I followed Dan Lepard's recipe to the tee but cut the recipe down to suit my requirements

312 gm all purpose flour + a little extra for kneading
1 tsp instant yeast
50ml cold water
188 ml warm milk
38 gm salted butter
13g castor sugar or honey (I had used honey)
Extra butter for greasing and kneading
1 tsp salt
Though not mentioned in Lepard's recipe I used extra milk to brush the tops before baking

Start by bringing the milk to a boil and letting it cool down to a lukewarm stage when you add the cold water and the yeast. Remember that the liquid must not be of a high temperature else it shall kill the yeast.

Next mix the flour, castor sugar or honey, salt and then melt butter and pour in in the dough. Use your clean hands to knead. Remember it will be sticky but you must not add extra flour else your bread will come out hard. keep kneading the sticky dough for 10 minutes and then let it rest for 10 minutes covered with a wet cloth. After 10 minutes grease your hands with butter and knead it till it forms a super soft dough and let it rise for the next 45 minutes to 1 hour.

Before the final rise 


Here is the tricky part. Dan Lepard works in a cold country and I stay in a tropical one , so my bread was done in 50 minutes and then I punched it down and added flour to knead it and shape it. I  divided it in three balls and shaped them like sausages by rolling them and placed them side by side. I covered it with the cloth and let it rise for the next 20 minutes.

Ready to be baked 


Now preheat the oven to 180 C and bake for 40 minutes to 50 minutes in a well greased tray or a loaf pan. Do not forget to brush the dough with milk before baking it for a beautiful brown yet soft crust else your crust will blacken.


It is important to let the bread cool completely before slicing it up. It takes a bit of practice to get it out of the tray. Simply use a blunt knife to gently but firmly bring it out after 10 minutes and cool on a wire rack.

P.S. When baking the bread always use a tray of boiled water beneath the rack on which the bread is beign baked. This keeps the bread moist while it is baking.

Enjoy the soft slices buttered well . Indulgence is a luxurious necessity. In the end my father might have shown his mock anger and said, 'The daughter is doing nothing but baking . Why don't you open a  bakery?' but his chewing on the buttered slice of milk bread said otherwise . Now I can happily go off to sleep and wake up to a delicious breakfast :)