Chocolate Buttercream Sponge Cake

Edited :-
You must be wondering what this edited bit is. Well this is my gratitude to a lovely lady who is a wonderful teacher. When it comes to baking and cooking in general I cautiously take advice because taste is very subjective so the only way to take another passionate baker's advice is to trust the person and see his reasoning. I am honestly scared of using syrups because it makes my cakes too sweet and I don't care too much for that intense sweet taste but then when a very seasoned baker advised me to soak the cake in syrup I knew I must do it. By this time exactly half my cake was devoured by friends and family who thankfully liked it. In fact the friend even asked for more . So I took my cake out of the refrigerator and let it come to room temperature then put a strip of butterpaper on the cake and brushed the sponges with syrup. Now I used the syrup sparingly yet because the sponge was well made it soaked it up very well. Then I refrigerated it for the cake to set and had a sliver and even though it was a bit sweet than I would have preferred I would recommend the soaking with syrup because it gives the sponge a delightful flavour. I am have mentioned the steps required to soak the sponge in the recipe so please do use it. Of course I doubled the amount of syrup for the whole cake :) Hope you enjoy this sinful indulgence. before I move on to my experience with the cake here is a sneak peak into this talented lady's facebook page Sinfully Your's and she takes regular cooking classes in our very own city of Dreams, Mumbai . Contact her for a great learning experience.

Such special occasions call for a special frosted cake. Funnily both of us love butter based frosting less cakes but I never leave such opportunities to make a nicely frosted cake and usually frosting for me means a silky smooth buttercream.
So lets move on top the cake
I have already shared the recipe for the fluffy sponge cake for which the technique is as important as the ingredients used.
Here is the recipe for the foam sponge cake
Once you have baked the cake let it cool down completely before slicing it. You need to make four rings.
Now for the buttercream and ganache :-
For the buttery chocolaty buttercream
300gm butter softened at room temperature
150gm dark chocolate chopped well
200gm to 300gm icing sugar
2 to 3 tbsp cocoa powder
A few tbsp of milk to loosen the frosting
For the syrup :-
1/2 cup water
1/2 cup sugar
1 tsp vanilla extract
For the ganache
65gm dark chocolate
90ml to 100ml cream
You should ideally soak the cake with the syrup a day ahead of frosting. Once the cake cools down completely just soak each ring with about Half a tbsp to 1 tbsp with the syrup and then refrigerate.
The next day simply whip the butter to a smooth fluffy consistency add the sugar bit by bit and keep tasting . Now temper the chocolate by chopping it on a clean water-free surface and melting it on a double boiler and then let it cool down and slowly add this to the fluffed up buttercream beating it constantly so that the fluffiness is not hampered. Keep whisking and add the cocoa powder till you have a beautiful fluffy buttercream frosting.
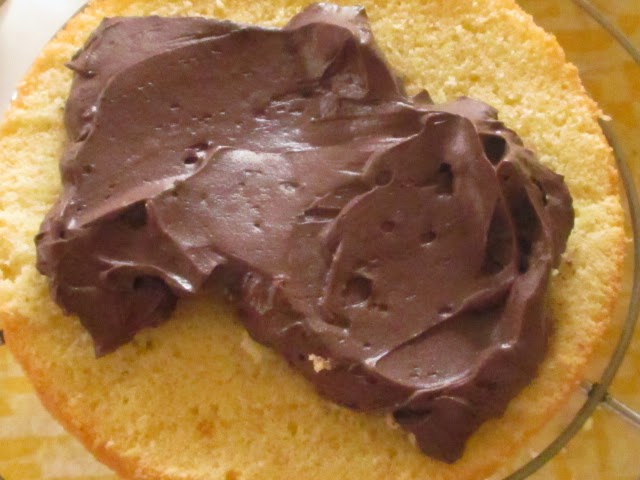
Now spread a thick layer of buttercream on one cake ring and let ti get set in the refrigerator for 15 minutes and do this with all the rings till you reach the final one then give a single coat to the entire cake and let it rest in the refrigerator for 15 minutes.

Now make the ganache by warming up the cream and pouring it over the chopped chocolate and stirring ti till you get a smooth consistency. Let it cool down for 5 minutes and give the cake a coat with the ganache and then decorate if desired.

Let this set in the refrigerator. Decorate with some buttercream and enjoy with friend sand family.
Tip :-
This cake is a buttercream lover's delight so use thick layers so that you use up most of the buttercream leaving about 1 cup for decoration.
Your cake would look more professional if you levelled the layers. The easiest way to do that is to put the cooled layer back into your baking pan and then, using the edge of the pan as a guide, and using a long knife, slice the top off horizontally. You now have a top and bottom that are parallel to each other. If you want to further slice the layer in half, you should consider obtaining a professional cake leveller, which is a metal U shaped frame with a piece of piano wire that runs across the U. You adjust the height of the piano wire to the desired height of each layer. I have taken standard height pans and created 3 layers out of each pan. Nothing more impressive than a 6 layer cake, especially if you like icing.
ReplyDeleteWhen you assemble the cake, place the cut side down, which will give you a perfectly flat top on every layer. If you prefer an arched top, do not cut your top layer and put it on crown side up.
Take the leftover cut tops and cut rounds from the center of each using a drinking glass as a pattern. Put your icing between two of them to make a sandwich. I consider these to be the "chef's treat", as well as giving you a preview of how the whole cake will taste when you serve it to your guests.
Hey thanks for the tip :)
DeleteGreat post thank you
ReplyDeletecool
ReplyDelete