Friday, January 31, 2014

Apple Carrot Salad

Apple Carrot Salad 


Salads are the most versatile of dishes. Ranging from warm to fresh, cooked to raw , creamy and cheesy to refreshingly lemony the options are endless. There are the ones for the summers the ones for winters.
I have tried to focus on a low calorie healthy one which is crunchy with the delicious sweetness of the ingredients used . It goes perfectly with a side of healthy poached or grilled fish or chicken. Refreshing and wonderful it is very easy to make as well.

You need

Serves 1

1 cup of julienne carrots the sweetest variety you find in the market
1 large apple
2 tsp lemon juice
1 tbsp extra virgin olive oil
Salt and pepper as per taste
2 tsp finely chopped parsley

Simply chop the apple and carrots julienne style. Mix the ingredients for the dressing and serve it.

You can always assemble your salad from before but you should use the dressing just before serving else the salad becomes watery and soggy. 

Simple lemony bell pepper salad


Refreshingly delicious this salad is not only for those who are on a diet but for anyone. It is healthy and delicious. The sweetness of the crispy fresh bell peppers interspersed with the lemony tangyness and sweetness of basil it  is an ideal summer time salad. Unfortunately in India we get the very best quality of bell peppers during the winters but going by our temperature and weather this can be taken at any time of the year. With a side of poached or grilled chicken it makes for a perfectly low calorie healthy meal. In case you are a green fellow you can use some sauteed mushrooms. The recipe is simple enough for anyone to try their hands on .


Serves 2

2 large bell peppers , I recommend using one red bell pepper and one yellow bell pepper for that lovely colourfulness which makes things cheerful


For the dressing
1 tbsp lemon juice
2 tbsp extra virgin olive oil
1 tbsp finely chopped basil
Salt and pepper as per taste
Pinch of chili flakes

Simply julienne the bell peppers. Make the dressing by first mixing everything together except the extra virgin olive oil and then slowly adding the oil little by little and whisking vigourously to create the emulsion for a delicious dressing.


It is very important  to use the dressing right before serving or still better serving the dressing in a separate bowl or jug. You see if you dress the salad ahead of your meal it makes the salads watery and soggy. You can always chop the bell peppers and keep it in the refrigerator and then prepare the dressing and serve it on the dinner table.

Thursday, January 30, 2014

Chatpata Mix chat


I believe the little changes in your dietary habit can help you a lot. Now as someone who loves potatoes I advocate the use of potatoes. It is a complete misconception that this nutritious carbohydrate is fattening. It is your method of cooking which usually determines a dish's calorie etc. So deep fry it and you murder it of all its nutritional value but boiled or baked at 77 calorie for 100gm this is one of the healthiest snacks or food items ever.

Now healthy eating means you have to plan extra carefully to appease your taste buds. A wise man once told me that no diet would ever work if your taste buds remain unsatisfied. Having said that a little change helps a lot. For instance if you crave some mushy potato on any given afternoon or anytime that you want to have snacks replace the french fries or aloo tikkis (a famous spicy potato patty dish from Northern India) with some chaats made with boiled potatoes. The recipe I follow is nothing new. I add a little bit of extra virgin olive oil for extra health and to suit my taste. Try it for a quick snack session.

This mix chat takes me back to my school days as well. Those were the days when the street food hawkers would line up in front of every school luring children with lip smacking dishes. While most of my childhood was spent in longing for them since my parents never ever allowed me to have street food with logical fear for my health because tasty they are but lets be honest most of these items aren't that hygienic. Of course the moment I started getting my pocket money it was a different issue altogether. I would gorge on these delectable snacks throughout school, college and university. In those times it felt as if the chatwallahs had some magical potion. I later realized you can make the same stuff at home. The magic was the work of spices. So I hereby present by spicy chatpata meaning lip smacking snack. I have given it a healthy minty twist. You can even have this as a salad for a main course in which case you shall probably need to double or tripe your portion of salad.


Serves 4

You need

2  large potatoes
3 medium sized firm tomatoes
1 large onion
1 cucumber
2 tbsp finely chopped mint leaves
1 tbsp finely chopped coriander leaves
Juice from Half a medium sized Indian lemon
Rock salt as per taste
1 tsp cumin powder
1 tsp coriander powder
2 tsp dried mango powder
1 tbsp extra virgin olive oil
1 green chili de-seeded and finely chopped


Boil the potatoes and if you are in a hurry simply drain them and place them in a bowl of ice water. It shall cool down in no time. Peel and cube them in bite sized cubes. Cube the tomatoes, onions , cucumber after peeling it. Mix the vegetables and potato with the extra virgin olive oil , spices , lemon juice , herbs and green chili. Enjoy your lip smacking snack.

P.S. You can always increase the number of chilies used. 

Chole


I love Punjabi Food. Its robust, spicy and utterly delicious. To be fair living in Calcutta the options for real Punjabi food was scarce. There was of course this wonderful Dhaba in the middle of the city which churned out amazing dishes. The beauty of Calcutta is its diversity of food. Of course the diversity is best seen in and around Central Calcutta but nevertheless it is still there. You see each cuisine has an essence and after researching enough about Punjab's dishes and having had the good fortune of tasting some real Punjab da khana in a Punjabi home near Delhi I have come to the conclusion that original Punjabi food tastes its best when cooked in some desi ghee. I mean sure there are millions of recipes out there and you can always use health as an excuse but having used both the options I can definitely tell you that cooked in pure desi ghee the beauty of these dishes are simply at their best when they are cooked in that silky creamy ingredient.

If this cuisine were to be personified I would call it a beautiful voluptuous lady with glowing skin and dressed in a riot of colours.

If you have had the good luck to taste some delectable dishes in Punjab you would know that the use of spices is a bit more than in other cuisines of India. I like mine exactly that way and so here is my recipe for Chole collected from a dear old woman staying in the NCR region. Chickpeas are a store house of nutrition and cooked with all that spice it simply becomes divine.


Serves 4 to 6 people

2 cups of dried chickpea
2 medium sized red onions which are finely sliced
2.5 tsp finely minced garlic
2 tsp finely minced ginger
2 chopped tomatoes
3 to 4 green chilies finely chopped
Cinnamon (3/4th size of your little finger) crushed
3 black cardamom crushed
2 tsp cumin powder
3 tsp coriander
2 tsp chili powder
Pinch of turmeric
Salt as per taste
2 tbsp finely chopped coriander leaves
1 tsp Punjabi garam masala made at home for which you use (1 bay leaf, 2 to 3 green cardamom, 4 black cardamom, 1.5 inch cinnamon , 5 to 6 cloves and about 7 to 8  peppercorn , 1 tsp cumin seeds, 2 tsp coriander seeds , pinch of nutmeg and 2 blades of mace) . Dry roast and grind this
2.5 tbsp ghee
2 bay leaves
Juice of Half a lemon

Soak the chickpeas overnight and then boil it with 5 cups of water and 1 tsp ginger. Heat 2 tbsp ghee and saute the garlic and ginger taking care not to burn them. Now add the onions and fry till translucent. Add the bay leaf and crushed spices. Saute for a minute and add the tomatoes and Half the chopped chilies and stir continuously , mashing it from time to time to form a thick spicy paste and add the ground spices except the garam masala. Mix well stirring for a minute and add the boiled chole with the remaining water. Bring to a boil and salt, turmeric, chili powder and half the garam masala. Simmer till it reaches a thick gravy like consistency. Add the rest of the garam masala, the rest of the chopped chilies and coriander leaves and the juice of lemon. Serve hot with soft chapatis or paraunthes with onion rings and a wedge of lemon.


Monday, January 27, 2014

Refried Beans

Meaty Refried beans 


Now what is Comfort food? Most of the time comfort food is associated with nostalgia and childhood. Sometimes we create our own nostalgia and then that simply becomes a comforting dish. I have always had this fascination for cuisines from all over the world and how one can find a thin thread holding all the cuisines which are a world apart from each other. The re-fried beans is one such dish which is what I call food that comforts me. While they can be made in different ways I like mine Beany and meaty . While I have never seen Pinto beans in my life after reading many a blogs of real people and their real-life stories I figured out in India I could use the "Chitra Rajma" to create my re-fried beans. With inspiration from a recipe which belonged to someone's great-grandmother I made my own re-fried beans and it has become a staple comfort food for me. I served it with hoemamde Salsa roja , cheese sauce and nachos and that was one of the best parties ever.

Now coming to my meaty beans, in a tropical country such as India eating too much of red meat is not one of the wisest decisions and due to many a dietary restrictions Pork meat is a meat which is not available easily and even if available it is not always hygienic. So one has to carefully choose one's shop. Thankfully in Calcutta we have a very hygienic cold storage started by a Hungarian gentleman some 60 to 70 years ago. Over the years his family dispersed and he ultimately left his right hand man as the owner of this wonderful cold storage. Till date they stuck to the Hungarian gentleman's recipes and produces delicious sausages, hams and other cold cuts along with some meat.

For this particular recipe I have used their bacon and what they call "Hungarian sausages" which is a dried garlicky sausage delicious to the very core.

So here comes the recipe

Serves 4 to 6 servings

1.5 cups chitra rajma
5 bacons  chopped in little bits
4 dried sausages chopped (It is better to use one with garlic flavour)
7 to 8 garlic cloves (Indian medium sized. These are about 1/4th the size of the usual large cloves available outside India)
2 medium sized red onions
Salt and pepper as per taste


Soak the beans overnight with 4 times the amount of water. Drain them and then cook them with triple the amount of water and salt the next day till its well cooked. You will be left with the boiled beans and water. reserve this water.

Grease your pan (just brush with a bit of oil) and fry your bacon (when frying bacon it anyways leaves behind a lot of fatty liquid) and sausage and keep aside along with some bacon grease and saute the minced garlic till the aroma of garlic fills your kitchen and then saute the onions to a translucent stage. Add the beans and the water bring to a roaring boil and then taste to check if more salt is required since some salt is added while boiling the beans and add salt as per taste and 1 heaped tsp freshly ground black pepper and simmer for  15 minutes or so. Cool this and blend it away using a bit of the water with which you have cooked the beans. I used more than 3/4th of the water to make a smooth blend. Now simply heat  the reserved bacon grease and add your blend beans along with the fried bacon bits and crumble 3/4th  the amount of sausage and mix well. After 2 minutes transfer to a serving bowl. Garnish with the remaining sausage pieces. This is one fatty comfort that anyone who loves meat cannot resists. My friends couldn't resist helping themselves again and again to this mashed meaty delight. They scooped this with their nachos but this mashed delight served as a filling with some sauteed bell pepper and homemade cheesy sauce and  homemade flat-bread is a real treat as well.


Friday, January 24, 2014

Salsa Roja


Roja means red and this salsa is red, hot and will blow your mind. You see a quick search will yield 17 variants of salsa. The easiest cooked Salsa is this delicious Tomato based one from Mexico and Southwestern USA. It literally translates to "Red sauce" and the simple salsa is an excellent dip be it with nachos, crisps or simple raw vegetables as a delicious snack.

The ingredients are very simple . All you need is :-

To be fair this recipe might have served more than 4 people but whenever I make it vanishes in no time and well that's the beauty of this simple yet delicious recipe

800gm to 1 kg of plump red tomatoes
2 onions
3 to 4 ripened red chilies / dried red chili
1.5 to 2 tbsp minced garlic
2 tbsp olive oil
1 tbsp cumin powder
Salt as per taste
2.5 tbsp finely chopped coriander leaves

Blanch the tomatoes and then skin them and chop. Saute the garlic in olive oil and when the beautiful aroma spreads throughout your kitchen add the onions and fry till translucent which means its soft and cooked but not golden and definitely not browned. Add the chilies and saute for a minute before adding the tomatoes. Masher with a masher and and salt and cumin powder. Cook till it reaches you desired consistency and add 1 tbsp of the coriander leaves. Once done coarsely blend it and garnish with the rest of the coriander leaves. This sauce is supposed to be chunky and deliciously spicy and red hot. Enjoy this lovely salsa 

Cheddar Pork Chops


There was a time when the idea of blogging was far-fetched but the Kitchen has always been my haven and with friends who were determined to keep a souvenir of the day I even have my hands on an image from the memorable day.

Now my best of friends loves Pork. I mean she can devour on Pork all day long. I personally wouldn't mind the chop once in a while but I am more of a ham sausage kind of girl but well when you have friends whose primary interest in life revolves around gastronomy you have plenty to rejoice about for you can whip, chop, sear , fry and they shall wait with eager anticipation. The other good thing about having such friends is that due to their love for food they wouldn't lie to you if there was some deficiency in your dish and so you always end up with improving yourself in case the dish needs a bit of changing etc. I still remember that cold day from January last year when I was hosting a dinner party and was cooking this Kashmiri mutton and even after 2.5 hours it wasn't soft enough and my friend didn't hesitate one bit to let me know that. I immediately let it simmer away for another hour and my lovely guests enjoyed it to the last bit and among the guests one aunt still talks about the dish whenever she meets me

Now food is a matter of choice. What one would love the other wouldn't. So you cannot always satisfy everyone. For instance lets take these pork chops. Some like theirs just cooked , some might want it a bit crispy, my friend likes it in all forms. This one is a bit on the crispy side , tender and juicy inside and wonderfully cheesy yet crisp outside.

Basically 1 pork chop would serve 1 person

So I am writing down my recipe per pork chop which serves 1

You need

1 Pork Chop (Fat trimmed with a little bit of fat left for the pork to be rendered in)
4 tbsp of freshly shredded cheddar
2 tbsp butter
1 tsp finely chopped fresh herb of your choice I used parsley
Salt and pepper
2 tbsp olive oil
1 tbsp balsamic vinegar

Season your pork and press it down on the meat with your hands. make three incisions in the fatty section so that the chops do not curl up in your pan. Whisk the Olive oil and vinegar together and then add the herb salt and pepper and keep whisking and slowly add the cheddar and whisk to make a sauce. Now the cheddar wouldn't melt and that is alright.

Preheat oven to 180 C . Simply brush the a pan with butter and put it on high heat and then slowly add the chops and cook for 1.5 minutes on each side. Let it rest for 3 minutes and then grease your baking dish with butter and add the chops and use a generous amount of the fresh cheese sauce on both sides. Keep aside 2 tsp  cheese sauce aside. Bake for 20 minutes to 30 minutes using the butter on the pork chops after 5 minutes  and basting the meat with the juices twice during the length of baking. Let the chops rest for 5 to 7 minutes before serving. Serve it with cheese stuffed tomatoes , mashed potato and a few steamed greens . Take a tomato and hollow out the middle , stuff with the cheese sauce and grill it till the cheese melts and it sizzles.


Thursday, January 23, 2014

Pork Chops with Sweet and Sour salad


Gordon Ramsay's Pork Chops with Sweet and Sour Bell Pepper Salad 


Well I was hosting a brunch. Now I have never hosted a dinner party or brunch where I personally do not know the people because knowing my guests is the key reason for my brunches. Now these friends were originally friends of my best friend who with the years united together for the love of food , movies travel etc. In fact when I was in Delhi I had a memorable day spent with one of my lovely guests in the Jawaharlal Nehru Campus eating a lovely dish of chili lamb and taking long walks in the middle of the night no to forget the wonderful street shopping the next day. 

I had planned the brunch a long time before the B-day and as is usually my style I asked them about preference, allergies etc and my dear friend told me she wanted something exotic from me which meant, usually unheard of dishes and expressly mentioned that she doesn't consider chicken and mutton to be meat anymore which actually made me very very happy because a reason for fatty pork chops is always welcome. 

While I planned and planned the other dishes I knew what I was doing with my pork chops. Back in September I was either watching TLC or Fox Travel or some channel on television  where Gordon Ramsay had shown this extremely easy and delicious looking pork chop and I simply typed in Ramsay Pork Chops and ah I hit the jackpot. It was right there on you tube and all I did was follow the recipe but with a mild change 

You see Ramsay cooks in Britain and I cook in Kolkata. While he can easily access any cut of meat he wants I am heavily dependent on one wonderful shop and while they deliver excellent quality of meat their pork chops are always 50% meat and 50% fat. In this matter I had to do a lot of trimming of fat because believe that amount of fat can give anyone a cardiac arrest. So instead of the olive oil Ramsay used in his pork chop I simply rendered the chops instead of using any olive oil. After the enormous success of this recipe I would say keep it simple keep it delicious

So what you need is basically extremely simple 

4 Pork chops 
salt and freshly crushed pepper
5 to 6 medium sized garlic unpeeled 
Bunch of thyme (In case Fresh Thyme is not available go for the Parsley) 
Butter to brush the pan 

Sweet and sour salad 

1 red bell pepper per person 
1 medium sized onion per person 
Half tbsp sugar 
2 tbsp olive oil 
salt and pepper 
A splash of balsamic vinegar 
1 tbsp fresh finely chopped basil 

Start with the salad. Thinly slice the onions and bell pepper. Heat the olive oil and add your pepper and onion and toss it around and add salt ,pepper , sugar and toss around for another half a minute and add your splash of balmasic vinegar. While it cooks away finely chop basil and add in the pan and toss everything and then place it on the dinner plates.  Once you cook your pork chop you simply add it atop the delicious salad. It takes not more than 8 minutes to cook this dish including chopping time. 

Ramsay gave a very valuable tip to prevent the chops from curling in the pan which is easily achieved by making slits on the fatty part alone. Season with salt and pepper and pound it lightly with your hands. If you have a good amount of fat simply heat the pan on high flame , brush it with butter and put your pork chops to be cooked and when it crackles put the herb and garlic unpeeled and crushed on the sides. Cook the meat for 5 to 7 minutes on each side and in between you must use a spoon to take the oily melted fat from the pan to bast the pork for tender juicy meat. Now use high heat for the first 1 to 2 minutes to seal the juices and then cook on medium heat so that it does not burn. To be fair Ramsay did use a good amount of butter while cooking the chops as well but mine had so much of fat that the Chops were literally swimming in the fatty goodness and I didn't have to add any butter. 

Ramsay's valuable tip for getting moist juicy chops is to let the Pork chop rest for the exact amount of time it takes to cook it before serving. When asked how it was my darling friend who is usually polished blurted out , "It is F****** awesome Oh F***" I asked, "Is it juicy? " to which the reply was "F****** juicy" 


I rest my case. 


Pollo Alla Milanese


So the most delicious things in life are the simplest ones. One such delight is the Pollo alla Milanese which is basically chicken breast beaten well to flatten it and then served with spinach and a tomato sauce but then Christmas is all about love is it not?

Well it actually goes back to the 26th when I was tryign to meet my deadline and was in a flurry of typing , listenign analsyizing etc and then the phoen rings and here si what happened:

H: "Where are you Manjari?" Me: " I am in my house why?" H: "Come out please" And holy Mother of God there he was standing in front of my house , my lanky bear of a husband. Well with his beard and all he can pass of as a bear , a lanky one at that standing with his luggage and a rose. Between transit to his hometown the dear man had made a stop and demanded that i immediately accompany him which was not possible since I had a deadline and a Christmas celebration which had been anyways fashionably postponed . With precious little time left since we came to an agreement of my traveling on the 30th I knew that a Dundee cake and whole roast would not be possible what with packing and all and so I decided on a simple recipe which did not require the oven.

So this cotoletta as the Italians would say might have originally been made of veal but i have read in blogs by people from that land of culinary delight that chicken is also acceptable hence from Cotoletta alla Milanese it becomes pollo (chicken) alla Milanese. Well authentic cotoletta is a cutlet fried bone in but i did get my chicken breasts all deboned from the butchers and used the bone for a fantastic stock for later usage .

Christmas is definitely all about relationships and so I had originally planned on the Pomodoro (tomato) sauce and spinach tossed around with garlic and olive oil but since I was going away I could help ask my best friend which sauce she would prefer and she said she would want the white based sauce and so the dish finally came to represent the Italian flag. My dear friend and cousin gobbled up both sauces and from the way they were engrossed in the dish I can say that my Christmas was most definitely a wonderful one. Now Bechamel sauce is essentially French but add a bit of nutmeg and Parmesan and you have Italian white sauce

Anyways the most obvious reason for choosing this lovely dish is because of its sheer simplicity and here is what you do

Use 1 chicken breast per person and flatten it with a mallet Ah but before that this is what you need

Chicken breast 1/2 per person
Salt and pepper
Olive Oil
Homemade breadcrumbs Handful for 2 breasts
1 egg per breast (again the size of eggs vary greatly)
Roughly 50gm all purpose flour per breast


For the pomodoro sauce (Tomato sauce)

8 large plump tomatoes
3 to 4 large sized garlic cloves which when minced should yield about 2.5 tbsp garlic (You see the size of the garlic varies from place to place)
Salt and pepper
2 to 3 tsp red chili flakes
Handful of fresh basil
1tbsp extra virgin olive oil

For the special Italian bechamel sauce

3 tbsp of silky smooth almond paste
3tbsp unsalted butter
3 cups of whole milk
6 tbsp cream
Pinch of nutmeg
Salt and pepper
A good handful of Parmesan cheese

For the spinach

I used about 500gm of spinach
3 tbsp minced garlic
Olive oil
Salt and pepper

The recipe is basically very simple.

Start with the sauces . Simple blanch the tomatoes and chop chop chop. Use about 4 tbsp olive oil and saute minced garlic and add the chili flakes and half the chopped basil and quickly add the tomatoes and stir and cook on medium flame till it bubbles and add salt , pepper and the rest of the basil then mash a bit and simmer till you get a thick sauce.

For your white Italian bechamel sauce simply melt the butter and add the smooth nut paste and the milk and quickly add salt, pepper , nutmeg half the cheese and stir continuously so that no lumps are formed to make a smooth silky sauce and then add the other half of the cheese and mix well. You can also first bring the milk to a boil with the nutmeg salt and pepper and simmer it for 5 to 7 minutes then melt butter add nut paste and the flavoured milk and cheese and simmer while stirring continuously.

All you need to do is flatten the chicken a bit and season with salt and pepper and then simply roll around in the flour and then dip in whisked eggs and coat well with breadcrumbs so that no bit is left un-coated and then fry in the olive oil. The flavour of this cutlet comes from the frying in olive oil and this one must never substitute with other oils else it seizes to be Pollo alla Milanese from Italy and believe me the flavour of the olive oil fried cutlet is superb. Here is a little tip with your breadcrumbs. The fresher it is the better it is of course and nothing beats homemade ones but adding a bit of salt, pepper and dried oregano gives an amazing flavour.

Once you are done with the chicken. Simple add 5 to 6 tbsp olive oil to a hot pan and add the minced garlic and the chopped spinach and cook on high heat for not more than 3 minutes to retain the colour and flavour. Over-cooking renders the spinach bitter.

You have your beautiful meal waiting for you and everybody to appreciate


Wednesday, January 22, 2014

Aubergine salad

Creamy and tangy Aubergine salad 


There comes the time when you are tired, tensed with an approaching deadline yet there is the weekend to spend with the other half (Cannot be sure if better) So despite the work schedule we lazily watched movies and then there were the hunger pangs at 4 p.m.

My funny bachelor of a husband as I call him lives in the City of Dreams while I stay in the City of Joy. Quite naturally I expect compromises such as having to not have the joys of an oven, absence of many a kitchen appliances both electronic and otherwise but what was beyond my anticipation was the absence of a gas-stove. Apparently the electronic stove which was probably invented during the discovery of Electricity itself does the work for him.

Swamped with work I asked the other half to stock the pantry and come Saturday I had garlic, onions, tomatoes , plump purple aubergines , a few stale wholewheat bread slices  , chili flakes salt Olive oil which I had stocked in my previous visit some 4 months ago and some curd which I did hang for a quick dip which meant a visit to the market was a necessity deadline or no deadline but before that it was lunch time and so I decided on making some cooked salsa and storing it for further emergencies. You see these humble tomatoes can work wonders when in need. Use it as a dip for veggies and you have a lovely snack, use it with salads , use it as a condiment for meat. Well its usefulness is endless.

Now the salad is extremely simple :

All you need is

Plump purple aubergines
Whipped hung curd
Homemade salsa


So I went ahead with my batch of salsa.

Basically it is very easy

I used about 6 plump small to medium sized tomatoes
1 whole medium sized onion and half a medium sized onion
5 to 6 pressed garlic (the size is 1/4th of the giant garlic cloves)
salt as per taste
Olive Oil
Chili flakes (I used 1 tsp since the other half has developed an intolerance for hot food) You can use it as per the amount of hotness you can handle

Just use a good lug of oil and saute your pressed garlic  , when you get that beautiful aroma add your chopped onions and saute till translucent and add chopped tomatoes. Mix well and then simmer covered. remember that tomatoes have high water content and hardly needs extra water in the salsa. When you see bubbles on top add salt and chili flakes and mix well. and then simmer mashing everything with a masher from time to time till it reduces and becomes sticky. Cool the cooked tomatoes and simply blend away to a chunky paste. This can be stored upto 5 days. Simply add 1 tbsp of olive oil when putting it in the jars

The next step is simple . Simple whip your hung curd to yield a smooth creamy texture. Tip Do not throw it in a blender please else you shall have a creamy but liquid curd.

Frying aubergines

Cut your aubergine in circular shapes neither too thick nor too thin because if its too thick it absorbs way too much oil and too thin would burn it easily. Simply fry these in olive oil. Now you might think that refined oil which is much cheaper is the better option but believe me when I say that olive oil has its own flavour which it imparts to the aubergine when fried in it. Simply rub salt and fry on both sides till golden. I usually cover the pan when frying aubergines to speed up the process.

Frying bread

Make little cubes out of your bread slices and simply fry to a crunchy delight

Assembling the salad is a piece of cake. Simple layer the aubergines add whipped hung curd on top and top it with salsa and the fried pieces of bread.

Now while this salad is neither low calorie nor fat free it is one hearty salad perfect for the gloomy cold weather of which Bombay had neither on that particular but nevertheless the husband licked the plate clean. I took a single bite and was tempted to try bite after bite but refrained from doing so with great difficulty


Thursday, January 16, 2014

Luchi Cholar Dal Aloor Dum


Luchi Cholar Dal Aloor Dum 


Every region, culture which of course cannot be there without the cuisine has reasons for celebration be it the lazy Sundays, festivals etc etc. In Bengal a common celebratory combination is the puffed up deed fried breads with sweet pulse and a spicy dry gravy potato curry.

Now this is the most beloved meal and personally for me one cannot exist without the other. They are like the inseparable family. Of course there is the preference for a meaty curry with the puffed bread but the most easy and common items are the "aloor dum" and "cholar dal" . They are like a family.

So luchis might seem like puris served elsewhere in the country of India but it is in reality quite different. It takes a bit of skill to master the art of luchi making and it was last week that I finally perfected it and my joys knew no bounds. You see dont say this to everyone but not everyone can make luchis these days. You see they are either too crispy or too thick. A luchi's characteristic lies in its paper thin texture which is unbelievably soft at the same time. Of course what amazes me is how one food item can be amde in so many ways so you have the "phulko luchi" puffed up bread and the "kara luchi" the bread which is fried but not puffed up and is crispier , well "kara" means hard hence the name. Then I know people who like theirs "white" and people who love theirs reddish fried for a longer time at higher heat to produce  a warm tinge.

Now in my life I have only met one person who makes luchis the perfect way, my dear Mimi. She has carefully taught me the important factors such as the importance of "moyen" the ghee or oil used with the dough , the importance of properly making the dough , the control of temperature  yet my luchis were never good enough. They were thick or too crunchy and then came the day when I carefully gathered all the information in my mind and if I can make them anyone can. All you need is patience and hard work.

Now there are three golden rules

1. Measurement and Dough making

So start with the measurements
Lets say you are using 1 cup of all purpose flour then add 1 tbsp whole wheat flour to it, 1.5 tsp ghee and Half a cup of water to make the dough. Now feeding the dough this water is extremely important for the puffing up. Start when you are fresh, best time is after a nice nap. Work the water slowly and steadily into the flour to make the smoothest of dough. Take your time. It really helps. The dough must be super soft with a stretchy texture. Cover and leave for 1 hour with a wet muslin cloth.


2. Rolling

Now when you are making the balls to be rolled out with a rolling pin. Give the dough another round of pounding when ready to be rolled and then make a long cylinder and start taking out a bit of dough to be rolled in your hands to make a smooth ball and then roll out the ball in a nice round luchi. Now here is the thing about rolling, it takes practice is extremely crucial in deciding the fate of your luchi yet you cannot really give tips as to how one can roll it out. It cannot be too thin because then it becomes crispy and doesn't puff up, if one side is thicker than the rest even by a bit then only one side puffs up so practice practice practice. It took me 3 years to get it right

3. Temperature

Now for the temperature. Heat your oil but you see this is also a key factor in getting your luchi right. Too high a flame and it makes the luchi burnt out or well too crispy, too less a temperature and then it doesnt puff up and sits sadly in the oil. So throughout the process you need to keep adjusting the temperature.

I hope this helps you all. Now for the rest of the family members the cholar dal and aloor dum. Lets start with the pulse, now India is a land of pulses , the varieties will amaze you from watery to thick smooth delight from salty and spicy to mild and sweet. Now Bengalis especially the ones from the current state of Bengal from India the western half of erstwhile undivided India has a very delicate palate and the pulse has the beautiful aroma of ghee with the hint of spices and sweetness. What is most important is retaining the shape and size of the pulse when boiling it. It must not be a mushy lump.  While each family has a recipe of its own this is mine.


So here it is our cholar dal with raisins. You see we have two sweet pulse from Bengal the Mooger dal (Moong pulse) and Cholar Dal (Chana pulse) and both being special pulses we for some unknown reason add coconut to moong pulse and raisins to this one. Of course you might add both to both pulses but here is mine without coconut but yes adding coconut does make it delicious as well as I have tried as well.

What you need

1.5 cup of uncooked chana pulse
2 tbsp ghee
2 medium sized bay leaf
2 inch cinnamon
2 green cardamoms
2 dried red chili
Pinch of hing
2 tsp ginger cumin chili paste (I usually use 2 green chilies)
2 tsp cumin
Pinch of garam masala
3 tbsp tomato puree
Pinch of turmeric
Salt as per taste
3 tbsp sugar (Add more if you like it that way or reduce it to 2 tbsp if sweet pulse is not your bowl of pulse)
2 tbsp raisins
5 to 6 cups of water


Start by boiling the pulse with 4 cups of water and a bit of water. Since you need to make sure that the pulse retains the shape and size do not pressure cook but cook on open fire half covered. Check from time to time and when cooked start preparation your pulse.

Once your pulse is boiled start with the preparation of tempering. Heat the ghee and add the hing and then the cumin, when its spluttering add the dried chilies breaking them and then before anything burns add the ginger cumin chili paste and when its golden and the raw smell is no more there add the cinnamon and cardamom but after giving them a bit of pounding . Then add the bay leaves and finally the tomato puree and cook till the oil separates and then the pulse and the rest of the water and bring to a boil and add raisins salt , sugar and turmeric and simmer away stirring from time to time till you find a homogeneous mixture. It should be thick yet such that it can still move freely. Before you transfer this tot he serving pot add a pinch of garam masala.


Serve with luchi and do not forget the Aloor Dum


Wednesday, January 15, 2014

Mustard aubergine


Beguner tel Jhal 
Aubergine in a spicy curry from Bengal


Everything has a meaning. So you see the part of India I belong to, a state nestled between the somber Himalayas and the beautiful Bay of Bengal has one of the most elaborate cuisines of the country. Even today many a household serves a good 5 course meal which is mostly unheard of in most parts of India.

The way the cuisine is segregated with many a terms has never seized to amaze me so you have your soupy curries called "jhols" then the spicy thick ones as "jhals" and the vegetarian section has a whole lot of difference such as the "Ghontos" "dalnas" "chorchoris" "chechkis" etc etc.

Nevertheless in a Bengali's regular dining habit a meal without fish is something which shall probably make most Bengali mothers faint. The usual curries are segregated as either the "jhols" your soups fish curry or "jhals" a bit spicy and thick curry. Of course there is the "Kalia" for special occasions but that will be for another post.

Now the most basic of spicy thick gravy is a very simple recipe which simply uses mustard paste and is tempered with nigella seeds. The spicy strong flavour of mustard is a very popular dish in all of Bengal East or West.

Now my in-laws from down South are green people as I call vegetarians. So I couldn't understand why they should not get a flavour of this delightful comfort food and so I simply used aubergines to create "Shorshe Begun Jhal" which can be translated as "Aubergines in mustard sauce" . Now "jhal" translates to hotness of a dish and the kick in this dish is gotten from that delightful flavour of mustard. Now use of mustard oil is a must for the true blue flavour to come out but in case you do not have access to it you might use refined oil.

What I need is very simple

3 medium sized aubergines (Using the violet ones help)
4 tbsp yellow mustard seeds soaked in 6 tbsp water.
1 tsp nigella seeds
6 green chilies
Salt as per taste
Mustard oil
1 dried red chili

Start by soaking the mustard seeds in the water and leaving it to soak for about an hour. Now check after Half an hour and if you find all the water to have been absorbed by the mustard seeds then add a little bit of extra water. Now in usual Bengali homes they use the black mustard seeds which bring in a greater punch but for first timers I suggest using the yellow ones and in case you are a brave heart try half an half. In the meantime slice the aubergine but it must neither be too thick nor too thin since if it is too thin it shall break when being cooked in the gravy and if its too thick it shall soak up too much oil when it is fried and it takes too much time. Now make a smooth paste with the mustard seeds , 2 green chilies adding more water if required.

Now heat mustard oil and fry the aubergines on medium to low heat but do not make them crispy. Just cover and cook till its cooked. Now use 2 tbsp mustard oil and add the nigella seeds and when they splutter add dried red chili and the mustard chili paste but only through a strainer else you end up with a terribly bitter curry. Add the bit of water and strain as much liquid as you can till you have a crumbly dried residue. Add this strained yellow liquid to the pan and add 350ml of water and bring to boil and add salt and then simmer till you have a slightly thickened gravy and add the aubergine slices. Cook for another 7 to 8 minutes till you see a layer on top and enjoy with hot fluffy rice.


Tuesday, January 14, 2014

Simple Bengali Cabbage Curry


Simple Cabbage Curry 

Bangalir Sadha seedhe Bandhakopir ghanta 


Now some of the most simple dishes can give you such joy that you feel stumped about what culinary magic can do to you. This one is a simple common dish found in every household. Ranging from yellowish colour (due to love for turmeric) to a beautiful greenish yellow colour it is mildly sweet with a hint of that exotic flavour of cinnamon.

Now the usual norm is to use bodis (lentil which is soaked mashed and then made into tiny mountains which is sun dried and stored) which is fried to bring out that delightful crunchiness. Now having prepared this dish in a different state with no access to the "bodis" I gave it a shot with whatever was handy which was everything else but the "bodis" and yet the taste was amazing.

What you need is simple

I used 3/4th of a large sized cabbage and shredded it finely
1 heaped tbsp ginger  cumin chili paste (I used 1 green chili and Half a tsp cumin seeds)
1 large bay leaf
2 dried red chilies
Salt as per taste
1 heaped tsp cumin seeds
Pinch of asafoetida (one of the key ingredients to bring out flavour)
1.5 inch cinnamon
2 to 3 slit green chilies
Pinch of turmeric since I like mine retaining a bit of green colour.
1 tbsp ghee / clarified butter
Sugar as per taste. (Now Bengalis like their dishes a bit sweet but then your preference for sweetness varies from home to home so use as per your taste) I usually use 2 tsp sugar
Fresh finely chopped coriander leaves

A mild variation


For a bit of variation you can use :-

Half a tomato
1 cup soaked Bengal gram (must be soaked overnight)
1/2 cup water

Start by shredding your cabbage and making your pastes. Now heat the clarified butter and add the asafoetida, the add your cumin seeds and when they splutter add the dried red chili and bay leaf and the ginger cumin green chili paste , saute well and add your cinnamon after giving it a nice pounding and then add the cabbage. Cabbage does not need any water and so simply simmer but after covering it. Check after 7 minutes and you shall find the quantity to have reduced to half its original quantity. Stir well and if required sprinkle a bit of water and add salt, turmeric and sugar. Look till its all done and garnish with slit green chilies and fresh finely chopped coriander leaves. The fresh flavour it adds is hard to beat. Enjoy this simple dish with fluffy white rice.

For the variation

If you are using the tomato and Bengal gram just add the tomato after adding the spices and mix well and add the Bengal gram after adding the shredded cabbage. In this case you need to add the 1/2 cup water and bring it to a boil after adding the cabbage and Bengal gram and then simmering it covered till the water dries up.


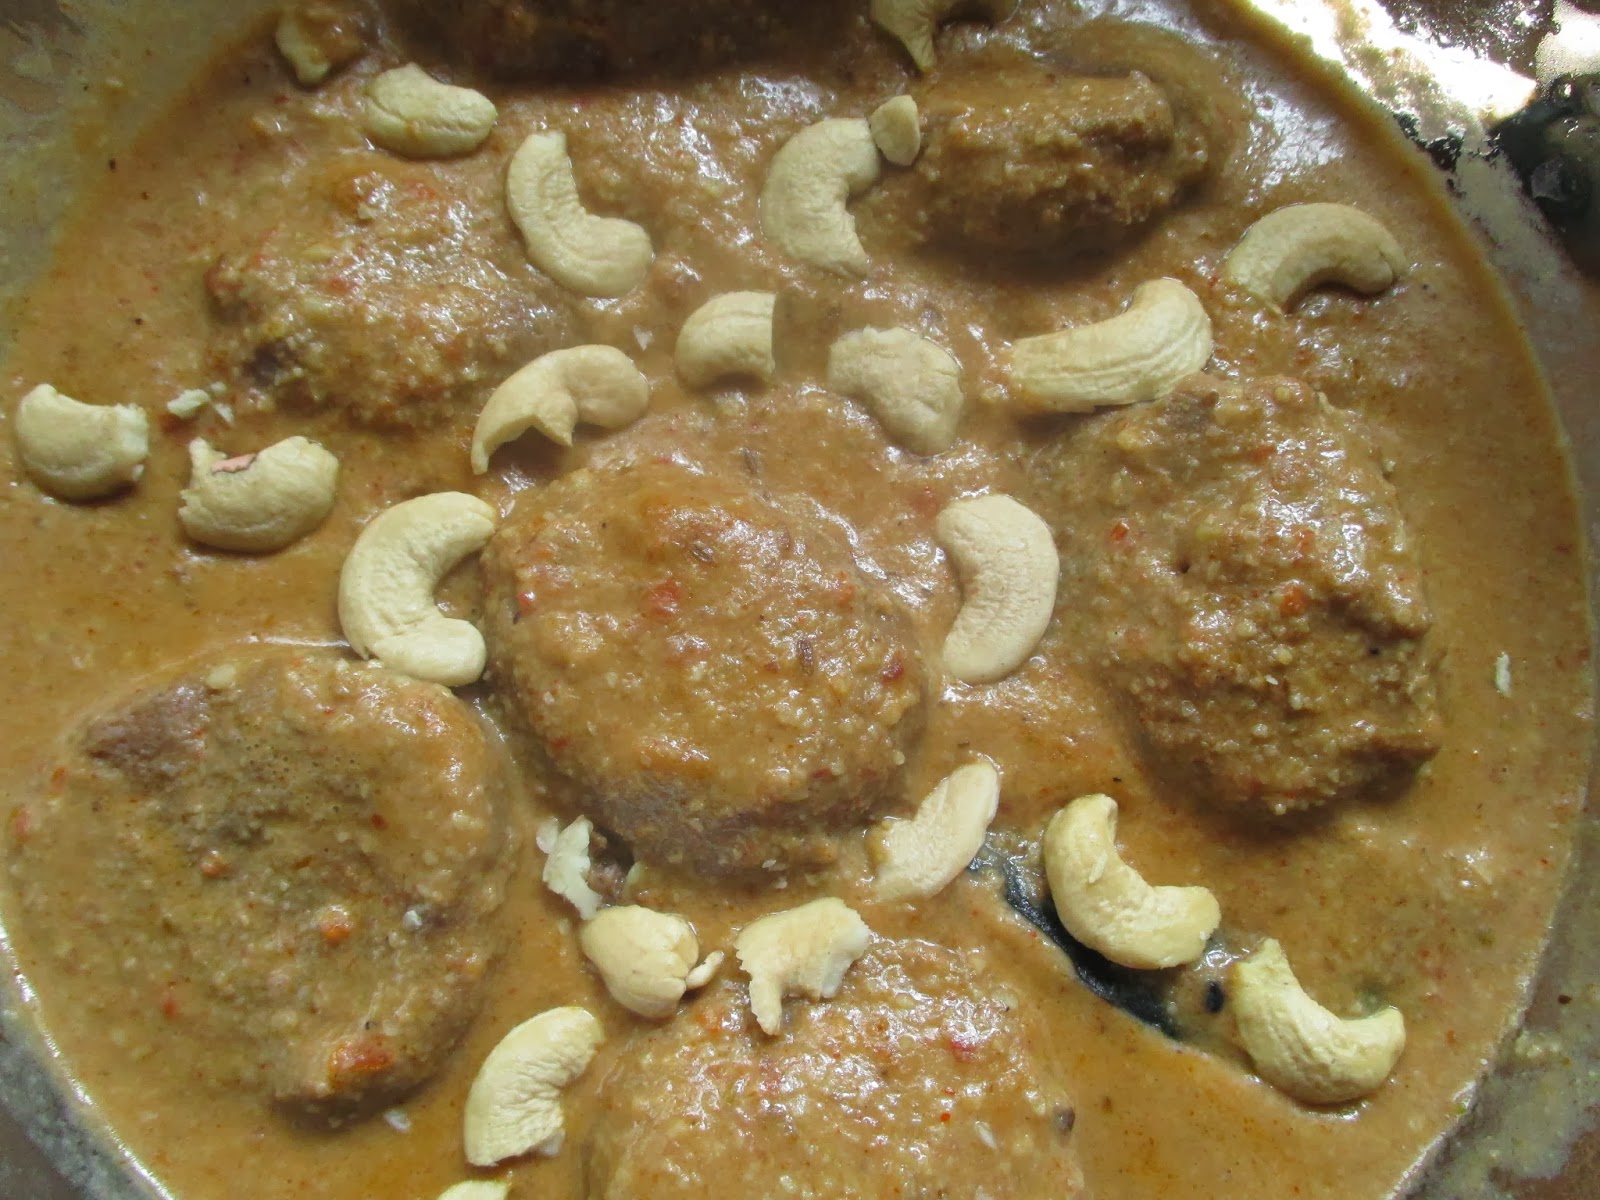
Kach Kolar Kofta


Kach Kolar Nawabi Kofta 

(Raw banana koftas in a regal gravy)


Now India's culinary connection with the Middle East has been well established. With her beautiful connection it is but obvious that the influence trickles from Persia to India to Bengal. Originally supposed to be Middle eastern Meatballs we of course have the meaty version but to suit many a Green person's taste in India we have our own many a vegetarian Koftas well.

Here is one which is essentially what I have seen being made in our home and my mamarbari (Mother's brother's home) While I have seen many a homes observe a vegetarian day of the week such has never been the case with my own family but the ingredients being easily available this kofta made from Raw Green bananas might perhaps make you go bananas. Rich soft smooth it is delicious.

While in Vizag I treated my mother-in-law and grandfather-in-law to this delicacy and they couldn't stop enjoying this dish which they hadn't eaten before.

The little flat balls melt in your mouth the creamy gravy is a sheer delight and that with soft fluffy Basmati rice one of the finest rice of the world is a regal treatment meat or no meat.

Now there are many a ways to make this particular dish. Mine is a bit heavy so that you can simply enjoy your meal with this one dish with rice . What makes this dish delightfully tasty is the use of ghee.

What I used:

4 Raw bananas
3 potatoes
1 medium sized tomato made into a smooth paste
2 tablespoonful of ginger garlic  paste (made into a smoother than the smooth paste)
Onion green chili paste made with 2 small onions and 3 green chilies (the paste must be extra smooth because we want the gravy to be rich and smooth fit )
Salt as per taste
1.5 tsp sugar
10 to 12 whole cashew nuts soaked in milk for 1 hour and then made into a smooth paste
Half a cup of milk
150gm of curd whipped well
1.5 inch crushed cinnamon
2 to 3 crushed green cardamom
2 to 3 crushed cloves
1 large bay leaf
1 small pinch of Homemade garam masala
3 tablespoonful of ghee
Oil for frying the kofta balls
1 tsp smooth ginger paste
1 tsp cumin powder
1 large tbsp besan or gram flour
1 pinch of turmeric


Start by peeling the green bananas and potatoes. Make them in small cubes and boil them till soft enough to be easily mashed. Drain and preserve the water. lay them out on a plate to cool so that it is soft enough to be mashed. Now you might want to wash your hands and use it for mashing because your masher will never be able to achieve that extra smooth mashed vegetable. Mash it well with the heel of your palms after adding the gram flour , salt ,the ginger paste and cumin powder.


Now keep a bowl of water beside you when making the balls since it becomes easy without the mashed vegetable sticking to your fingers . Make them in balls and flatten them. It yielded about 14 koftas for me.

Now let them rest and prepare yourself for the gravy by making the paste and crushing the spices.


Heat oil in a wok and fry the flattened balls one by one till they are golden brown but not dark brown. Leave them aside on a plate and start making your gravy. Decant the oil and heat the ghee and add your bay leaf and then your crushed spices and the ginger garlic paste and saute it till the raw smell disappears and then add your onion chili paste and saute well but making sure to not burn it. Add your tomato paste and keep stirring till the oil separates and add turmeric . If you find it sticking to the bottom sprinkle it with the reserved water from the boiled vegetables and make sure it is a bubbling thick paste to which you now add your whipped curd and stir continuously to ensure the curd does not curdle and bring to a boil. Add the remaining reserved water or if you do not have reserved water then half a cup of water and milk and bring to a boil and add salt and sugar and  simmer for 5 minutes to 7 minutes and add the cashew paste. remember that this will instantly thicken the gravy. Bring to slow boil and then simmer . If you find the gravy too thick loosen with a bit of milk or water and then add the koftas and simmer for 5 minutes or so and serve with hot fluffy long grained rice.


This one will be a sure hit unless you are allergic to nuts of course


Friday, January 10, 2014

Typical Bengali Tomato chutney


So the beauty of online groups are that it

a) Encourages you to explore more and more in the kitchen
b) Interaction motivates you to document your own recipes some of which are actual heritage ones

So here goes a recipe for a delicious tomato chutney that we Bengalis simply love, we usually take them with fried papads. It is usually taken after the meal before desserts

You need

5 plump juicy tomatoes chopped in little pieces
3 broken dried red chilies
Half a tsp kalonji
Pinch of saunf
1 bay leaf
Salt as per taste
Chopped Aaam paapd (2 tbsp)
2 tbsp chopped dates
2 tbsp raisins
1 heaped tsp dried mango
1 tbsp ghee
1 heaped tsp green chili ginger paste (I used about 2 medium sized green chilies)
Water
Sugar as per taste (Traditional Bengali version makes it a bit sweet)
Pinch of turmeric

Start by heating the ghee and adding your dry spices (kalonji, saunf and broken red chili) . When they splutter add the ginger paste and bay leaf and the chopped tomatoes and then bring to boil while mashing with a masher and simmer but keep mashing. Remember that tomato has a lot of water and will cook in its own juices. Now add the salt, sugar , dried mango powder and a pinch of turmeric. Cook till it is well mashed and is sticky, sprinkle water it is feels too sticky. Add the  raisin, dates and aam papad. Serve with fried papads and a wedge of lemon. Since the authentic version is quite sweet I like squeezing lemon juice for a tangy fresh feel.


Patishapta

Nolen Gurer Patishapta
(Bengali crepes with Date Jaggery)

Lost traditions , Date Jaggery and  Bengali Crepes (Patishaptas)


So what you take for granted at one point becomes necessarily important on the road of life. So my year started in this clean coastal town of Vizag at my mother-in-law's. Lazy days, a beautiful view of the sea right from the balcony, morning walks made easy with a wonderful rule of no traffic on the road right adjacent to RK beach. "Rotte" (a fluffy crispy idli) for breakfast made by my adorable mother-in-law who adores me and spends her time writing science books while I engage in dinner.

Without internet connection I was happily immersed in Anna Karenina , morning walks, lazy mornings enjoying rottes, making rajma or chole or something else in the evening when  I suddenly heard my husband speak about sankranti. True it was spoken in a language completely alien to me and other then the word sankranti I did not understand a word but that itself opened my inner window to all those years till last year when my grandmother would churn out these Bengali sweet delights on Sankranti, the festival celebrating harvest. Since back home my doctor father still kept our Rice business alive I am even close to this beautiful festival and images of white "pithas"  (stuffed sweet treats which are steamed) and browned "pithas" (stuffed sweets which are fried but my favourite are these pancakes or crepes with stuffing. Now there is no hard and fast rule to what one uses as stuffing but for me these treats with Bengal's other reason for joy during the winters, the fabled "Nolen Gur" Palm date jaggery is blasphemy itself. That typical delightful taste is exotic and delicious.

So in a land far away with reminiscence of my grandmother using the bell. Well here is what would happen , my mother's method of teaching was what legends are made of. So every evening from 6 to 10 it would be war with my mother's shrill voice and my voice which would range from squeaky to whiny. In-between my grandmother would provide these amazing comic reliefs by suddenly pressing the bell. Well when you stay in an old house which is multistoried it is essential to adopt some method of communication other than the most natural way unless you are happy having screamed and sounding like a croaking frog. So just when my mother was ready to throw a book at me ting tong came the sound and during this time of the year it would essentially mean a plateful of pithas and patishaptas.


I decided on the crepes because it is easy and being far away from home and my mother-in-law having just moved from Ranchi and having three huge chunks of date jaggery had me craving for these Bengali crepes doused in liquid date jaggery. I was superbly satisfied with the results when my lovely grandfather-in-law (my mother-in-law's) husband asked for a second helping and could not stop praising these "amazing sweet dosas"

So for this recipe you basically need a little bit of hard work but its all worth it. I have used the date jaggery with homemade reduced milk and grated coconut as a filling which made it the most wonderful delight.


Start by making the reduced milk for which you need :

1 litre full cream milk
1 teaspoonful of ghee
2 green cardamom
1 big bay and 1 small bay leaf

Bring the milk with the ghee and spices to boil and simmer for 1 hour 45 minutes. Now the usage of ghee (clarified butter) gives the reduced milk an amazing smoothness and besides that it ensures that the milk doesn't stick to the bottom of the pan. Now if you are planning to make the dish during the evening I suggest starting in the morning hours. Say 11 a.m.to keep everything ready because making the reduced milk takes some time say about 1 hour 45 minutes and one very important point to note is that one must use low flame and must keep stirring from time to time and after 1.5 hours one must stir continuously.


For the filling one needs:

3/4th of the reduced milk
3 cups (250ml) of grated coconut
2 tbsp ghee
1 green cardamom
Grated Jaggery as per taste

Start by gentle heating the ghee and sauteing the coconut with the cardamom and add the reduced milk and slowly add the grated jaggery. Now for the jaggery keep adding a bit and stirring and taste  and add more if required. When the content becomes pudding like and everything mixes well and the educed milk si well incorporated you are done. Now remember once you are done with cooking the cooked coocnut will anyways dry up a bit more so keep it a bit soft.


For the crepes or pancakes one needs

1 cup all purpose flour'
Half a cup semolina
Half a cup rice flour
Ghee

Mix everything with 1.5 cups water but when mixing mix bit by bit so that no lumps are formed. Spread it on a  girdle as you would make crepes but thin ones turn and immediately add the stuffing and fold from both sides and serve drizzled with liquid jaggery or the saved reduced milk.