Showing posts with label Garlic. Show all posts

Monday, November 24, 2014

Junglee Murgh (Priyadarshini's recipe)

Junglee Murgh (Priyadarshini's recipe) 


I thought November would be a month I shall relax. Well what you anticipate and what actually  happens in life can sometimes differ greatly. Its not always bad , in fact here are some great bits of news.

So after a crazed work schedule till the first week of November the parents visited us in Mumbai since the husband will be off to South Africa for research work for a good 2 years. So sooner had I finished this massive Project there was celebration with the parents and sightseeing in Bombay can be beautiful if you enjoy classic architecture but the travel can wring you of all your energy. Well once they were gone I thought I would relax a bit but then there is back to back work and I am not really complaining because to be honest I love work. In between all this work I met my good friend Claudia and then a week later it was a gathering of friends . I finally met Gungun from Sinfully Your's and what a lovely day it was.

On top of all of this Kolkata Food Bloggers' is conducting its ongoing Project of 'Know Your Blogger Part II' where each week we choose a member and each participating members, recreates the member's recipe.

This week the star is my good friend and the most creative food blogger I know, Priyadarshini from 'Lets Talk Food' What you need to know about this gorgeous lady is that she is a creative rebel. I mean she puts her own creative touch in every dish that she posts about and this is not the first time that I have followed her recipe. Previously I tried out her 'Kancha Lanka Murgi', this lip smacking Chicken dish from Bengal cooked with loads of Green chilies and it was out of this world.

So when it comes to selecting a recipe I usually try and find one which suits my needs of the time. So this time I was in Bombay with a husband who follows the green diet and I am personally on a high protein, extremely low carbohydrate with lots of vegetables diet but the good news is since I exercise I can have fat in controlled portions.

I'l be honest I mostly chose her Junglee Murgh which literally translates to Wild chicken due to the reigning flavour of garlic and chilies two of my favourite ingredients and the fact that its cooked in pure clarified butter. Here is the thing with Most North Indian food and clarified butter. Ghee makes every dish better which is why these days I cook these recipes rarely but when I do so I use what was originally intended for it and the results are just unbelievably good.

 I must say that since this recipe uses very few ingredients modifying it would simply ruin the taste. The best part is that it being dry it makes the perfect appetizer and if you are on a diet you can just team it with some salad on the side or a spicy spinach paste like I did.

Now here is a crucial part, working with chicken breasts can be very tricky so read on to make sure you never again end up with dry chicken. If you follow the steps I guarantee that you will always get soft succulent chicken breasts.

Now here is another good news before I finally share the recipe with my good readers,We The Kolkata Food Bloggers proudly present a Bake Sale on the 13th of December 2014 and I would have a small stall which I am sharing with Pritha from 'Guilt-Free' and it gives me great pleasure to invite all of you to drop in.

So here comes the recipe

Serves 1 to 2

380gm of Boneless cubed  Chicken
2 tsp minced garlic
7 to8 Dried red chilies (preferably the ones from Rajasthan'
2 tbsp unmelted ghee
Salt as per taste
3 Fenugreek seeds
2 to 3 Black peppercorn

Simply heat the ghee and garlic together. This step ensures that your garlic doesn't burn at all in the end.

Once you get the aroma of garlic filling your kitchen add the chilies, peppercorn and fenugreek and finally the chicken , add some salt and seal  its juices on high heat for a few seconds on each side. Now is the tricky part. You see chicken breasts are very delicate and if cooked for too long it turns dry and stringy. So now your lower the heat and cover and cook for 5 minutes to 7 minutes. Open the cover and cook for another minute or 2 till it becomes dry.

Now is a very crucial part to end up with moist juicy chicken. Cover and let it rest for a good 15 minutes before you dig in.

Enjoy this lip-smacking dish.


This is part of : -


Penette E Pomodorini D'O Piennulo (Pasta with Tomatoes and basil)

Penette E Pomodorini D'O Piennulo 

(Pasta with Tomatoes and basil)


I used to think I make a decent Tomato based pasta be it the Arrabbiata or just a normal Tomato based Pasta . Well in my defense the sauce would mostly turn out flavourful and ever since I discovered al dente pasta I would in fact think I was creating quite the Italian dish in my kitchen.

Then one day I finally invested in La Cucina one of the best Classic Italian cookbooks of all times. You see I started cooking from a very tender age and to be able to afford a good book it does take a bit time. Your mid 20s are very different from your late teens. Anyway the point is I somehow believe that the mark of any good restaurant, cookbook or for that matter a cook lies in how he or she makes the most basic of dishes. Which is why I chose one of the simplest dishes of all times,

Now in these modern times when cooks can't seem to find their way around the kitchen with step by step photographs this classic book is quite the opposite. It has tons of exquisite recipes but not even one photograph which is quite fine by me. In fact you won't even find most of these recipes over the internet.

Well I am kind of an old fashioned world. People often ask me why a 25 year old (almost 26) would want to spend hours in the kitchen for a dish . Here is the thing I want to learn the characters of the dishes I cook and a dish's character can be traced back to its cuisine.

So if you really want to learn Italian cuisine a good old classic book is essential.

Anyway coming back to our recipe I was quite startled for a the technique used was completely different than not only what I usually use but what is mostly shared far and wide from across continents and chefs.

Now I somehow tend to be passionate and so I passionately believe that a cookbook brought by by the Culinary Acedemy of Italy will not leave any scope for mistakes. Period.


So I went about doing exactly what they had asked to. In the end I was dumbstruck. I have been to some of the fine dine restaurants of India in both Calcutta , Mumbai and Delhi and never have I tasted a tomato based pasta which had so much of flavour and the colour was the colour of passion, a deep red that I could romance with romance in my head  just by looking at it.

So here is what you need :-

Recipe :from La Cucina . Before I begin I must admit that for when I cooked the tomato sauce I halved the recipe and used half the time for cooking and being on an extreme low carb diet I used very little pasta and kept most of the sauce for later use. I am sharing the original recipe exactly as was given and I suggest you don't alter it.

1 lb Penne Pasta
1/2 lb ripe plump tomatoes blanced and skinned
1 large clove of garlic , minced
Pinch of chili flakes / Half a ripe red chili
Several Basil leaves chopped
Salt for taste
2/3rd cup EXtra Virgin Olive Oil


Chop the skinned tomatoes. Place the minced garlic and finely chopped chili with the oil and let it slowly brown . Once its browned take out the garlic and chili and add the chopped tomatoes and add salt and cook on high heat for 15 minutes stirring it and pressing it down with a masher or back of a big spatula from time time time.

While the sauce is cooking bring a pot of  water to a boil on another stove with a pinch of salt and add the pasta and cook till al dente and once done add it to the sauce and mix well and add some basil and serve.

I can promise you this is the most flavourful tomato based pasta ever.


The reserved Tomato 

Saturday, November 15, 2014

Pan Seared Lemon Garlic Basa Salad

Pan Seared Lemon Garlic Basa Salad 


These days I am on a high protein, high on vegetable and extremely low on carbohydrate diet which I absolutely love and what also puts me in a good mood are salads especially a light fresh one.

So here is a simple Pan seared basa salad

Serves 1 :

200gm Basa fillet
Juice from 1/2 a lemon
1 fat clove of garlic
A pinch of freshly ground black pepper
Salt as per taste
1 ripe red chili sliced
1 tsp Olive oil + extra for spraying

For the salad

2 cups of assorted lettuce
5 to 6 cherry tomatoes
Half a red bell pepper chopped
1 tsp Extra Virgin Olive oil


Thinly slice the garlic and chili and then marinate the fish for 1/2 an hour and then heat a pan and spray with a bit of oil add the fish and seal it juices on high heat for less than a minute on each side and cover and cook for about 5 minutes to 8 minutes on low heat .

Arrange the lettuce , cherry tomatoes and bell pepper and drizzle with a little EVOO and add the fish and enjoy a healthy meal. 

Tuesday, September 30, 2014

Creamy Potato Spinach 'Aloo palak malaiwale'

Creamy Potato Spinach 'Aloo palak malaiwale' 


There here are some dishes which you anyway know are going to be delicious because butter and cream makes everything extra delicious. Now normally I don't even bring in fresh cream in my house because the thought of those extra kilograms hanging from everywhere on my body  is not something I relish thinking about but then there are those special occasions when you can actually indulge and my mother-in-law's visit is reason enough to make a creamy lip-smacking Aloo Palak Malaiawale aka Creamy Potato Spinach.


Now before I share the this recipe let me tell my readers from before that any substitution of the ghee or cream used here will not render the same results at all. In case you want to not use ghee the only other substitute for ghee can be mustard oil but even that cannot give it that delicious taste that ghee gives .

Anyway moving on to the recipe

Serves 3 to 4

4 medium sized potatoes cubed into medium size
1 large bunch of spinach
1.5 tbsp minced garlic
1 inch ginger chopped julienne
1 green chili julienne
Salt as per taste
4 cups of water
4 heaped tbsp fresh cream
2 heaped tsp clarified butter 'ghee'
Pinch of asafoetida 'hing'
Garam masala made with 1/2 black cardamom, 1 green cardamom, 1 tsp cumin seeds, 2 tsp coriander seeds, 1 blade of mace, pinch of nutmeg, 1 bay leaf , 1/2 inch cinnamon, 3 cloves
3 to 4 green chilies
Dollop of butter

Start by dry roasting the ingredients for your 'Garam Masala' and then grinding it to a fine powdery consistency.

Now ever since I read this Italian chef's tips on maintaining the green colour of spinach I have never had  trouble with maintaining its colour. Its simple actually. Wash the spinach well. The easiest way to make sure you get rid of all the dirt is to fill a bit pan with water and then chopping off the end of the spinach and soaking the leaves in the water and rubbing them and cleaning them. This mostly gets out all the dirt.             Bring the 4 cups of water to a boil. Now add the chopped spinach leaves and let it boil for exactly 2 minutes and immediately take out the spinach and there you have boiled green spinach. Reserve the water in which you have cooked the spinach.

Cube the potatoes and heat the ghee and add the asafoetida 'hing' and when it splutters add the minced garlic, ginger and chili  and saute till softened and add the potatoes and cook on medium heat to saute the potatoes and add the reserved spinach water and bring to a boil and add salt and then simmer covered till the potatoes are mostly cooked. It might take anything between 10 minutes to 15 minutes.

In the meantime make a paste of the cooked spinach and 3 green chilies.


Now add half the garam masala and remove the cover and cook till the curry dries up. Add the spinach paste and mix well and then add the cream and mix well and simmer for 2 minutes . taste and add salt if required. Serve with a dollop of butter on top with soft chapatis or hot fluffy rice.


Sunday, September 28, 2014

Paneer Butter Masala

Paneer Butter Masala 


I usually like trying out different versions of the same dish so that I might eventually find a recipe which suits my taste buds perfectly. Such was the case with Paneer Butter Masala also known as Paneer Makhani. Lets face it the name itself suggests it must have copious amount of butter but then the recipes I have had till date did have butter and a lot of ingredients yet there was something which was missing.


Now Butter and I go long back. My Dima 'maternal grandmother' would always compliment the Punjabis due to their use of butter in most dishes. All throughout my growing up years I was fed a meal of hot steaming rice with a good 50gm of butter and numerous boiled and mashed vegetables. Lucky for me my parents had got me admitted to swimming and till I  was involved in some pretty heavy exercise which kept my weight in check. Anyway coming back to the dish, now I know that everyone wants to be healthy and that's great. In fact on any regular day you'l find me with a bowl of steamed vegetables or a raw salad and some boiled egg or poached chicken but when it comes to certain dishes you cannot just try and make them healthy. It takes away the entire essence of the dish. Exercising and balancing your diet on every other day is how you stay healthy not by trying to make a dish named Butter Masala healthy.


Anyway back to the recipe. I had discovered the lovely robust chef Harpal Singh's videos quite by chance and after my tremendous success with his Kadhi I naturally knew whom to turn to for the Paneer Butter Masala. So here goes the recipe. I did use homemade paneer and believe me when I say that once you have made homemade paneer there is no looking back. You can use store bought paneer if you are not much inclined to making your own paneer .

Chef Harpal Singh Sokhi's Paneer Butter Masala

Serves 3

For the paneer :-

1.5 litre full cream milk
1.5 tbsp vinegar diluted with 2 tbsp water or 2 cups leftover whey

For the tomato gravy

6 medium sized tomatoes roughly chopped
6 green cardamom
3 blades of mace
100gm butter
1 tbsp minced garlic
1/2 cup fresh cream (I used Amul Cream but do use double cream if you have access to it )
Salt as per taste
1/2 tbsp sugar
1/2 tsp Kashmiri chili powder

For the final gravy

Ginger the size of half your little finger cut into julienne
2 green chilies de-seeded and cut julienne
1/2 tbsp butter
The freshly made tomato gravy


The final paneer made at home 
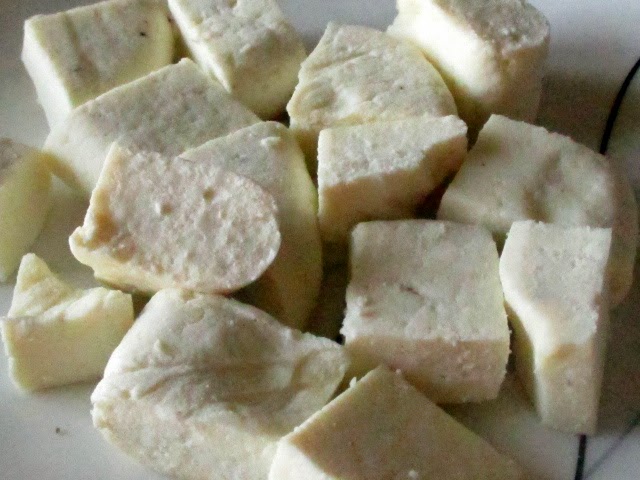
Start by making the paneer. Simply bring the milk to a roaring boil and then add the diluted vinegar or whey and lower the temperature and let the milk for the cheese and when you see the green coloured whey with the cheese floating around switch off the stove and cover and keep for 5 minutes . Strain the cheese but reserve the whey and tie the cheese in a cheesecloth or muslin cloth and drain it for 15 minutes to 20 minutes and then flatten it out with the cloth and put in on a plate and put another plate on top with a mortar and pestle or a heavy book on the plate and leave for 1 hour or so. Cut the slab into cubes and there you go , you have soft fresh paneer.

Store the whey in the refrigerator for future use. If you knead your dough for chapatis with whey the chapatis turn out extra soft, used in vegetable curries it enhances the flavour and if used for the next batch of paneer you will get the softest paneer ever.

Final tomato gravy 

Now start off with your tomato gravy. Melt 1 tbsp butter and add the chopped tomatoes and cook over medium to low flame till its mushy (covering and cooking gives faster results) and add the mace and cardamom and cook till it forms a paste and add the Kashmiri chili powder , add salt and cook for another minute . Let it cool down and blend it smooth .

Now mince the garlic. Melt 1 tbsp butter and saute the garlic and add the tomato paste and cook of medium flame , stirring continuously for 3 minutes and add 75gm butter and mix well and cook for 1 minute and add half a cup of cream and cook on low flame for another 2 minutes and your tomato base is ready.

Now melt 1 tbsp butter and saute ginger chopped julienne and the green chilies and add the paneer cubes and saute well. When the paneer turns golden add the tomato gravy and mix well and simmer for 3 minutes and serve with hot chapati or butter nan or Basmati rice.


Tuesday, September 9, 2014

Potato Cutlets

Potato Cutlets 


To be fair these Potato cutlets which I made on a particularly lazy Sunday without the internet in-between back to back episodes of Til' Death was mainly for the husband. My husband loves eating in which should be a boon for a cooking enthusiast such as myself but then at times his want to eat at home bites me hard. It was one of those days when I knew was going to be those overly lazy ones so I decided instead of going out for Dosas I would be prepared with ingredients for a quick snack.

In Bengal the easiest snack that I was served as a child was puffed up rice with the beautifully aromatic green mango and chili flavoured mustard oil and lots of fried potatoes. Now as much as I love fried food I am trying to avoid it these days and so I decided for the husband who suddenly becomes a fry obsessed maniac on holidays I would boil potatoes and make something.

I was about to make the Indian potato cutlets 'Aloo Tikki's which is one of my favourite Indian snacks but then I simply cannot imagine Tikkis without the fiery Green chutney hara bhara chutney and sonth ki chutney (a sweet and tangy sauce) and because I was feeling lazy I ditched the idea of Indian potato cutlets and simply made potato cutlets

Serves 2 (In our case my husband gobbled up 1.5 serving :) )

Here is what you need :-

2 big potatoes
Half a large onion finely chopped
2 large cloves of garlic finely chopped
Salt as per taste
1.5 tsp Fresh Thyme leaves
1 tsp Freshly ground pepper
1 tbsp cornflour

Olive oil for shallow frying

Simply mash everything except the oil together and make 4 cutlets and let them rest in the refrigerator for 15 minutes. This helps them harden up a bit and hold shape when frying.

Heat oil and shallow fry on low heat till its golden brown on both sides. Enjoy by itself or team it up with some mustard.


Thursday, August 28, 2014

Braised Tofu Mushroom

Braised Tofu Mushroom 


Turns out this is my first vegan post. I decided to make something nice for the other half  and when he told me he has tried his hands at Chinese food while I was away in Calcutta I decided I would make a Chinese spread for him. Now my husband is vegetarian which proved to me a challenge since most of the Chinese dishes that I know of are strictly non vegetarian and even the ones with lots of vegetables contain some form of meat.


Well all I did was chuck out the meat and make a braised tofu mushroom for the hubby.


Serves 2 to 3

200gm tofu cut into rectangular cubes
150gm button mushrooms
1 tbsp dark soy sauce
3/4th cup water
2 tsp cornflour
2 large cloves of garlic
1 scallion
1 tsp chopped ginger
1 tbsp oil
2 ripe red chili
Salt as per taste

For the marinate :-

2 tsp rice wine vinegar (or any white vinegar)
2 tsp soy sauce

Oil for frying

Marinate the tofu with the rice wine vinegar and soy sauce for 1 hour. In the meantime mince the garlic and ginger, slice the scallion bulb and finely chop the scallion green and red chili and halve the mushrooms. Whisk the cornflour with 2 tbsp water and make a smooth paste

Now shallow fry  the tofu till its golden brown on both sides. Don't forget to turn them over and take care not to burn them.

Keep aside the  tofu and heat 1 tbsp oil and add the minced ginger and garlic along with the scallion bulb and saute and add the mushrooms. Let it get cooked and sprinkle salt and then add the soy sauce , chopped chili and half the finely chopped scallion green. Saute for 1 minute and add the tofu and after half a minute of tossing them about add the rest of the water and bring to a boil and simmer for 6 minutes or so and add the cornflour mixed with water and keep stirring to make a thick sauce. Garnish with the remaining finely chopped scallion green and serve with some fried rice.


Tuesday, August 26, 2014

Chicken Soy Chili with Rice And Greens

Chicken Soy Chili with Rice And Greens 


Sometimes you feel happy and you want to do something special for that other half but I believe in order to give happiness to others you must first feel happy yourself. So I decided to make a spread with a South East Asian cum Chinese touch  for the other half and since my husband follows a green lifestyle I was happily shopping for tofu , bokchoy etc when I realized I was craving some chicken with rice and so voila here I am with one of my favourite lunch ever. Now none of these dishes are any authentic dish from South East Asia or China but have a touch from those cuisines. 


Serves 1

Half a chicken breast weighing roughly 120gm to 130gm
4 to 5 cloves of medium cloves of garlic (In case you are using garlic with big cloves use 1)
1/2 tsp minced ginger
1 tbsp soy sauce
Splash of Chinese rice wine vinegar (If you do not have the Chinese rice wine vinegar just use any white vinegar)
1 tsp tomato sauce (I use my own homemade sauce else blanch 1 large tomato and then blend it and cook it on medium flame in a pan till it gets thick to make a tomato puree)
4 red eye chili (You can decrease the number as per taste)
Salt as per taste (I needed a pinch)

 2 thin slices of tofu / 1 boiled egg

The greens :-
Half a leek
1 scallion
3 to 4 bokchoy leaves with the stem
1 large clove of garlic

2 tsp sesame oil or olive oil

1/2 cup of small grained rice or basmati rice


Start by preparing your chicken by marinating it. Cut the chicken in stripes and then make your marinate by blending together the garlic, ginger, chili, soy sauce , tomato sauce , salt and vinegar and then marinate the chicken and leave it for 2 hours.

Now start by first mincing the garlic clove and finely chopping the leek and scallion green. Thinly slice the scallion blub and then use 1 tsp oil and saute the minced garlic and add the bokchoy and saute for 2 minutes till the greens start softening and then leave it aside. In the same pan add the remaining 1 tsp oil and add your chicken , tofu ,  leek, scallion (both bulb and leaves)  and cover and cook for 1 minute and then turn the chicken and cover and cook for 1 more minute.

Now cook the rice. Simply wash the rice and then boil it with 1 cup of water and when ti starts to boil simmer covered till cooked. Ideally the rice should be a bit sticky.

Once the rice is cooked seperate the bokchoy stems and leaves. Julienne the stem .

Assembling the dish :-

Place the rice in a bowl and add the bokchoy  stem and mix well and then add the chicken and sliced bokchoy stem and mix very well. Serve. Enjoy this healthy hearty dish.


Tips :-

In case you are using egg instead of tofu just boil it and keep it aside and add it in the end when assembling the dish.

Watch this space for more recipes with  South East Asian and Chinese touch coming out very soon


Saturday, August 23, 2014

Garlic Potato salad

Garlic Potato salad 


Sometimes cooking becomes easy . Well if you have a kitchen where you have all the equipment such as a gas-stove, oven ingredients then preparing a meal becomes much more easy but I came to Bombay all for love and ah well the husband uses an induction cooker. 

Having landed at night the first night was all about some ordered food but today morning once the other half left for some conference or training I was feeling smug about having bought my Darjeeling tea when I realized I am terribly hungry. Here is what I had, tomatoes, some fruits, oats but no milk and just when I was feelign annoyed that I woudl have to go out ah there I spotted one of my favurite things in the world, potatoes.

I looked in the cabinets and there was some extra virgin olive oil, garlic and chili flakes. Well I didn't need anything else. The best part is this dressing can be stored and can also be used as a dip.

So here is a simple recipe for a simple potato salad

Serves 1

1 medium sized potato

For the garlic dressing :-

1 head of garlic
1 tsp chili flakes
1/2 cup of extra virgin olive oil
Salt as per taste
A good splash of white wine vinegar

Simply boil and peel potatoes and blend the ingredients for the dressing. You'l need round about 1/2 to 3/4th  tbsp dressing and you can store the rest for later usage.


Monday, August 18, 2014

Roasted garlic dressing

Roasted garlic dressing 


Don't you just love it when you accidentally discover a recipe which you immediately love and what more its a bonus when you tweak it to make it absolutely healthy. 

I am tired of vinaigrette. I mean I like a healthy low calorie dressing for my salads and the usual common easy option are different  vinaigrette and so I was browsing through Martha Stewart's website when I suddenly came across this Roasted Garlic dressing. Ah for a garlic lover such as myself I knew it was the right recipe but the original recipe had sour cream among other ingredients and so I tweaked it and had a fabulous salad . You can use this as a great dip as well.

Serves 1 to 2

200gm curd which you have to drain by hanging
1 head of garlic
1 tbsp olive oil
Salt as per taste

For the salad :-

1 wedge of iceberg lettuce

Start by first hanging the curd to drain it of all the water. Preheat the oven to 200C and then take a foil and place your garlic head and lop off a bit from the bottom and pour the olive oil wrap the foil and roast for 40 minutes to 50 minutes. Once done let it cool down and squeeze out the creamy roasted garlic and smash it with a fork and then add the hung curd and whisk well and add salt.

Pour it over the ledge of iceberg lettuce for a delightful creamy garlicky meal


Tuesday, August 5, 2014

Poached Chicken salad with Plum Sauce

Poached Chicken salad with Plum Sauce 


I love salads and I love soft tender chicken breast and I love combining the two of them together but the major problem I have usually faced is getting a perfectly soft succulent chicken breast which is melt in the mouth and not stringy. I searched and followed many many tips until I hit upon the right recipe and there is this one crucial advice from my friend Claudia which helped me immensely. 


This post is not only about the salad but about the delightful plum sauce which makes for a wonderful tangy dressing.

Basically its very simple

Serves 1

What you need for poaching :-

1 breast of chicken weighing anywhere between 110gm to 120gm minus the bone
1 clove of garlic if the clove is fat or 2 cloves of garlic in case they are of the medium size
1/2 tsp fresh thyme
1 tsp finely chopped spring onion
Enough water which covers the chicken
Salt as per taste
Freshly ground pepper

For the salad

1 cup of shredded iceberg lettuce
1 cup of bell peppers (A mixture of yellow bell pepper and red bell pepper)
1 small onion
1/2 tsp finely chopped fresh basil

For the plum sauce

The plum sauce serves 3 to 4

Now when I made this plum sauce I had a big bowl of leftover plum sauce and you can always store it in the refrigerator for 2 days to 3 days

4 to 5 medium sized red plums
3 cloves of garlic
1 onion
2 tbsp extra virgin olive oil
1/2 tbsp balsamic vinegar
1 tsp honey
Salt as per taste
Pinch of chili flakes

Start by chopping your vegetables for the salad and chilling it. Now make your plum sauce by grilling the plums, onion and garlic for 5 minutes on each side with a tray beneath the racks which collects all the jucie that bursts out. You can also use the Microwave cum grill mode for 6 minutes at 600W to cook the plums with garlic and onions.

Now wait for it to cool and skin the plums , garlic and onion and then blend it with the extra virgin olive oil, vinegar honey, salt and chili flakes.

For the chicken breast here are some important tips

Use the smallest possible pan to fit the breast in

Now add the garlic, thyme , salt and freshly ground pepper and cover it with water and bring to a boil and then simmer covered for exactly 2 minutes and then cover and walk away letting it cook in the steam for 5 minutes and then take out the chicken and wait for 5 minutes and then slice it. That's it soft succulent chicken breast

No simply arrange the vegetables, chicken with the plum sauce on top.


Sunday, August 3, 2014

Roasted Carrot Onion Soup

Roasted carrot onion soup


Sometimes in life what you need is a soul warming hearty soup. It may be on a cold winter's night or a day when the rain lashes out on the earth.

I generally love soups. Now before I give you the recipe I have to admit one thing,  in my experience soups cannot get their  flavours if you do not have a good stock at your disposal. For those who eat chicken a good bouillon is one of the best blessings and for vegetarians a good vegetable stock is a must.

This recipe is a teeny bit elaborate but the end result is just so soul warming that you don't mind the lengthy process. Its lengthy but does not need much energy and you actually get two dishes in the end

What you need to serve 3 to 4 people

200gm carrots
5 to 6 small sized onions but not the tiny variety
1 head of garlic
50gm butter
4 leg plus thigh of chicken with the skin (the 4 legs and thigh together should weight about 1.5 kilogram) or a whole chicken weighing about 1.5 kilogram
Half a stalk of fresh celery
1 litre chicken stock
Salt and pepper as per taste
2 tbsp finely chopped spring onion

Start by cutting the carrots and onions roughly and making a bed of them on a roasting pan . Roughly chop the celery and toss it in and then melt 20gm butter and pour it over the vegetables.

Now season  the chicken with the salt and pepper and then massage it with the rest of the butter and leave it aside for 15 minutes. Now preheat oven to 220 C and place the chicken on the bed of vegetables and roast for 1 hour or so or till the chicken juice runs clear.

Now take out the chicken and let it rest covered in kitchen towel for 15 minutes and in the meanwhile peel the roasted garlic cloves and bring your stock to a boil and add the vegetables , peeled garlic and the juice in the roasting tray and then blend all of it to make a smooth paste. Now bring it to a boil again and check the saltiness and add some salt if you want to and simmer for 5 minutes and add the finely chopped spring onion.

Ah its one of the best soups I have ever had all thanks to  the fatty goodness.


As for your chicken you can save it for a gorgeous sandwich


Thursday, July 24, 2014

Lemon Garlic Chili Grilled Chicken


Lemon Garlic Chili Grilled Chicken 


Truth is I love having grilled chicken. Out of the many reasons the two most important ones are well, the first is obvious I love the taste of grilled chicken but the other one is simple. Grilled chicken means minimum work in the kitchen and it comes especially handy when I am working on a project. So I feel grilled chicken is the freelancers saviour. 


To be fair I knew exactly how I wanted my chicken to taste and threw in the most basic ingredients but boy oh boy was I in for the most delicious surprise ever. As I have already mentioned I love grilled chicken and so I have quite obviously tried numerous marinates and so when this most basic marinate yielded one of the best grilled chicken ever it just made a very ordinary day extraordinarily beautiful.

Here is a simple recipe which serves 2 to 3

400gm to 450gm of chicken with bone (Preferably the thigh and leg , wings with bone)
3 large cloves of garlic or 5 to 6 medium sized ones
1 tbsp chili flakes
Salt as per taste (I required about 1.5 tsp)
2.5 tbsp lemon juice
1.5 tbsp Extra virgin olive oil

Simply make a marinate by blending all the mentioned ingredients except the chicken and marinate the washed and dried  pieces of chicken for 2 hours and then grill . I use a convection oven and it took me 15 minutes on one side and about 10 minutes on the other. pair it with a salad of your choice or you may even make a delicious grilled chicken sandwich.


Tips


  1. If you are using small cloves of garlic it is often difficult to peel them quickly. In that case soak them in water for 15 minutes and you shall be able to peel them quickly 
  2. Keep a tray at the bottom of the rack on which you are grilling so that those juices fall on the tray. This way your oven stays clean and you can use a piece of bread to soak up the juice for an amazing treat. 

Tuesday, July 15, 2014

Almond Tomato Pesto

Almond Tomato Pesto 


Well when you restrict your diet sometimes it can be hard especially if you are part of too many food groups on the virtual media. Someone wanted to know about pesto and that led to a serious craving for pasta and I was glad that I hadn't eaten dinner. I decided to read a bit about pesto and ah ha it provided the exact information I needed , while there are the traditional recipes which mostly needs cheese it is also a generic term for anything which is pound or crushed. I knew exactly what to do. So here is a pesto which is bursting with flavours and is healthy as well


Makes 2 servings

5 to 6 medium sized cloves of garlic
4 plump juicy medium sized tomatoes blanched and peeled
30 to 40 almonds blanched
2 to 4 dried red chilies
Salt as per taste
1 tbsp to 2 tbsp  extra virgin olive oil
1/4th cup fresh mint leaves

Simply start by pounding the garlic and then add the mint leaves and almonds and keep pounding till its more or less smooth and add the tomatoes after chopping them and then add salt and finally add the oil bit by bit to create a smooth emulsion. Serve over wholewheat pasta and you have a healthy meal . You can use it as a dip as well.

In case you do not want to go through the whole process of pounding the ingredients just blend away in a mixer grinder.


Malvani Murgh


Malvani Murgh 

Its hot spicy and coco-nutty 


I believe there is nothing better in this world than the exchange of recipes for its not just ingredients and processes sometimes you get your hands on someone's heirloom recipe and I believe a recipe as as much value as any other historical item because it upholds the culture and lives of real people. And once you get a recipe from a faraway land you might just surprise yourself by finding a subtle similarity with something close home.

Take the beautiful Western coast of India. Its green , its where the hills  meet the sea and then there is that lovely Konkani cuisine, well I visited Malvan a tiny place in the southern most tip of Maharashtra, a coastal town with a slow paced life, smiling people, virgin beaches which are cleaner than most commercial beaches in India and thick spicy hot curries with that delightful taste of coconuts.

It is usually the Southern cuisine that we associate coconuts with but you see being born in one of the few states which can boast of a coastline , mountains , mangrove swamps and forests Bengali cuisine has its way of imparting coconuts. We usually use grated coconut in all our special curries but then there is that distinct difference which makes each cuisine unique for though we love adding grated coconut to vegetarian dishes when it comes to non vegetarian dishes other than the 'Chingri macher malai Kari' Lobsters cooked in a gravy of coconut we usually shy away from using coconut in our non vegetarian curries.

Anyway coming back to the delightful Malvani curry thanks to Meena Phatke I have this wonderful Malvani Chicken recipe which is her mother's recipe and with enough freshly grated coconut at home I decided I must 'strike the iron while it is hot'

So here is a recipe for 2 one that is spicy hot and coconutty

300gm chicken with bones
2 tsp smooth ginger garlic paste
Salt as per taste

For the Malvani essence

8 to 10 dried red chilies the hot variant
1 tsp coriander seeds
1 large onion
1.5 cup of grated coconut (cups which hold 200ml liquid)
6 to 7 cloves
20 black peppercorn
Half an inch cinnamon
2 tbsp oil (I used refined oil . You may use coconut oil or peanut oil or even sesame oil)
1.5 cups of water (cup that  holds 200ml of liquid)
Pinch of turmeric

Simply marinate your chicken pieces in the ginger garlic paste with a pinch of salt and let it marinate for 1 hour to 2 hours.

In the meantime slice the onion and fry it in 1 tbsp oil. The trick is to keep the flame to low and cover the wok so that your onion softens and browns and you do not use too much of oil. Once the onion turns mildly pinkish brown let it cool down. Now dry roast the dry spices and once the fried onion has cooled down blend the onion, coconut and dry spices.

Now heat 1 tbsp oil and add the marinated chicken and seal the juices on high flame for 2 minutes and then add the beautiful coconut base that you have created and coat the chicken and add the water and bring to a boil. Add some salt and turmeric and simmer covered for 15 minutes. Serve hot with steaming rice


Thursday, July 10, 2014

Chili Garlic Sesame Dip

Chili Garlic Sesame Dip 


The truth is I love having vegetables. Yes that is right I love my bacon, cake and steamed or raw vegetables. Well sometimes the salt and pepper isn't enough and so you need an extra boost with a dip but most dips are unhealthy and high in calories . Well a few years ago I had suddenly become interested in Middle Eastern cuisine and finding the ease of availability of the ingredients used in many of their dishes I became a fan of both tahini and Toum and that is how I came to make this dip of mine which is heavily borrowed from those two dips. This takes very little time to make and is a wonderful accompaniment to fresh vegetables or crisps or even nachos.

Makes 4 servings

1 head garlic
4 to 5 dried red chilies
1.5 tbsp red wine vinegar (you can use any other vinegar)
3 tbsp extra virgin olive oil
salt as per taste
1.5 tsp thyme
1 tsp cumin seeds
1 tbsp sesame seeds

Soak the peeled garlic and red chili in the vinegar and oil for 1 hour. This helps reduce the heat of the chili and then just add everything and blend away and you have a healthy dip ready for you. Can be stored in the refrigerator for a week.


Wednesday, July 9, 2014

Low Calorie Mashed aubergine dip

Low Calorie Mashed aubergine dip 


Sometimes you will be amazed by how much similarity we have throughout this wide wide world. Take the case of the simple roasted aubergine. In India there is spicy robust Punjabi 'Baingan Da bharta' then there is a simpler Bengali version where you just add chopped onions, roasted spices, fresh coriander and it has a fresh taste . Much later in life I learnt to make Baba ghanoush and fell in love with this Middle Eastern delight. Then I discovered a light soupy dish made with roast eggplants from the South of India. There is also a version from Eastern Europe.


Anyway other than the culinary connection roast aubergine can be a delightfully healthy dish and the best part is it makes for a super healthy dip. Now with all the World Cup Madness I realized one thing snacking is not an option when the football field is on fire. Well here is a thought ditch the chips, ditch the nachos , well you can always have baked potatoes but then it doesn't have than thin crispy crunch so here is something which is unusual yet makes for a delightfully healthy snack. Mashed aubergine with dry roasted stale chapatis which makes for an addictive snacks and its healthy low on calorie and utterly delicious.

Serves 2

2 medium sized aubergine
3 to 4 stale chapatis
1 tsp cumin seeds
1 tbsp olive oil
2 tsp  extra virgin olive oil
1 tbsp sesame seeds
3 large cloves of garlic
Salt as per taste
1/2 tsp cayenne pepper
1 tbsp lemon juice
Half a large tomato chopped into tiny pieces


Simply roast the eggplants over gas stove and then when cool enough to handle mash with a fork and take off the skin and then blend the garlic, sesame, cumin, 1 tbsp olive oil  and add the mashed aubergine and blend away some more to create a smooth dip. Now take a girdle and heat it and then turn the gas flame to low and cut triangular shaped crisps from stale chapatis and dry roast till crispy. The flame must always be on low else you shall burn them. Once completely crisp drizzle the extra virgin olive oil on the crispy chapati triangles and enjoy with the dip.