Showing posts with label Rice. Show all posts

Saturday, June 13, 2015

Rotte (A Rice and pulse pancake from South India)

Rotte (A Breakfast dish from South India) 


I love food. Over the years I have known that for me comfort food doesn't expressly stay within the dishes that I was first introduced to as a child. In my 9th standard while reading 'Gone with The Wind' I fell in love with the description of fried chicken and once I made it that became my comfort food. Then sometime down the line I fell in love with Shepherd's pie etc etc Basically according to me to really know a particular food you have to respect where it came from that is if its made with lamb substituting it with goat meat unless and until there is absolutely no way you can get your hands on lamb meat changes the dish.


Anyway the point is I have always liked Idlis and Dosas. There are very few dishes that I do not personally like. In fact right now I can't even think of one dish I dislike per say.


When I got married it was mishmash of culture. I am from Calcutta , living in a world of English literature, soaps, movies  , growing up hearing my father playing the violin in preparation of concerts after coming back from the chamber (he is a doctor) cooking from an age of 14 years since the time I told my father that I wanted a taste of world food and he told me he would allow that if I cook it myself while my husband was brought up in Ranchi and is originally from Andhra Pradesh in South India.

Anyway when my mother-in-law had first made this for me I fell in love with it. It was  crispy golden outside and soft fluffy inside.

I noted the recipe from my mother-in-law and I love this. Its easy, soak, grind, ferment and your batter is ready.

So her goes the recipe for Rotte as given by my mother-in-law :-

Cups used hold 250ml liquid

1 cup whole husked Urad Dal
2 cups parboiled rice
Oil for frying
Salt as per taste ( I need 2 tsp)

Soak the pulse and rice separately for 4 hours . Drain the pulse and rice and keep in separate containers but reserve the water in which you have soaked them.

Grind them separately.  First start with the pulse. grind it without any water and then slowly add water to make this creamy smooth soft paste. I usually do not measure the amount of water required but you have to add it slowly to get the fluffy soft consistency and when you touch the mixer grinder it should have become hot. I grind it , stop the mixer and grind ti again and it pretty much takes me 15 minutes to 20 minutes to get the perfect consistency.

Down South I have seen most houses having a wet grinder dedicated for making Idli/dosa batter but for the rest of us its not impossible even with the normal mixer grinder . All you need is patience.

Once the pulse is done keep it in a container. Take half the drained rice and start grinding forst on its own. It will give a gritty mixture then start adding water slowly and steadily. Grind , stop , check the mixture, add water and do this till it reaches a smooth ribbon stage. It should be ultra soft and fluffy to touch.

The entire success of this batter used for Idlis, dosas , Rottes and Uttapams depends on the consistency of your batter and the consistency depends on your grinding.

When the rice is done now grind the Pulse and rice together taking half of each for easy grinding and grind till its fluffy and laves a trail.

It should be ultra soft to touch.

Divide the mixture between two containers filing them till half the container. Add salt about 1 tsp per container , mix with your clean hands and let it ferment for 8 hours.

To know whether your fermentation has gone as expected you shall see it having risen and then there is that smell.

For the Rotte simply take a deep bottomed wok not a flat vessel. Add  a little bit of oil and ladle some of the fermented batter in the wok and cover and cook for 3 minutes to 4  minutes on one side , till you see small bubbles on one side and then   flip and cover and cook for another 3 minutes to 4 minutes  minutes and its ready. Make sure its cooked on absolute low hat else instead of getting crispy golden outside you shall have a burnt outside.

Serve it with some Tomato chutney or 'Podis' (Spicy pulse mixture available in South India) or Onion chutney or any type of chutney of your choice.

I have a sneaky feeling this will team very well with some Mutton stew or chicken stew.


P.S. I have made it with split husked Urad Pulse and it gives the same result.

Please note that I stay in a tropical country where I do not place a problem with fermentation. In case you stay in a cold country keep the mixture in a warm place for fermentation.

You may check out my post on detailed step by step process for the batter here


Important tips :-


  1. Always start the grinding with no water and add the water bit by bit else it will never be the soft fluffy mixture that is required for the dish. 
  2. Cook on slow flame throughout. You cannot hurry the dish. 
  3. You know one side is done when it fluffs up and then you flip it. It might take you less than 3 minutes per side depending on the size of the wok. 

Sunday, January 11, 2015

Nolen Gurer Payesh (Plam date Jaggery rice pudding)


Nolen Gurer Payesh 

(Plam date Jaggery rice pudding) 


Poush Sankranti is the festival of harvest.

Now I had initially decided to learn how to make fried 'Pithe' from my grandmother but then somehow I couldn't get over the idea of smooth creamy rice pudding or payesh as we call it.

To be fair one who has not tasted 'Noel gur' (Date palm jaggery) would not understand that delightful taste which all of Bengal can't get enough of during the winter season. To be fair these days much like everything else on offer this winter's delight is available much before autumn sets in but if you ask the pros they still advice you to use it when its supposed to be used, which is during the chill of the winter season from somewhere in mid December.

Now coming back to the Festival of harvest when it comes to harvest I cannot but have fond memories of acres of rice paddy which we own in Burdwan. My family had moved to the big city more than a century ago and we are what one would call essentially city dwellers living in the heart of the metropolitan city of Calcutta but we come from a district known for its beautiful variety of rice, Burdwan.

As a child my parents would take me to our village every 15 days and it would get me far from the madding crowd. I distinctly remember the voice of that lonely bird while I sat on the roof reading Malory Towers while the entire village and the fields beyond it lay in front of my eyes. I could see them from our roof and then I would set out with my father for a walk through the paddy fields.

I was essentially a free bird in the village. In the city I was sequestered in our home but every time we visited the village I could play all around the village and I had friends from every nook and cranny of our village.

What I remember most about my village were these huge storage of rice. Everybody in the village grew rice as did my family and they still do thanks to some loyal and honest help from some good people and every woman of every household would be bent over this fire made from wood and brick and stir a huge pot to make puffed rice.

As a result I almost make an instant connection with rice when I think of harvest.

I am sharing a classic recipe for Rice pudding made with Date Palm jaggery . To me the rice pudding should neither be too thick nor too thin and should have this creamy consistency. Usually people add raisins and cashew nuts to rice pudding but when I use Palm date Jaggery I refrain from using anything else so that the taste kind of remains classic.

This recipe has been passed down by my ant's mother and I was lucky enough to get hold of it. What is essential is the timing.

Makes about 6 servings :-

1 litre of full cream milk
3/4th tsp melted clarified butter or butter
1 handful rice which comes to about 1.5 tbsp heaped washed short grained rice
Palm date jaggery as per requirement (I needed about a little more than 1 handful of crumbled jaggery)
1 green cardamom
1 large bay leaf

Wash the rice thoroughly and then take a heavy bottomed pan and add the rice and milk and clarified butter with the bay leaf and crushed green cardamom and bring to a boil while stirring the pan constantly and then lower heat to the lowest possible temperature and let it simmer.

Stir the pot every 7 minutes so that the consistency remains smooth and the milk doesn't get stuck to the bottom of the pan.

After 30 minutes you would see the rice boiling well. keep stirring every 2 minutes and check at 50 minutes and dd the jaggery and keep stirring for another 3 minutes to 5 minutes and switch off the flame and let it cool down.


Chill and enjoy this winter delicacy

Important tips :-


  1. Never ever add the jaggery before the rice is fully cooked else the rice will remain raw 
  2. The addition of clarified butter keeps the consistency to a smooth creamy one 
  3. It is essential that you use short grained rice. 


This is part of :-

Kolkata Food Bloggers' ongoign event 'Poush Sankranti Specials'


Saturday, October 4, 2014

Payesh/ Bengali Kheer/ Payasam

Payesh/ Bengali Kheer/ Payasam


One of the most basic Indian desserts is the Rice Pudding. It goes by many many names be it Payesh in Bengali, Kheer in Hindi, Payasam in tamil and telegu, payasa in Kannada or Khiri in Oriya.

Its an easy basic recipe indeed yet perfecting it is really an art.


To be fair I am fortunate enough to have an aunt like my Mimi who can perfect each and every Bengali recipe. Now the problem is once you have had the perfect dish or to be politically correct lets say its perfect for me then it is difficult to enjoy any other variations which falls short of being perfect. As a result throughout my childhood and adulthood the only place I would relish this decadent creamy dessert was at my Mimi's (even my grandmother's kheer pales in comparison to my Mimi's) till the day I asked her to teach me how to make it.

The best part about Mimi as a teacher is that she tries and explains each step and gives me the reasons wherever possible.  This one is neither too thick so that the creaminess is overshadowed by the rice clotted together and nor is it too liquid in nature. Its just right.


This is one of the desserts I have made again and again and again from a very long time and so here goes a simple easy recipe which I have tried to keep as precise and detailed as possible

Recipe :

Makes about 4 to 5 servings

Cups used hold 220ml liquid

1 litre full fat milk (you cannot use toned milk else it will most definitely compromise the taste)
1 handful of . rice washed thoroughly (it comes to about 1/4th cup of rice ) { This rice is short grained and sometimes it is sold as kheer rice in many places, it is called Atop Chal or Gobindobhog chal in Bengali)
1 handful of sugar + 2 tbsp sugar but you must change the amount of sugar as per taste
2 green cardamom
1 large bay leaf
50gm broken cashew nuts
Fat pinch of saffron soaked in milk
1 tsp ghee

Bring the milk to a boil in a deep bottomed pan and the ghee , green cardamom and bay leaf  . Adding the ghee keeps the dessert extra smooth.

Now reduce the heat to the lowest possible temperature and add the washed rice and simmer it. Use a wide spatula to stir the mixture every 10 minutes for the next 45 minutes make sure the bottom of the pan does not burn.

Add the cashew nuts after 45 minutes.

After 50 minutes of simmering it with frequent stirring check the rice . It would have been cooked by now and will be of a melt in the mouth consistency. Now add the sugar . You must not add sugar before the rice is fully cooked else the rice remains uncooked.

You must stir continuously for the next 10 minutes to 15 minutes to prevent the dessert from sticking to the bottom and getting ruined. After 10 minutes add the soaked saffron and simmer while stirring continuously for another 2 minutes and switch off the gas.

Let it cool down and chill it for 3 hours to 4 hours and serve after giving the dessert a good stir. You must stir before serving because a thick cream will form on top which must be mixed well with the desert for the creamy smooth consistency.


Enjoy this classic delicacy

Tip


  1. During the winters we get a special jaggery called 'Nolen Gur' in Bengal which is palm date jaggery and we repalce the sugar with the jaggery and it gives a divine taste. 
  2. Many people love adding raisins to the dish. If you wish to do so add it when you are adding the cashew nuts. 
  3. You can replace the cashew nuts with blanched  pistachios or blanched and chopped almonds. 


Wednesday, June 11, 2014

Dum Biryani


Dum Biryani 


 Biryani is a cousin of the middle eastern Pilaf and the variety of Biryani which is available across South Asia (India , Pakistan and Bangladesh) is sure to amaze any culinary enthusiast. If you have grown up with a particular type of Biryani you will always have that funny little story when you tasted the other variety. So I grew up in Calcutta, the City of Joy, the City of Culture but also the city where the Nawab of Awadh had settled at one point of time bringing with him the glorious cuisine of Awadh. While there had to be certain economic changes made in the kitchen with the Nawab's glorious days behind him the basic of the recipe remains the same and so I grew up knowing the Calcuttan Biryani which is very similar to the Awadhi Biryani except that it has the additional potatoes and in some cases you can even add eggs but then again I was never really that fond of Biryani from the eateries in Calcutta because of the high amount of ittar and kewra water and oil . Well originally it is supposed to be ghee all the way but one of the reasons why Biryani is very famous in Calcutta is its affordable price and as we all know 'you can't eat your cake and have it too'. Nevertheless it was not until I had the tasted the Lucknowi Biryani available in only one eatery of Calcutta that I fell in love with Biryani all over again. Well I say all over again because while I was growing up I might not have liked the Biryani from eateries but that was only because come every Sunday and my father would make Biryani at home. It was of course not oily and had the balanced proportion of flavoured water which suited my taste buds and this Lucknowi Biryani brought back strong memories.

Now I am particularly fond of Awadhi cuisine but getting hold of recipes from Awadhi cuisine can prove to be quite difficult. While a few are found all over the place one should understand that more that the ingredients its the numerous methods of cooking that makes this cuisine so exquisite.

Well anyway going back to that time when I had Biryani from Bombay I was well completely taken aback and to be fair very disappointed . You see Biryani from Bombay has its own distinct taste which is completely different from your Awadhi Biryani with a curry like taste and it took me a while to appreciate it.

Anyway one fine day I decided to make Dum Pakki Biryani. Dum is a method of cooking on slow fire and the method I used for cooking was Dum Pukht where a curtain of dough seals the container and the food gets cooked in the steam. Now Biryani can not only be distinguished on the basis of the region it is from but also on whether it is made in the Pakki style or Kachchi style. While for the Kachchi style the meat is marinated and cooked together with the rice . The Pakki style Biryani cooks the rice and meat to an almost done state and then cooks them together.

Now here is the problem with 'authentic style' and why I am not calling my Biryani the Awadhi Biryani. I have never been to Lucknow and as I have said before there are not too many sources which gives you the recipe for Awadhi food and so I consulted two articles from the Times of India, recipes from two blogs and as much information as I could gather to make it as close to the original one as I can and here is why. While blogs are a great source for recipes some blogs are misleading. So I liked this blog very much and the blog talked a lot about certain details of what makes Awadhi Biryani so special and all the points to be kept in mind and then there are certain ingredients used which I immediately know makes it not  quite Awadhi and so I consult another blog and the article from The Times of India  and this is what I gather.


  1. The distinct flavour of the Biryani is imparted by cooking the rice in the 'Yakhni' or the meat stock
  2. The spices used are always kept whole and not ground.
  3. The rice grains are fluffy and the sign of a good Biryani is the grains remaining separate
  4. No oil of any kind should be used. Its cooked all the way in the mutton fat and ghee.       
  5. The quality of the Biryani will greatly depend on the quality of mutton. In India goat meat is also categorized under mutton and for this it is always goat meat that is used. 

Anyway  coming back to the recipe this one can easily feed 3 to 4
What you need :- 

500gm   of good quality meat with bones
2 cups of Basmati rice (cups which can hold 250ml of water) / Approximately 360gm of rice 

For the Yakhni 

7 cups of water (cups which hold 250ml of liquid)
1 black cardamom
5 green cardamom
5 cloves
1 inch cinnamon
4 blades of Mace
1 tbsp chopped ginger
1 tbsp chopped garlic
1 large bay leaf
1 tsp Shah Jeera
3/4th tsp black peppercorn
Salt as per taste (I required 1 heaped tsp)

To sear the meat

4 tbsp ghee
4 tbsp whisked curd
4 tbsp whole milk
1 black cardamom
3 green cardamom
4 to 5 cloves
1 inch cinnamon
2 blades of mace
1/4th tsp Nutmeg
Salt as per taste (I required 1/2 tsp)
Pinch of turmeric
20 black peppercorn
1 tsp chili powder

For layering

2 pinches of saffron soaked in 8 tbsp water
2 tsp rose water
7 tsp ghee

For the Birista (Optional) Usually not a part of the Awadhi Biryani
Birista means golden fried onions . If you desire to use it
Take 2 medium sized onions and chop them as finely as possible
50gm ghee for frying

For the seal to cover the mouth of your pot . Now this will largely depend on how big the mouth of the pot is :-

I needed 2 cups of flour
1 cup of water

Once the seal was opened 


Start by soaking the rice and then go no to make the Yakhni . Put all the spices for the yakhni in a muslin cloth and tie it up. Place everything together and bring to a boil and then simmer on low heat for 1.5 hours. Take out the pieces of meat after 20 minutes when its done to a 3/4th stage.

After 1.5 hours start by searing the mat. Heat the ghee and add the meat and saute on high heat for 1 minute and add the spices and reduce to low heat and add whisked curd and milk and keep stirring till you get a dry consistency.

Bring 4 cups of broth to a boil and gently add the rice. Be careful because Basmati rice is very delicate and the soaking will make it more vulnerable to breaking. Bring to a boil and then lower heat and cover and cook for 3 minutes to 5 minutes till its 70% done. It should be soft yet not soft enough to eat. Once done drain the rice and spread it out if possible and leave it under the fan for 5 minutes.

Now for the final Dum take your pot and grease it with ghee. I needed about 2 tsp and then add a layer of rice and some meat and 2 tsp ghee , 1/2 tsp rosewater and some soaked saffron. Add another layer of rice and meat and repeat it with the ghee , rosewater and soaked saffron. And a third layer of rice and meat and then roll out the dough and seal the pot and place it over the lowest possible flame with a lid on top of the rolled out dough and a heavy object on top. I used a stone mortar and pestle and leave it to get Dum Pukht for the next 20 minutes to 30 minutes and switch off the gas stove.

She or  he who shall peel off that layer of dough once done will be hot with a delicious aroma which is intoxicating indeed. Serve with raita.


P.S. In case you want to use the Birista fry the onions on low heat till its golden brown and use it for layering but traditional Awadhi Biryani does not use it. 


Wednesday, April 23, 2014

Egg wrapped Chicken Wine Rice

Egg wrapped Chicken Wine Rice 


One of the pleasures of my life is to follow step by step elaborate recipes and the other joy is to create quick fix meals when I am swimming in a lot of work. To be fair Minced meat rice is something which I have been eating since I was a child. You see I was not fond of the usual fare cooked at home and would refuse most of the food and so my grandmother would lovingly prepare this Chicken minced meat rice which I would happily eat since it was so delicious. Of course she would add peas and the Indian spice mix 'garam masala' and later when I grew up I realized this is one of the easiest recipes I can make when in a hurry. Of course I use herbs and throw in my ideas but basically its a very easy recipe.

The wine rice 


Now new ideas always attract me and so when Sayantani Mahapatra , a fellow blogger from Kolkata Food Bloggers which I am a proud member of posted this picture of Omurice I knew I had to make it even though I have to admit I didn't quite find the time to read her recipe, but this idea of a thin omelette with rice filling got me excited. I wanted to know what Omurice is and as per the information over  the internet its basically a Korean westernized dish with Japanese influence and usually has ketchup on top. Now I am not a fan of ketchup so I just made up my own recipe but it looks pretty enough and well the taste is probably going to be interesting for you if you like wine, chicken, herbs and eggs.


What you need for 2 servings to 4 servings (depending on your appetite and food intake)

4 eggs
2 tbsp olive oil

Chicken wine rice

1 cup basmati rice or any long grained rice
1 tsp butter
6 tbsp fruity white wine . I used Chenin Blanc
1 heaped tsp oregano
4 large cloves of garlic
2 tbsp apple cider vinegar
15 whole black peppercorn
2 whole dried red chili
Salt as per taste
3 tbsp olive oil
150gm to 200gm minced chicken

Start by washing the rice and using butter to mix with the rice . This step ensures that your rice stays fluffy and separate. Now soak the garlic, whole red chilies, oregano , 1 tbsp oil and black peppercorn in the vinegar. After 15 minutes soak it in 2 cups of water. Soak for another 30 minutes to 1 hour and then bring the rice with the water to a boil and immediately simmer covered for 10 minutes. If your pan is toop small then the foam might try to escape in that case leave a little gap till all the water gets absorbed and then cover. You know its done when it appears all fluffy. let it rest for 10 minutes and transfer to a colander else it will stick together. Now blend the vinegar with the garlic and other ingredients soaked in it to create a beautiful emulsion .


Now heat the rest of the oil and fry the minced chicken on high heat for 1 minute , keep stirring else they will form a big lump and add the spice emulsion you have created and keep stirring and then add 3 tbsp white wine and keep cooking on medium flame stirring continuously till it dries up and the oil comes out a bit.

The Omelette 


Now take a deep bottomed vessel and put one layer of rice, 1 tsp of wine and some cooked minced chicken and keep layering and leave it alone for 15 minutes. Use a splash of wine from the top.


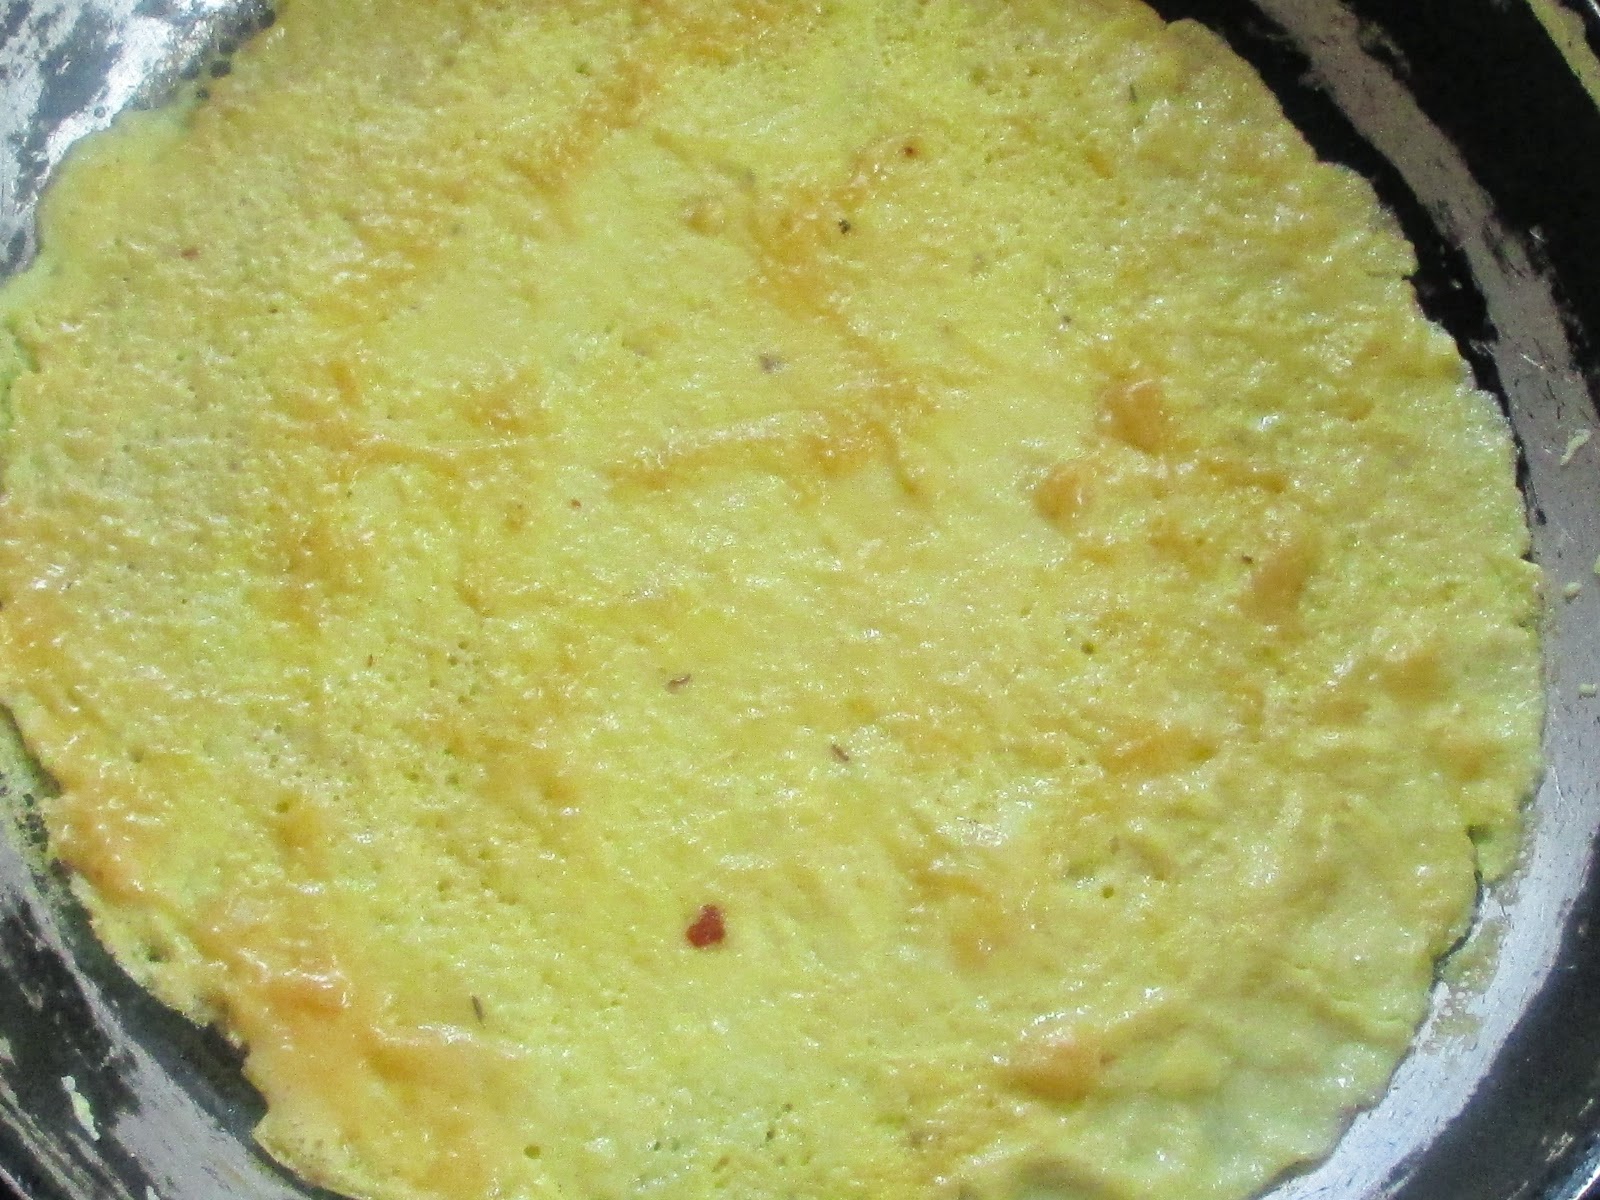
For the eggs whisk them well and use a large skillet to make a thin omelette. Make two omelettes one after the other .Wait till you are able to handle it with your hands and then place it on a big board and place some rice on the omelette and wrap it carefully.You have to have patience else it breaks. Cut it in half and serve it. You might find some extra rice after you have wrapped the eggs. Serve the rice on the side.


Wednesday, December 18, 2013

Bacon sausage ham Rice

Bacon sausage ham Rice 


Some days are just for a quick fix comfort food. You need a quick meal which is loaded with your favourite things. So I had fresh bacon, ham, dried sausages , fresh celery and some rice. Ah you must already be knowing where I am headed


Serves 1

Half a cup of long grained rice
1 bacon with the fat
2 slices of ham
2 thin dried sausage
1/2 tsp chili flakes
Pinch of salt
1 cup water
1 stalk of celery
Olive oil for brushing
1 tsp minced garlic
1 tbsp finely chopped spring onion

Chop the bacon, ham and sausages. Mince the garlic and chop the celery stalk into very small pieces and finely chop the leaves. Just brush a wok or pan with olive oil and add the little bits of bacon and lower heat cover and wait for 2 minutes. Then you'l have some fat bubbling away and add the minced garlic and saute and then add the celery stalk and the ham and sausage , chili flakes  and then the celery leaves and spring onion and saute for 3 minutes and leave it aside on a bowl. Now add the rice in the wok and add the water and bring it to a boil and add the salt. Be careful with adding salt because bacon and ham will have salt in them when you shall later mix the rice with the meat. Now lower heat and cover and cook for 8 minutes to 10 minutes till the rice grains look separated and then switch off gas and leave for 5 minutes and then mix the rice with the meat and serve.


Friday, November 15, 2013

Bang Bang Hot Hot Quick Quick


The real challenge of staying healthy is when you are so swamped with work that you are unable to even visit the market. Now I dislike heading for any packaged food items be it sauces, instant noodles and lately even biscuits. Why? Well why should I when I can cook anything I want in the kitchen. These are full of preservatives , too salty and well more unhealthy than pure butter.

Well well so it is 5:30 p.m. and I have my afternoon tea with the baked shortbread biscuits from the previous day and refreshed and enegized sit down for work . I think I am doing myself a favour by eating half a red bell pepper fro lunch because of the inability to go for the walks but suddenly there is a growl. Well  I shall exactly describe what I felt by 6 p.m. and saw in my head. It was as if moles and mice were scurrying in my stomach, playing football , doing a zumba dance. Now I was frustrated enough to simply head for my grandmother's hidden stack of instant noodles, 86 year old woman sure loves her maggi when I fought back, No I cannot do that to myself with instant noodles I shall not let preservatives and packaged food.

Now I have this habit of taking breaks and searching for recipes and for quit sometime I had searched for a blog featuring Chinese food from China. I have heard most people say and well believe it as well as to how altered our Indian Chinese is so i wanted to know what our neighbours actually eat. i remember watching a particular programme on Travel and Living some 5 years ago where this man made this scrumptious pork dish in a serene  mountainous village of china which looked tempting enough for me to try and cross the borders. It did not have any unknown mystifying ingredient, it was simple, sesame oil, Chinese 5 spice and garlic chili paste fried et all and the close shot of that beautifully prepared dish served with sticky rice shall be etched in my memory forever. It  was so tempting simple white rice a bit for us 'sticky ' was still an unknown word so I shall go with moist with succulent pieces of reddish brown a bit temptingly oiled pork. So I have searched high and low for recipes all these years only to have gotten the American Chinese, Indian Chinese and a lot of amalgamated Chinese dishes.

So imagine how my heart did leap with joy when I found this blog featuring authentic looking Chinese dishes. Now I do not know whether they are authentic where the Chinese will get offended etc but the a quick intense research on the ingredients featured in the blog and China's cuisine proves that it is as authentic as it can get. Now Just like India China has many a districts with many a regional cuisine and I have no idea which region of Chinese cuisine this blog explores but anyways so this one recipe had caught my attention . the picture looked beautiful, A bed of flat white noodles topped with cucumbers and steamed chicken with sauce. Light healthy inviting. A quick check of the recipe mad em realize how easily I can grab all the ingredients sitting in Calcutta not to mention Calcutta's old old old connection with China.

By this time it was 6:30 p.m. and my stomach was making itself heard quite loudly so off I headed into the kitchen to check my pantry. Curses to myself for not stocking it well. There were bell peppers, garlic, onions and eggs and a few other things which are always handy in all kitchens. I immediately got down to work. ah what did I find , rice wine vinegar , I couldn't help smiling a bit.

The first thing I did was to call Mother darling to request for some chicken. I did modify the recipe quite  a bit to suit the available ingredients and time in hands.

So i did not have soy sauce or sesame oil but did have sesame seeds etc etc . Not getting into the original recipe I shall share what I used


For the chili garlic sauce
10 fat garlic cloves
6 dried red chilies
Rice wine vinegar
pinch of sugar

For the final sauce simply whisk together


1 tablespoonful of the fiery chili garlic sauce
2 tsp of sesame paste
4 to 5 peppercorns
ginger paste
2 small onions steamed with the chicken
salt as per taste
Chicken stock


Soak the garlic , sugar and  chilies in enough vinegar to just cover them and leave it in peace.

1 Cucumbers
1 Bell peppers
1.5 cups Rice: I did use basmati rice but would suggest using a more sticky rice which remains sticky moist and ideally not what we Indians look down upon.
300 gm or more Chicken marinated in ginger paste and sesame paste
Individual water poached eggs on top


Slice cucumbers and bell peppers as thinly as possible and put it in the refrigerator.

Very lightly toast sesame and make a paste with a little sesame oil or in my case I used refined oil. keep some extra. You can use this as raw tahini for later usage. For feel free to use 1 cup of sesame. You do two work with one shot. Store in air-tight containers in the refrigerator.

Make your chili garlic paste by blending everything in with water or oil. Now I have previously used water which retains a lovely red colour but cannot be stored for further use and so I used refined oil . I suggest using sesame oil if available .

Marinate chicken with ginger and sesame paste and salt and let it soak. I did not steam it but instead used  Half a teaspoonful of oil and let the juices get locked with the chicken for 4 minutes stirring constantly over high flame and then added water and covered and cooked till they fell apart in my hands. I added the onions and took them out after sometime to get rid of the raw smell. when done shred your chicken with your hands, it should be soft enough to fall apart and use the remaining stock to soak your rice bed.

Blend all the ingredients of the sauce and it is ready.

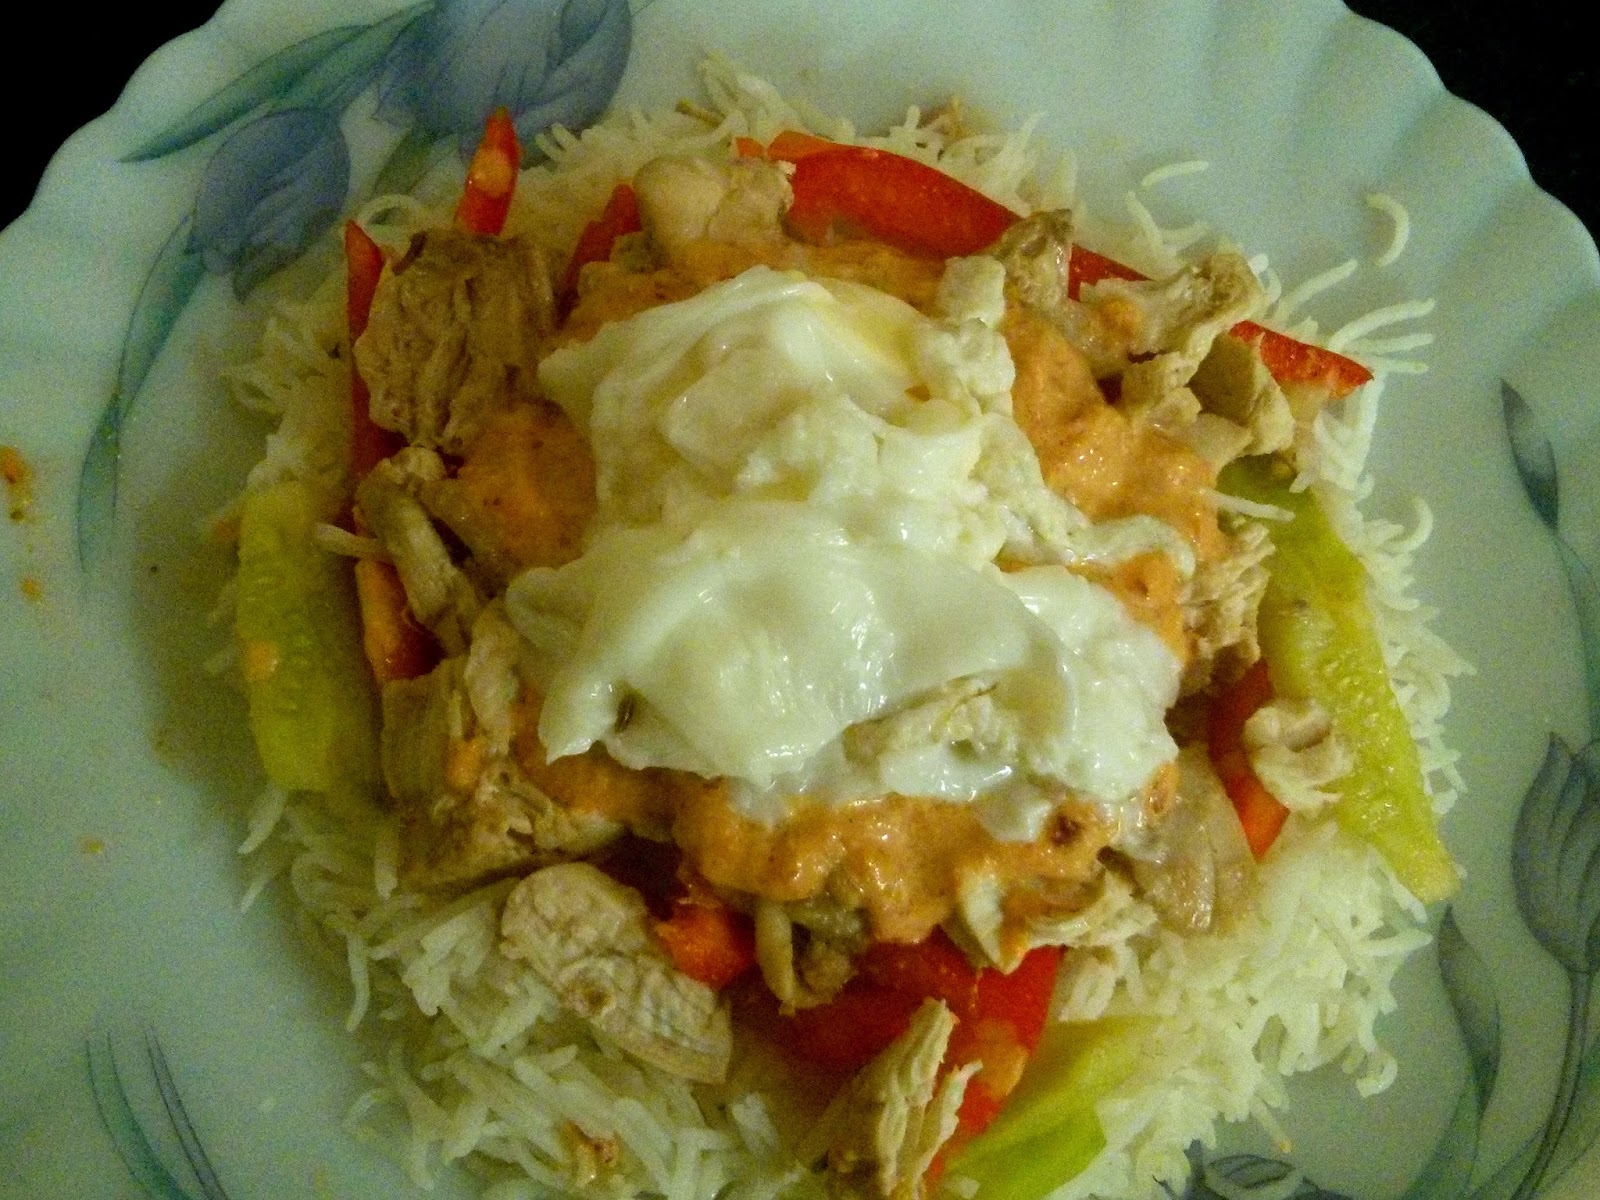
Arrange the rice on the a plate, add your vegetables and then the shredded  chicken and finally the sauce topped with water poached eggs per person. I loved my dinner. in case you are using basmati rice or any rice which is not sticky soak the rice with a bit of chicken stock for moisture when arranging it. I loved this new unique taste.

Difference with the original recipe : Rice is not used but bean noodles. There is the addition of soy sauce and it uses no eggs. the chicken is simply steamed with sesame oil and nothing else. there arent any bell peppers which are used.


I  did thoroughly enjoy my dinner. Hope you do so as well


Friday, October 25, 2013

Ghee Bhat


The love affair with Clarified Butter 


Bengal is a food lover's delight. Once a huge state , it is currently quite a small one but its cuisine is diverse indeed. Go up north and you have the delightful taste of  the famous dumplings from the hills. East Bengal once a part of Bengal has a special style of cooking and from what I have heard or researched it is strictyl a fish based cuisine with many of the vegetarian dishes being cooked with fish parts adding to their deliciousness.

Now when you feel lazy and you have an old friend coming over, one who is never on a diet , it is quite easy to cook and have all the time on your hands for lots of chatting and that is what I exactly did. I decided on the good old 'Ghee Bhat' (rice cooked in clarified butter' Now a virtual glance cannot do justice to the aroma and taste of this delicate dish. It looks like pulao but what makes it special for your taste buds is the amount of clarified butter which is not only the taste bud's delight but the sense of smell as well. Perhaps it has only one enemy and that is the increased waistline after its consumption. Well throw caution to the wind once in a while and simply indulge in this sweet and mild flavoured delicacy.


Serves 5

2.5 cups basmati rice
1.5 cup ghee
Cinnamon
Green Cardamom
3 to 4 cloves
1 large sized Bay leaf
salt
Handful of sugar
handful of raisins
Handful of cashew nuts

Soak the rice for 15 minutes to 30 minutes.  What one needs to do is to drain the rice and take a bit of clarified butter and gently mix it with the rice. Now this is a trick which always helps in keeping each strand of rice separate. The water must be preserved for cooking. Heat the clarified butter and add bay leaf , cinnamon stick, green cardamom and cloves, add the rice and gently stir. Basmati being the delicate queen of rice easily breaks. Add cashew nuts and raisins. Add 5 cups of water and include the reserved water within these 5 cups. Bring everything to a  boil and add salt and sugar and then simmer covered but with a little gap left for about 12 minutes to 15 minutes depending on the quality of rice. Once done keep the lid on and let it remain that way for about  7 minutes to 10 minutes. Immediately transfer the rice to a colander else it will take the shape of the container you put it in and the rice wouldn't delicately remain separated from each other.  Enjoy it with the 'fish kalia' a rich gravy made with curd or 'chanar dlana' (Home-made paneer in a gravy from the kitchens of Bengal)

Fish in a gravy (Bhetki macher Kalia)

Serves 4 to 5

5 pieces of the fish Bhetki or any other fish which doesn't have bones
salt and turmeric
Mustard oil
Ginger garlic paste
Onion and green chili paste
Tomato puree
Bay leaf
Cloves
Cinnamon
Green Cardamom
1/3rd cup churned curd
less than a handful fo cashewnuts made into a smooth paste with milk
Clarified butter
Pinch of garam masala


Wash the fish and rub it with salt and turmeric and let it rest for about an hour. Fry the fish lightly in mustard oil making sure it is not browned or is even red because we want the fish to soak up all the goodness of the rich gravy. Set aside the fried pieces of fish in a bowl.

Decant the leftover oil from the fish and add 1 tsp to 2 tsp clarified butter and add the ginger garlic paste and fry it till it becomes golden and add the onion and chili paste and mix it well till it is cooked thoroughly and add the bay leaf and other spices. it is recommended that one gives the spices a mild pounding before adding them and then ad the tomato puree and stir continuously till it is well cooked and add salty and turmeric. Add the churned curd and mix well and enough water to make the desirable amount of gravy and keep stirring continuously while bringing this to a boil so that the curd doesn't separate. Simmer this and slowly add the cashew paste and once again bring everything to a boil while stirring continuously and add the fried pieces of fish. Let everything boil for half a minute and simmer and cover and let it cook for about 12 minutes to 15 minutes. Check from time to time to make sure the gravy isn't drying out and add extra water if necessary. When it is almost done add clarified butter and garam masala and let it simmer for another minute or so and serve it with rice or pulao.

P.S. Even though the taste is best enjoyed along with plain white rice, it is a nice accompaniment with the 'Ghee-Bhat' (rice cooked in clarified butter) or other pulaos.


This recipe is a part of the E-book Best kept Secrets an initiative to preserve heritage family recipes from across India by Parzen Patel of Bawi Bride