Showing posts with label Indian. Show all posts

Friday, October 30, 2015

Coconut Poppy seed Mutton

Coconut Poppy seed Mutton 


The first time I slow cooked mutton was after reading an article where the author spoke to a member of one of India's erstwhile Royal families who harped on the beauty of a meat dish when it is slow cooked. That was it I slow cooked mutton , loved it and stuck to it and then there was this one time where the Cooking gas was delivered a month late than it was supposed to be delivered and the household was in a chaos. So for sometime I tried reducing the time taken for slow cooking by slow cooking in a pressure cooker for half the time and then slow cooking the meat which suited me not too badly but then again I must have not even known that in the corner of my heart I did miss slow cooking meat.

One of the wonderful things about interacting with people who are passionate about food is that sometimes matters related to cooking becomes even more clear to you. I am lucky to be part of a group where we have professional chefs and passionate home cooks interacting with each other and so I once again realized I had to slow cook meat and so I did and now its either slow cooking meat or no cooking meat. The flavour is amazing as is the texture of meat which is neither tough nor over cooked but sticks to its bones and melts in your mouth when you take a bite.

I love the flavour of coconut and spices so I was set on this spice mix from Lucknow which uses Charmagaz ( a blend of 4 seeds) etc but then alas I was out of charmagaz.

Thankfully I met with a friend who was talking about how people in our neighbourng state makes meat curry with Poppy seeds. And I knew exactly how I wanted my meat curry to be.

Marinating the mutton in raw papaya juice lessened the time of cooking by half an hour and in the end we licked our bowls clean with some piping hot rice.

From my personal experience the meat tastes even better if you leave it overnight post cooking where the flavours get absorbed even better and you have a wonderful breakfast or brunch for the next day.

800gm goat meat / lamb meat

For marination :-

1 tbsp ginger paste
1 tbsp garlic paste
1 tbsp raw papaya juice

130gm sliced onions
100gm yogurt

For the spice mix :-

2 tbsp heaped grated coconut
1 tbsp poppy seeds
2 blades of mace
3 green cardamom
1.5 inch cinnamon
4 cloves
4 whole dried Kashmiri Red Chilies
2 fiery hot dried red chili (choose a variant which is hot)

100gm clarified butter


Marinate the meat in raw papaya juice and ginger garlic paste for about 3 hours to 4 hours.

Heat the ghee and fry the sliced onions on low to medium heat till its golden brown. take care not to overbrown it. Add the meat and immediately lower heat to absolute low , cover and cook for 30 minutes. Keep it on low heat throughout.

Now whisk the curd well and add it to the meat and stir continuously till it forms a homogeneous mixture.

Now take the ingredients of the spice mixture and leaving aside the fresh grated coconut dry roast the rest and let it slightly cool down and make a dry mixture, add the coconut and grind further and then keep it aside.

When you have cooked the meat for 1 hour from the time you started cooking it add the spice mixture and salt  and lower heat sprinkle water and cover and cook for another 45 minutes to 1 hour till the meat is cooked through.

Keep sprinkling water and stirring every 15 minutes.

Once cooked cover and let the meat rest for 15 minutes and serve with hot piping rice

The resting period is crucial for better flavour and texture of meat.


Saturday, June 27, 2015

Butter Chicken / Murgh Makhani

Butter Chicken / Murgh Makhani 


Cut to 2017 and when I finally tried the butter chicken from Moti mahal Daryaganj, Delhi where this iconic dish had been created donkey years ago .  I realized how the real butter chicken should be like and I also realized that the butter chicken I had created using the recipe from this fabulous cookbook from the house of moti mahal gifted to me by Pritha tasted quite similar to the one I tasted at Moti Mahal.

Be warned that copious amount of butter has been used in the recipe and its meant to be that buttery. This is supposed to be for those are days of indulgence hence a bit of extra buttering is welcome.


Back in 2007 right out of school I was learning to make a lot of new dishes and I had tried the butter chicken masala but since our oven was broken at that time I used the chicken normally after frying it and so I can assure you that the tandoori chicken makes a whole lot of difference.

To be fair the entire process is not difficult at all. A little bit of patience is needed what with the time for marination and the grilling of the tandoori chicken but the end result is magnificent.

I understand if you have just moved into a new house or are yet to buy an oven then of course you have no other option but to use the gas stove for the chicken before it is cooked in the gravy. In that case pan roast it . I don't recommend this wholeheartedly but then again originally the tandoori chicken is made in a clay tandoor 'Clay Oven' so there you go.

What I particularly liked was that the book used chicken with bones. I personally feel when cooking Indian gravies chicken with bones work much better than boneless chicken and then I was assured by many on social media that originally it was cooked with bones but not with the skin on mind you.

Serves 3 to 4

You need tandoori chicken : Recipe Here : Tandoori Chicken


For the gravy you need 560gm tomatoes (firm and ripe)
1 heaped tsp ginger paste
1 heaped tsp garlic paste
85gm to 100gm softened butter
100ml to 120ml full dairy cream
Salt as per taste
1 tsp tandoori masala / garam masala made with green cardamom, black cardamom, bay leaf, black peppercorn and cinnamon
1 tbsp Kashmiri red chili powder

Once the tandoori chicken has been made start with the gravy.

Melt 1 tbsp butter and add the ginger garlic paste and saute for 1 minute and add chopped tomatoes and saute stirring continuously for 3  minutes to 5 minutes on medium flame and add 3/4th of the remaining butter. Now lower the heat and simmer till the oil separates and the cream , tandoori masala or garam masala , some salt and mix well and cook on low heat till its bubbling away. Joint the chicken (cut it up into medium sized pieces using a butcher's knife) and add this to the gravy , cover and cook for 4 minutes and then Mix well , add the remaining butter and serve with hot butter chapati or tandoori roti. Enjoy

Tips :-


  1. If using salted butter go easy on the salt in the gravy 
  2. In case you are not using the oven for the tandoori chicken . Marinate it as instructed and then heat a bit of ghee or mustard oil in a shallow flat pan and add the chicken and cook on low heat covered for 6 minutes per side. Then one the pan increase heat and cook for 2 minutes per side. Let it rest for 5 minutes and cut it into pieces. 


Monday, June 1, 2015

Murgh Khade Masala Stew (Chicken Stew cooked with Whole Spices )

Murgh  Khade Masala Ke Stew 
(Indian Chicken Stew cooked with Whole Spices ) 


There are times when you want to have your cake and eat it too. Usually when I make chicken stew I use herbs and at times a bit of wine along with the vegetables of the season and that makes it a Western influenced dish.

Today all of a sudden I was craving some spicy dish yet this extreme hot and humid weather is a big deterrent for me to cook spicy rich gravies and then  I suddenly thought of making some Murgh Khade masala Ke meaning Chicken cooked with Whole Spices. In fact while cooking it I decided it should have some soupy gravy instead of a rich thick one and what resulted  in the end  was a delight to have. It had the fragile flavour of all the whole spices. When you dry roast spices and grind them it automatically increases the spiciness of the dish. In this dish because the spices are kept whole it leads to this aromatic flavourful dish. The yogurt used in the dish adds flavour  and because yogurt is a natural coolant it makes the dish perfect for the hot weather.

This is best enjoyed with some rice or handmade flatbread 'Chapati'

The other point is that chicken breasts need a lot of care while cooking because a little bit of extra cooking leads to dry chewy texture. For roasts and other European dishes with the skin on it still does give you some protection but for Indian curries where the chicken is always cooked skinless and doesn't use any batter as coating for protection,  this one problem has always bothered me and then I found a solution from RasaMalaysia's site. She shared the trade secret of keeping chicken breasts juicy moist and delicious by marinating pieces of chicken breast in bi-carbonate of soda for 15 minutes to 30 minutes and washing them well before marinating the chicken or cooking it directly and boy does it work like a miracle. The chicken breast stays juicy , moist and full of flavour and so I applied it for my Indian Chicken Stew cooked with Whole Spices. It did work beautifully in keeping the pieces of chicken breast juicy and moist.

1 Kilogram chicken cut up in medium sizes
1 tsp bi-carbonate of soda
1 tbsp smooth thick garlic paste
Paste made from 1 inch ginger
4 small onions sliced thinly
3 tbsp yogurt beaten well with a bit of warm water
2 cups water
1/2 cup cashew nuts (This is optional but I like it when I use it. If using the cashew nuts simply grind it with half the yogurt till it reaches a creamy consistency)

Spices :-

4 to 5 green cardamom
1 black cardamom
2 medium sized 'Tej Patta' aka 'Indian bay Leaf'
6 whole dried red chilies
2 inch cinnamon
5 cloves
Pinch of turmeric
1 tsp Kashmiri Red Chili Powder
 Salt as per taste


Take out the pieces of chicken breast and marinate these pieces with bi-carbonate of soda and leave it aside for 20 minutes and then wash it very well and marinate all of your chicken with ginger garlic paste and let it marinate for 1 hour to 2 hours.

Make a smooth paste of the yogurt and cashew nuts. Add turmeric and chili powder to this mixture.

Heat the ghee in a deep bottomed vessel and add the onion on low heat and when it becomes golden brown add all your spices including the dried red chilies and stir for 1 minute and add the chicken all the while keeping the heat on low. Stir for 5 minutes on low heat and then add the curd cashew nut paste along with salt and water and keep stirring on low heat till it comes to a boil and then simmer for 30 minutes.

For a quicker method once you add the water and salt bring the content to a boil on high heat and immediately after it comes to a boil simmer for 40 minutes.

Enjoy this delicious stew with some 'Chapati' or any type flat bread or even rice.


Monday, May 18, 2015

Tandoori Chicken in the Oven

Tandoori Chicken in the Oven 


I have till date avoided making kebabs because I do not own a charcoal grill and while my oven makes delicious grilled chicken I somehow cannot fathom the idea of kebabs without the smoky taste. In the past I have tried using the method where you take a piece of charcoal and heat it up and then put that in a bowl add a few drops of oil or clarified butter and put this with the food you want to smoke covering it. Well to be fair that is nowhere close to a charcoal grill.


Anyway its wonderful to have friends who know exactly what would make you happy and so when Pritha who blogs from Guilt Free gifted me the book , 'On the Butter Chicken Trail' by Monish Gujral from the house of 'Moti Mahal Deluxe' the very restaurant which has supposedly created butter chicken I was ready with my ladle , spoon and spices.


Anyway point is I am quite neurotic when it comes to spice blends. I make my own and do not recall having ever bought garam masala or spcie mix for any dish ever. Sowhen I saw the recipe for Tandoori masala it somehow clicked and then I saw the recipe for Tandoori chicken and I must say that I immediately wanted to make it.

I had all the ingredients at home and so there I was dry roasting the spices so Tandoori chicken to be cooked the next day. Not just that I do not use colour in food on principle and since the recipe did not use any food colour that was just an added excitement for me.

Now I did have to adjust the oven time quite a bit since the original recipe calls for a clay tandoor and even though the book has a method given for oven having made grilled chicken a lot of times the time given seemed way too little and so I adjusted the time and in the end it was juicy succulent spicy tandoori which I made 3 times in the span of a week and I have to say this recipe is for keeps. I did cut down the recipe for tandoori masala quite a bit and even then I have a small jar full of tandoori masala.

The Tandoori garam masala

50gm cumin seeds
50gm coriander seeds
15gm rose petals
8gm mace
8gm cinnamon
10gm black pepper powder
1 tsp green cardamom
2 whole black cardamom
1.5 tsp cloves
1/2 tsp nutmeg

Dry roast all the spices on low heat making sure it doesn't burn and then cool and grind to a fine powder. Store in an air-tight jar.

Recipe adapted from On the Butter Chicken Trail

For the tandoori chicken

Serves 4

800gm whole skinless chicken

For the first marination

1.5 tsp salt
2 tbsp lemon juice
1.5 tsp Kashmiri red chili powder

For the second marination :-

200gm curd made into hung curd
2.1 tbsp ginger garlic paste
1/2 tsp kashmiri red chili powder
1 heaped tsp tandoori garam masala
3/4th tsp kasoori methi

Melted butter or Clarified butter or mustard oil for basting

Joint the chicken making 4 pieces. Two legs + thigh and cut the breast in half  bone in . Wash , pat dry make 3 deep slits on the breasts and 2 slits on each side of the legs and 3 little cuts at the joint of the leg. Marinate with the ingredients mentioned in the list of ingredients for first marination and let the chicken marinate for 1 hour. In the meantime make hung curd from the 200gm curd by tying it up in a muslin cloth and removing the watery bit.

For your second marination marinate the chicken and leave it aside for 3 hours. In the original recipe a bit of rock salt is added but I hadn't used it for the second marination.

Preheat oven to 180C in grill mode heating both the rods .

While the oven gets preheated boil some water. Once the oven is preheated place the rack on which you are grilling the meat on the top most part of the oven and place a tray beneath is with a bowl of water on the tray. This creates steam and ensures that your chicken is thoroughly cooked. Grill for 10 minutes turning the chicken midway and then take the bowl out and increase the temperature to 230C and grill for another 15 minutes basting with the clarified butter or melted butter or mustard oil every 8 minutes and turning the chicken.

If you want a smoky flavour just heat a piece of coal and place it in a bowl , add a few drops of clarified butter or mustard oil or melted butter and put it on the tray for the last five minutes of grilling.

Let the chicken rest for 5 minutes and then serve juicy succulent delicious chicken. What I loved was how juicy and moist the chicken breast was since chicken breast is notorious for turning out too dry if overcooked.


Thursday, April 23, 2015

Kancha Lonka Murgi II


Kancha Lonka Murgi II 


I rarely cook a special dish without following a recipe from an old cookbook or a cookbook by a chef I trust and I mostly stick to a recipe when I follow it which is why on that rare occasion when I make a recipe without following any recipe and go with my flow it instantly becomes special to me especially if I love the taste and more so if the people who taste it like it.

Now if you cannot stand heat and I meat hot and spicy food where the heat comes from chili then this particular recipe is not for you. It is called Green chili chicken for a reason.

What I most like about the dishes from my roots that is Bengal is how many of its recipes especially when meat is concerned is cooked sans garlic and onion and it yet turns out delicious.

Last year I made this 'Kacha Lonka Murgi' kancha lonka = green chili and Murgi = chicken following my friend Priyadarshini's recipe which used garlic and ginger paste and green chili.

This time I created my own recipe sans the garlic and I have to say I absolutely loved it. One other factor which is crucial is the use of mustard oil. This dish just simply cannot come out well without that strong flavour of mustard oil.

You must serve it with hot piping rice for a beautiful experience.


Makes approximately 4 to 5 servings :

1 kilogram chicken
40 green chilies made into a smooth paste using water. (The number of chilies depends largely on their strength of heat so start with 30 green chilies and if it doesn't taste hot enough use 40. I used 40 of them)
1 tbsp smooth ginger paste
3/4 tsp nigella seeds
1/2 tsp radhuni (optional)
4 tbsp mustard oil
Salt as per taste

Marinate the chicken with the ginger paste and some salt for 1 hour to 1.5 hours. Now heat the mustard oil and when its smoky turn down the heat and add the nigella seeds and radhuni if available and when it splutters add the chicken and sear it on high heat for 1 minute and stir and then simmer on the lowest heat possible covering the pan and let it cook on low heat for 7 minutes and add half the green chili paste and 1/4th cup of water  and keep cooking on low heat for another 10 minutes or so and add the rest of the green chili and cook for another 5 minutes and let it rest for 7 minutes to 10 minutes and serve with piping hot rice.


Sunday, March 29, 2015

Shahi Tukda

Shahi Tukda 


Sometimes I make a dish quite out of the blue without any reason and this Shahi Tukda is one such dish. Basically I had milk which I had reduced by mistake and then on a lazy Saturday afternoon I was fidgeting with the idea of a dessert but I knew I did not want kheer aka Indian rice pudding and then I remembered Shahi Tukda . This is one of the first desserts which I had made for a huge dinner party while in college. 

This time I adapted the recipe given in Adil Ahmed's book 'Tehzeeb' You see I believe ghee is the answer to superior quality better tasting Indian desserts. You simply cannot get the same taste when you are using refined oil which has no flavour of its own. Not to mention the immense flavour imparted by ghee. The ghee makes all the difference along with the kewda water and using full fat milk.


The thing thing is this does not use saffron but uses Kewra water. I love saffron and love using it which is why using Kewda water was  such a  refreshing change for me and the flavour it imparts is truly amazing.


So this Shahi Tukda is royal indeed the recipe adapted from a semi royal family's cookbook

Serves 4 to 5

What you need :-

6 to 7 small slices of milk bread their crusts cut out
500ml full cream milk
130gm sugar
A few drops of screwpine ittar or a tiny sprinkle of screwpine water
A handful of pistachio blanched and chopped
You may also use raisins which I left out
6 to 8 heaped tsp of unmelted ghee

Start by reducing the milk with the sugar . When doing so add 1/2 tsp ghee. This addition of ghee prevents the milk from sticking to the bottom easily. keep stirring from time to time. Reduce it till it thickens. Takes about 30 minutes to 40 minutes. Once reduced add the screwpine water aka kewda water.

Blanch the pistachio and chop them up.

 Slice the slices of bread diagonally. Fry them till golden brown on both sides. Do this over medium to low heat lest the slices of bread burns.

Once all the slices of bread are fried arrange them on a serving dish and pour the reduced milk on top. garnish with the pistachio and chill this for a good 2 hours to 3 hours and then serve this decadent dessert which is sure to impress your guests.


Wednesday, March 4, 2015

Kesar Pista Malai Kulfi (Saffron pistachio cream kulfi)

Kesar Pista Malai Kulfi (Saffron pistachio cream kulfi) 


When it comes to traditional desserts I do not believe that a healthy version can do justice to the dish. Now I have always used whole milk to make my kulfis yet I was simply not satisfied till I tried this version. This is one of the reasons that I have not shared the recipe on my blog till now.

I have a book called the 'Classic Cooking of Punjab' by the legendary Jiggs Kalra and needless to say it contains quite a few recipes for kulfi but he adds eggs to his kulfi and since my grandmother is allergic to eggs I am not much in favour of using eggs for my kulfi.

So what I ultimately did was use his recipe as a base and after a short chat with my friend Somnath who is a food enthusiast I finally decided to give the kulfis one last shot at making it perfect for my taste buds. I had an idea of how I wanted it to taste which is smooth creamy silky .

The trick is in using the 'malai' aka extra cream


Its actually one of the simplest desserst that one might try

Makes 7 Kulfi when using the moulds :-

1 litre full cream milk
400ml cream (I used Amul cream which has 25% fat)
80gm sugar which you can change as per taste
1 green cardamom pounded well in a mortar an pestle
Half cup whole pistachios (Cup used holds 220ml liquid)
A fat pinch of saffron
1/2 tsp ghee
Ghee to prepare the kulfi moulds

Start by first blanching the pistachios and then chopping them.

Now one needs to make the rabri for the base of the kulfi.

Keep aside 1/4th cup milk and mix 200ml cream , ghee and the rest of the milk in a heavy bottomed pan (preferably aluminium or iron)

Now reduce this on low heat till it reaches half its content and then add the sugar and 100ml cream and add half the amount of chopped pistachios in the milk while you further reduce it. Keep checking every 7 minutes to 10 minutes and stir it well.

Reduce the milk till it reaches 1/3rd of its original content. In this case you are reducing 1.3 litres milk + cream which means you need to reduce it till it reaches 433ml.

This process of reducing the milk took me 1 hour 45 minutes.

Let the rabri base rest for 15 minutes and then add the saffron an mix well and add the remaining 100ml cream and gentle mix everything.

Use a tiny bit of ghee to grease the moulds and then pour in the kulfi to be frozen. Freeze it till its just about frozen (takes me 2 hours to 3 hours but the time require largely depends on your freezer and the amount of things it is storing when you are freezing the kulfi)  and then de-mould and serve garnished with the remaining chopped pistachios.


Important Note


  1. The ghee used when reducing the milk prevents the milk from sticking to the bottom of the pan keeping it smooth and silky. This is a valuable tip I have learnt from my aunt.
  2. The ghee used to grease the moulds helps you easily demould the kulfi .
  3. From my experience with ice-creams freezing it till its just about frozen gives you the most creamy and silky tasting kulfi. Excessive freezing makes it very hard in consistency and prevents you from enjoying the creaminess.  


Monday, February 9, 2015

Bengali Scotch Eggs (Dimer Devil)

Bengali Scotch Eggs (Dimer Devil


I have this particular fascination with family recipes especially one that has survived 2 generations. When my fellow blogger and friend Pritha told me that she has some family recipes for chops and cutlets handed down by her grandmother to her aunt and mother, I was immediately excited with the prospect of family recipes. I knew that I had to get my hands on these recipes. For me, a recipe is a treasure and a recipe which survives 2 generations or more automatically becomes a part of history and culture and slowly heritage.


Pritha is an extremely dedicated person who sticks to her culinary challenges which she takes up every other month. Not that she doesn't keep preparing lip smacking dishes all round the year but every other month she takes up a challenge of creating  one recipe after a other for a particular time span on a theme she chooses.

I completely stuck to the recipe except for using coriander leaves aka cilantro rather than parsley leaves  .

Here is a little tip for you guys. In the recent past a very experienced lady who is part of the facebook Food group Ranna Bati brought this to light that the term Garam Masala is a very generalized term which makes so sense when it comes to Indian cuisine due to its vast range of cuisines. For instance a Punjabi would use Bay leaves and Black cardamom in his garam masala while a Bengali usually sticks to cinnamon, green cardamom , cloves and for special occasions there is the additional mace and nutmeg and usually we Bengalis do not grind our Garam Masal for most dishes  . Now in many of my previous recipes I myself have used the term 'garam masala' without specifying the spices used.

In this recipe's context since its Bengali when I was making the mince meat filling since I had halved Pritha's recipe I had used 2 green cardamom, 2 cloves , 1/4th inch cinnamon . I dry roasted it and then used a mortar and pestle to make a finely ground powder.

So go check out her recipe here : Dimer Devil

Here is a tip which might help you :

When you fill the cavity of the egg whites with the mince meat and then use a bit of mashed potato to coat the egg make sure the coating of potato is not too much because if you make a very large oval shaped Dimer Devil to be fried when you fry it , chances are that the coating of batter would break on both the sides.

I would suggest serving the dish with the classic 'Kasundi' (Bengali Mustard condiment) and in its absence any mustard condiment is the ideal choice for the condiment.


Friday, January 23, 2015

Pan Roasted Chicken Legs

Pan Roasted Chicken Legs 

Inspired by Urmi's Roasted Chicken drumsticks 


This week Kolkata Food Blogger's star is the quiet beauty, Urmi. I have met Urmi only once during Kolkata Food Bloggers' Bake Sale and the image I had of her before meeting her fitted her perfectly. A sweet gentle gracious person.

She was the first Kolkata Food Blogger to have guest starred in a cookery show which you may find on her blog and is ever so the humble person. Do check out her blog Ume's Kitchen

I particularly liked her Roasted Chicken Drumsticks and loved the story of how her mother would pan roast it and then use the traditional method of cooking the chicken on coal fire to give it the smoky affair. What I personally love about such family recipes is that yesterday's customs become today's and tomorrow's heritage. So instead of following Urmi's method of grilling or baking the chicken I pan roasted it. I do not own a traditional coal fire and had to sadly exclude it from my preparation.

I followed her recipe with a few tiny alterations and the result was juicy succulent delicious pan roasted chicken with Indian flavours. I used dark portions of chicken (thigh + leg without the skin) instead of the drumsticks alone.

As for the time for marination I used to think that the greater the number of hours the better the marination. Then someone told me that over marinatino can actually harm the flavour of fish. I immediately looked up the topic online and found this useful article : A Marinade Timing and realized that due to over marination my fish does actually turn mushy when over marinated.

Ever since that day other than some tough cuts of goat meat or pork I stick to round about 2 hours for chicken legs.

This time I put the theory to test by first having a chicken after 2 hours of marination and the other one was left to marinate overnight in the refrigerator. In the end what I personally found out was that while there isn't much difference in flavour with the extra marination the one which marinated overnight cooked faster and rendered softer meat. So for chicken legs (dark portions) I would suggest the long hours of marination when not using acidic agents.


Serves 3

3 Chicken (leg + thigh)

1st phase of marination :-

Salt as per taste
Juice from 1/2 a lemon

2nd Phase of marination :-

Wet ingredients :-

6 medium sized garlic cloves (if you are using the large cloves of garlic 2 would suffice)
1/2 an inch ginger
I usually have homemade red sauce ready at hands made with ripe red chilies, garlic and vinegar and I used 1 tsp of the very hot sauce but otherwise I suggest that you stick to the recipe and use 2 to 3 green chilies which give the chicken a lovely flavour which I know from previous usage
1 tbsp sour cream or heavy cream

Dry ingredients :-

You can check our Urmi's blog for her homemade recipe for tandoori masala . I stuck to the following ingredients :-

1 green cardamom
1/4th inch cinnamon
1/2 tsp whole black pepper
3 cloves
1 blade of mace
Pinch of nutmeg
1/4th black cardamom
1/4th tsp cumin seeds
1/4th tsp coriander seeds
1 whole dried  Kashmiri chili

1.5 tbsp mustard oil / ghee


Start by first cleaning the chicken well and then pat it dry  and using a fork to prick the chicken all over so that the chicken gets well marinated. Rub it with salt and then the lemon juice and leave it aside for 15 minutes. Strain the chicken and go on to dry roast and grind the ingredients for the 2nd phase of marination and grind them to a fine powder.

Make a paste of the wet ingredients and massage the chicken with the wet marination and freshly made spice powder and leave it in the kitchen for 6 hours to 7 hours or overnight.

Heat mustard oil or ghee and seal the juice of the chicken on high heat for 1 minute on each side and then lower the flame to the lowest and cover and cook the chicken for 4 minutes to 5 minutes per side and open the cover and brown it a bit and then let it rest for 5 minutes and then serve it with some raita made with yogurt , rock salt , cumin powder and roasted brinjal.


I am sending this to :-


Monday, January 19, 2015

Easy Soft Succulent Lamb/Goat curry

Easy Soft Succulent Lamb/Goat curry 


I do not advocate that which I do not practice.

I used to be one of those stubborn people who clings on to the old ways of life which give excellent results no doubt but at times provide impractical. Quite honestly I still try and cook the old fashioned way most of the times but practical problems such as shortage of fuel in our daily lives leads to a few problems which can be sorted out.

This post is about a basic meat preparation when you are cooking lamb or goat.

We all know how wonderful meat tastes when it is braised and slow cooked for hours but at a time when preservation is the key to building a better future wasting fuel or electricity is probably not practical for most people.

Well let me begin by going back to those days when I would cook a kilogram of meat for a good 3 hours to 4 hours and in the end I would be satisfied inside out as would be my guests. Then came a time last year when my family was ready to pay extra but nowhere could gas fuel be found.

It was then that I realized that an alternative method must be present for soft succulent meat. Let me be honest here. I have for long avoided the pressure cooker when cooking meat because somehow pressure cooked meat always lacked that flavour and tenderness and then this one day I was serving dinner to a particular guest who is extremely fond of extra succulent juicy tender meat.

Well I had planned to cook it for hours but somehow we got late in procuring the meat and I was in trouble.

I was basically slow cooking it as I had done before and after 45 minutes I panicked because it was already 7:30 p.m. and I was supposed to serve dinner by 8:30 p.m. Now having slow cooked all my meat preparations before I knew that a kilogram of meat would take a good 3 hours to 4 hours to result in that juicy tenderness where the meat falls of the bones but holds its shape and is excellently flavourful. Going by my sudden instinct I put the entire contents of the vessel in a pressure cooker and put it on the lowest flame possible and allowed the steam to build up which took a good 45 minutes which made me jittery. Again going by my instincts I allowed the steam to go out on its own and when I finally opened the cooker and tested the meat it was soft and succulent but the only problem was that it needed to be drier than it was so I put it back in the vessel and slow cooked it for another 20 minutes to 30 minutes and then when I tasted it I was amazed to find that rich flavour along with soft tender juicy meat which would previously take me hours to achieve .

The truth is even though the entire process did take a considerable amount of time which was close to 2 hours if the entire process is taken into account it saved my fuel for a good 1 to 2 hours and yielded perfectly satisfactory  result.

So here is my very basic recipe or rather pointers for meat curry when using lamb or goat


Serves 4 to 5

1 kilogram of goat meat preferably the shanks
2 to 4 tbsp ghee or mustard oil. You may use any oil which has a flavour of its own but refined oil since refined oil imparts no flavour to your meat
Salt as per taste
Spice of your choice (When I am not following a particular recipe for a kilogram of lamb or goat I usually use 1 big black cardamom, 1 inch cinnamon, 2 tsp dried ginger powder, 2 heaped tsp Kashmiri red chili powder, 4 cloves crushed lightly, 2 large bay leaves)
1 to 2 tbsp thick curd.
Pinch of turmeric

I have often marinated meat when making this juicy curry and have at other times left out the marination to boil the meat with spices both of which give the same result.

In this case I marinated the lamb with 2 tbsp ginger garlic paste and 1.5 tbsp thick curd for over 15 hours.

Heat the oil of your choice and sear the meat till browned well . First seal its juices on high eat for 2 minutes on each side and then lower heat and sear it till its browned and take out the meat and leave it aside and put the pot on low flame and add the lightly pound spices except the powdered spices on low heat ensuring the spices do not get charred.
Add the meat and water and simmer till the oil separates and mix well and simmer for another 30 minutes and put everything in a pressure cooker and cook on the lowest flame till the first whistle and switch off the gas and let the steam go out on its own. Put everything back with the powdered spices and salt and simmer for another 20 minutes to 30 minutes. Keep checking to make sure the meat doesn't over cook.


P.S.


  1. The quality of meat makes quite a difference to your curry. The cuts of meat which I usually prefer are from the legs or shoulder.
  2. I have cooked the same mutton curry using a slow cooking method which you may try for your own pleasure. It usually requires the meat to be simmered for round about 3 hours to 3.5 hours depending on the quality of meat and needs  a bit of stirring from time to time else the meat might stick to the bottom of the pan. 


Sunday, January 11, 2015

Nolen Gurer Payesh (Plam date Jaggery rice pudding)


Nolen Gurer Payesh 

(Plam date Jaggery rice pudding) 


Poush Sankranti is the festival of harvest.

Now I had initially decided to learn how to make fried 'Pithe' from my grandmother but then somehow I couldn't get over the idea of smooth creamy rice pudding or payesh as we call it.

To be fair one who has not tasted 'Noel gur' (Date palm jaggery) would not understand that delightful taste which all of Bengal can't get enough of during the winter season. To be fair these days much like everything else on offer this winter's delight is available much before autumn sets in but if you ask the pros they still advice you to use it when its supposed to be used, which is during the chill of the winter season from somewhere in mid December.

Now coming back to the Festival of harvest when it comes to harvest I cannot but have fond memories of acres of rice paddy which we own in Burdwan. My family had moved to the big city more than a century ago and we are what one would call essentially city dwellers living in the heart of the metropolitan city of Calcutta but we come from a district known for its beautiful variety of rice, Burdwan.

As a child my parents would take me to our village every 15 days and it would get me far from the madding crowd. I distinctly remember the voice of that lonely bird while I sat on the roof reading Malory Towers while the entire village and the fields beyond it lay in front of my eyes. I could see them from our roof and then I would set out with my father for a walk through the paddy fields.

I was essentially a free bird in the village. In the city I was sequestered in our home but every time we visited the village I could play all around the village and I had friends from every nook and cranny of our village.

What I remember most about my village were these huge storage of rice. Everybody in the village grew rice as did my family and they still do thanks to some loyal and honest help from some good people and every woman of every household would be bent over this fire made from wood and brick and stir a huge pot to make puffed rice.

As a result I almost make an instant connection with rice when I think of harvest.

I am sharing a classic recipe for Rice pudding made with Date Palm jaggery . To me the rice pudding should neither be too thick nor too thin and should have this creamy consistency. Usually people add raisins and cashew nuts to rice pudding but when I use Palm date Jaggery I refrain from using anything else so that the taste kind of remains classic.

This recipe has been passed down by my ant's mother and I was lucky enough to get hold of it. What is essential is the timing.

Makes about 6 servings :-

1 litre of full cream milk
3/4th tsp melted clarified butter or butter
1 handful rice which comes to about 1.5 tbsp heaped washed short grained rice
Palm date jaggery as per requirement (I needed about a little more than 1 handful of crumbled jaggery)
1 green cardamom
1 large bay leaf

Wash the rice thoroughly and then take a heavy bottomed pan and add the rice and milk and clarified butter with the bay leaf and crushed green cardamom and bring to a boil while stirring the pan constantly and then lower heat to the lowest possible temperature and let it simmer.

Stir the pot every 7 minutes so that the consistency remains smooth and the milk doesn't get stuck to the bottom of the pan.

After 30 minutes you would see the rice boiling well. keep stirring every 2 minutes and check at 50 minutes and dd the jaggery and keep stirring for another 3 minutes to 5 minutes and switch off the flame and let it cool down.


Chill and enjoy this winter delicacy

Important tips :-


  1. Never ever add the jaggery before the rice is fully cooked else the rice will remain raw 
  2. The addition of clarified butter keeps the consistency to a smooth creamy one 
  3. It is essential that you use short grained rice. 


This is part of :-

Kolkata Food Bloggers' ongoign event 'Poush Sankranti Specials'


Wednesday, October 22, 2014

Khasta Kachori

Khasta Kachori 


 The festivals bring forth the joy of celebrations and celebration is incomplete without gastronomic indulgence. For The Festival of Lights , Diwali, here is some Khasta Kachori a popular snack from North India.

While growing up I have mostly seen my own family hosting luncheons or dinner parties. The truth is even if a guest was invited over for tea they were always made to stay till dinner which is why the idea of snacks was always neglected a little bit in anticipation of the exquisite dishes prepared for the main meals.


It was only during a particular celebration, when my grandmother would make these amazing Samosas for breakfast since for that occasion everybody stayed over from morning till evening.

By the time I grew up I had developed an intense passion for cooking which borders on obsession which in turn makes my grandmother extremely happy since I apparently remind her of her mother who would churn out immaculate delicacies from the kitchen.

Sitting far away from home I dedicate this to my grandmother and can't wait to go back home and make these for her.


Makes about 8 Kachoris :-

1/2 cup Split black gram aka Dhuli Urad Dal
Pinch of asafoetida aka hing
1/2 tsp Cumin seeds
1/4th tsp saunf
1 tsp red chili Powder
Pinch of turmeric powder
Salt as per taste
2 tsp coriander powder
1/2 tsp sugar
1 heaped tsp dry mango powder
2 tbsp melted clarified butter aka ghee
2 tbsp raisins

For the dough :-

2 cups of all purpose flour (cups used hold 210ml liquid)
3 tbsp non-melted clarified butter aka ghee stored in the refrigerator for 15 minutes.
Pinch of salt
1/2 cup ice cold water
The tiniest pinch of bi-carbonate of soda

Oil for deep frying

Basically making these kachori is one of the most easy things if you understand its characteristics.

Soak the pulse for a good 6 hours and then drain it of all the water and grind it to a paste.

Start with the dough. If you have made pie shell before you would know the concept behind using a lot of fat and ice cold water. This helps in creating the flakiness. Mix the flour and ghee to form a crumb like consistency and add salt and sprinkle water to create a firm dough and wrap it in cling film and put it in the refrigerator to chill for 1 hour.

The final filling minus the raisins 

Now heat 2 tbsp melted ghee and add the asafoetida aka hing, cumin seeds, saunf and then add the pulse and add the chili powder, turmeric, salt , coriander powder , sugar and mango powder and mix really well and sprinkle a bit of water and cook on low heat for 7 minutes to 10 minutes. Make sure it doesn't burn. You'l know its done when it starts leaving the side of the pan, add the raisins and once it cools divide it into 8 parts .


Now divide the dough into 8 equal halves and then make balls out of them and then flatten them a bit with the palm of your hand and roll out a little bit in a way where the center remains a bit thick and place the filling which should be almost the same size as the balls and now roll out the edges and then dip your hands in water and fold the dough to make a pouch and flatten it out so that you create a flattened ball.


Press the flattened balls against your palm  to increase the size but make sure no cracks are formed and once you are done with all 8 of them put them in the refrigerator for 15 minutes.


Now deep fry them on low heat till it turns into a brown colour on both sides. It takes about 8 minutes on each side but do check to ensure that it doesn't burn. You should ideally keep turning them so that it doesn't burn on one side.


Important tips :-


  1. The large amount of clarified butter results in flaky crispy delightful kachoris so please do not cut down on the amount 
  2. Fry at low temperature to medium temperature controlling it  at all times else you end up with burnt kachoris
  3. When you are sealing the Kahoris make sure there are no cracks 


Serve with some sweet and sour Sonth Ki Chutney . Recipe : Sonth Ki Chutney


Saturday, October 18, 2014

Kalakand

Kalakand 

(Indian Milk Cheese Fudge) 


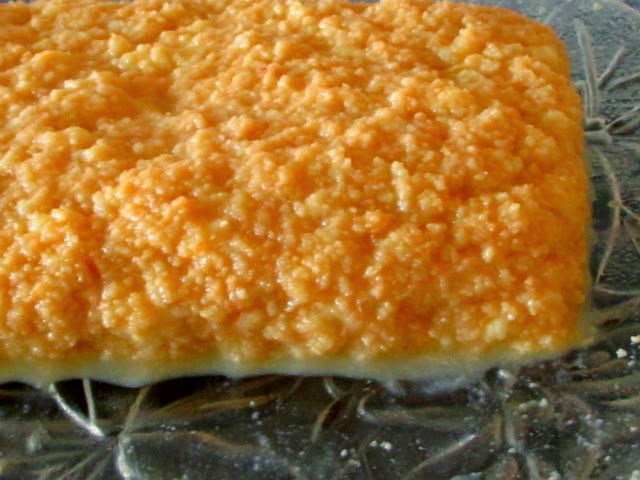
It seems that right after the partition of India a 'Halwai' (Indian sweet chef)  named Baba Thakur Das who had migrated from Pakistan to Alwar, Rajasthan in India had started his day with experimentation with milk and having added lemon juice to the milk he was fascinated with the resultant cheese and legend has it that he uttered the famous Sentecne 'Arey ye to kala hai' (This is art) which led to the creation of a magnificent sweet dish, Kalakand a kind of Indian Milk Cheese Fudge. Freshly homemade cottage cheese is cooked with reduced milk till it reaches an extremely thick consistency which is milky, cheesy and completely lip smacking.


Now Baba Thakur's descendants say with great pride that recreating the original magic of the Kalakand produced at their store is impossible due to the water and the soil around Alwar which I believe to a certain extent but then again you can still make a gorgeous Kalakand which might not be as good as the ones created at Alwar but with a bit of patience you can create some lip smacking gorgeous dessert.


Before I give the recipe let me emphasize on the fact that certain desserts cannot be made easy by cutting down on time and effort else you shall simply not get the proper taste and flavour. The internet is filled with recipes which uses packaged condensed milk and a short cut method which wouldn't simply give you a superior taste. Believe me I speak from experience. A bit of hard work  is worth the effort. The entire process takes about 2 hour 15 minutes to make and another 1 hour to 2 hours for setting.

Makes 10 large sized Kalakand :-

2 litre full fat milk and yes it must be full fat
1 tbsp to 2 tbsp vinegar diluted with 2 tbsp water
5 to 6 tbsp sugar (please adjust the sweetness as per your taste)
3 green cardamom
2 tbsp blanched halved pistachios
2 tbsp ghee

Simply start of by taking 1.2  litre of the milk and add 1 tsp ghee to it. (The ghee helps in keeping the reduced milk smooth)

Start reducing it. Take the remaining milk and bring to a roaring boil in another pan and then lower heat and add the diluted vinegar and when the cheese forms in 2 minutes. You should have white masses floating in an olive green whey switch off gas once the entire milk is well curdled and then cover it and leave it for 5 minutes. Gather the cheese in a cheesecloth and drain it of its water. After 10 minutes squeeze out the excess water and crumble the cheese as finely as possible.

Meanwhile keep stirring the other pot of milk which you are reducing to avoid scorching the bottom. Once it gets reduced to half its original content add the crumbled cheese and crushed cardamom seeds along with the sugar.

The best way to add sugar as per taste is adding it little by little and checking the taste.

Now keep reducing the mixture of cheese and milk together stirring it from time to time and when it gets reduced to a mass where you see bubbles all over keep stirring the mixture continuously from this point on.


Here is an useful tip. At this point transfer it to a non-stick pan and use a masher to mash the content continuously . Non-stick pans reduces the chances of  scorching. Once the mass is dried up add the remaining  ghee saving a bit for greasing the plate on which you would set it and mix well .

Transfer to the greased plate and make a rectangular block and stud it with blanched halved pistachios and leave it to set at room temperature for 1 hour to 2 hours . Never ever set it in the refrigerator which dries out the Kalakand. Cut squares and enjoy this delightful dessert.


Tips :-


  1. You must use full fat milk else the taste will be compromised upon 
  2. The leftover whey used to cook curries gives it a full bodied flavour and when used to knead chapati or make bread renders it extra soft 
  3. Use the pistachios on the Kalakand while its warm so that it remaisn studded once the Kalakand sets the nuts won't remain intact on it.
  4. Enjoy a bit of warm Kalakand as suggested by the creator's descendants. It tastes amazing when served warm. 
  5. Using the masher ensures that the cottage cheese is evenly distributed and does not form any big lumps anywhere. In case you don't have a masher use the back of a big ladle to use it for the mashing effect. 
  6. For storing it , do use an air-tight container and then put it in the refrigerator. I would personally suggest eating it as fresh as possible but in case you are storing ti the air-tight container helps in retaining the moisture. 
Source of information 

Tehelka 
The Hindu 

This is part of Kolkata Food Blogger's ongoing event Deepavali Festival of Lights with Sweets and Savouries


Monday, October 13, 2014

Malai Chop and an aunt's Love

Malai Chop and an aunt's love


I can just call this my Calcutta Connection. Well I'l be honest once you start making sweets at home it becomes an addiction. I am passionate not just about sweets but about cultures because for me it through food that I can communicate with the entire world.


'Malai Chomchom' is a much loved sweet dish from Bengal where flattened or cylindrical shaped cottage cheese is boiled in thin sugar syrup and then soaked in slightly thickened milk. It is an absolute delicacy but then the recipe I am sharing today is extra special for me. I have a beautiful aunt who would often come over to our place with a big case of delightful  white Malai Chomchom but these malai chom choms had a coat of milk which was thickened enough to stay put on the white beauties. Now that I think about it I haven't ever paid attention to the name of the shop from where my darling aunt would bring one of my favourite sweets but now I can easily make it at home and so can anyone who is reading this.


Sitting in Bombay I miss Kolkata and so on an ordinary Saturday I decided to make these sweets from my memory. Having previously made roshogollas , pantuas, chanar jilipi , jalebi I was more or less confident enough to not consult any recipe and my confidence was well rewarded with a husband who usually doesn't like sweets yet gobbled up 3 and 3/4th malai chomchoms out of the 5 that I made 

Makes 4 Malaichochoms and a semi mini malai chomchom

1 litre full fat milk and it must be full fat
7 tbsp sugar
3/4th tbsp vinegar diluted in 3 tbsp water
1 tsp sugar
3/4th tsp semolina
tiny pinch of bi-carbonate of soda

For the syrup
1/2 cup sugar granules
5 cups of water
2 green cardamom

2 tbsp pistachios blanched and finely chopped

Start a day ahead by first making the condensed milk. Simply take 500ml of the milk and 7 tbsp sugar in a heavy bottomed pan and simmer it on low flame stirring it from time to time. Once the milk turns beige , thick and starts bubbling you must keep stirring it continuously and then cool it and blend it in the food processor / mixer grinder. Chill it in the refrigerator. The process takes about 45 minutes to 50 minutes.

The next day bring the milk to a roaring boil and lower the heat and add the diluted vinegar and let the cottage cheese form well so that in the end you have snow white cheese floating in a green liquid. It takes 2 minutes. Now switch off the gas-stove and cover and leave for 5 minutes . Then gather the cheese in a cloth and drain it for 15 minutes to 20 minutes and then take the cheese on a wooden board and knead well rubbing the cheese against the wooden board and gathering it and kneading it. After 3 minutes of kneading add the semolina , baking powder and 1 tsp sugar and knead well. Knead well for a good 15 minutes. The softness of the dessert depends entirely on the kneading. Make a large ball and divide it into 5 parts and make discs out of them.

Now bring the sugar and water to a boil and add the green cardamom . make sure that the pan is large enough to hold all the cheese discs side by side. Lower the heat and add the discs and cover and boil on medium heat for 15 minutes. It is essential that you keep lowering the temperature and increasing it in-between. Once done keep it covered for 10 minutes to 15 minutes and then take off the cover. Once the discs cool down place them on a tray and soak them with the thick condensed milk and garnish with pistachios and chill for 4 hours to 5 hours before serving.

Enjoy these soft milky creamy delights.

Very important tips :-

  1. It is extremely important that you use the tiniest pinch of bakign soda else your discs will break when they are being boiled in the syrup. 
  2. The softness of the discs depends entirely on the kneading , so knead as much as possible , your dough should be melt in the mouth and ultra soft 
  3. When you make the syrup remember that it is the thinnest syrup possible so once the sugar gets dissolved in the water after you have started boiling it immediately lower heat and add discs.  


This is part of Kolkata Food Blogger's  Ongoing event 'Deepavali, Festival of Lights with Sweets and Savouries'


Sunday, October 5, 2014

Nawabi Paneer

Nawabi Paneer 


Some dishes are celebratory dishes and this Nawabi Paneer which I make for special draws heavily from Nawabi chicken. It is a rich decadent creamy nutty gravy and is fit for the royalty indeed .

I made this when my mother-in-law's visit almost came to an end and since she loved it as did my husband and brother-in-law I am sharing this extremely easy recipe.


Serves 3 to 4

1 litre full cream milk
1.5 tbsp vinegar diluted with 2 tbsp water

2 tsp ginger garlic paste
Onion paste made from 1 medium sized onion and 2 green chilies
50gm cashew nuts
1/4th of a coconut
1.5 inch cinnamon
1 large bay leaf
2 cloves
Pinch of saffron soaked in 2 tbsp milk
Pinch of nutmeg
2 blades of mace
1 tbsp crumbled khoya (In case one doesn't have khoya one can use 1/2 cup cream)
Salt as per taste

2 heaped tsp ghee

Start by making your paneer. Simply bring the milk to a boil and then lower heat and add the diluted vinegar and wait for 5 minutes for the paneer to form. You know its done when the white paneer clumps flat around in a green liquid called the whey. Switch off the gas and cover and leave for 5 minutes and then strain the paneer in a cheesecloth or muslin cloth and reserve the whey . Hang the cheesecloth for 15 minutes and then press it on a flat surface to make a slab with the cloth around it and place a plate on top and a mortar and pestle or a heavy book on the plate and leave for 45 minutes. You will have the softest paneer ready to be used.

Soak the khoya, cashewnuts and coconut in 1/2 cup reserved whey while the paneer is being made. Soak the saffron in the milk.

Now make a smooth paste of the ginger and garlic and then reserve it and make a smooth paste of onion and green chilies with 1 tbsp of reserved whey. Make a smooth paste of the soaked khoya, cashew nuts and coconut. Use extra whey if required.

Heat the ghee and saute the ginger garlic paste and then add the bay leaf and the onion paste and saute till the raw smell goes away and add the cinnamon after crushing it well and then add the crushed cloves. Now add the Khoya cashewnut coconut paste and mix well and add 1/4th cup whey and bring to a slow boil and add salt  , crushed mace and the nutmeg and the paneer and then simmer covered for 5 minutes to 7 minutes. make sure you check from time to time and give it a stir if it shows sign of sticking to the bottom of the wok. Once done the gravy should be velvety smooth and thick but not extremely  dry. Add the saffron , mix well and serve with hot rice.