Showing posts with label North Indian. Show all posts

Saturday, June 27, 2015

Butter Chicken / Murgh Makhani

Butter Chicken / Murgh Makhani 


Cut to 2017 and when I finally tried the butter chicken from Moti mahal Daryaganj, Delhi where this iconic dish had been created donkey years ago .  I realized how the real butter chicken should be like and I also realized that the butter chicken I had created using the recipe from this fabulous cookbook from the house of moti mahal gifted to me by Pritha tasted quite similar to the one I tasted at Moti Mahal.

Be warned that copious amount of butter has been used in the recipe and its meant to be that buttery. This is supposed to be for those are days of indulgence hence a bit of extra buttering is welcome.


Back in 2007 right out of school I was learning to make a lot of new dishes and I had tried the butter chicken masala but since our oven was broken at that time I used the chicken normally after frying it and so I can assure you that the tandoori chicken makes a whole lot of difference.

To be fair the entire process is not difficult at all. A little bit of patience is needed what with the time for marination and the grilling of the tandoori chicken but the end result is magnificent.

I understand if you have just moved into a new house or are yet to buy an oven then of course you have no other option but to use the gas stove for the chicken before it is cooked in the gravy. In that case pan roast it . I don't recommend this wholeheartedly but then again originally the tandoori chicken is made in a clay tandoor 'Clay Oven' so there you go.

What I particularly liked was that the book used chicken with bones. I personally feel when cooking Indian gravies chicken with bones work much better than boneless chicken and then I was assured by many on social media that originally it was cooked with bones but not with the skin on mind you.

Serves 3 to 4

You need tandoori chicken : Recipe Here : Tandoori Chicken


For the gravy you need 560gm tomatoes (firm and ripe)
1 heaped tsp ginger paste
1 heaped tsp garlic paste
85gm to 100gm softened butter
100ml to 120ml full dairy cream
Salt as per taste
1 tsp tandoori masala / garam masala made with green cardamom, black cardamom, bay leaf, black peppercorn and cinnamon
1 tbsp Kashmiri red chili powder

Once the tandoori chicken has been made start with the gravy.

Melt 1 tbsp butter and add the ginger garlic paste and saute for 1 minute and add chopped tomatoes and saute stirring continuously for 3  minutes to 5 minutes on medium flame and add 3/4th of the remaining butter. Now lower the heat and simmer till the oil separates and the cream , tandoori masala or garam masala , some salt and mix well and cook on low heat till its bubbling away. Joint the chicken (cut it up into medium sized pieces using a butcher's knife) and add this to the gravy , cover and cook for 4 minutes and then Mix well , add the remaining butter and serve with hot butter chapati or tandoori roti. Enjoy

Tips :-


  1. If using salted butter go easy on the salt in the gravy 
  2. In case you are not using the oven for the tandoori chicken . Marinate it as instructed and then heat a bit of ghee or mustard oil in a shallow flat pan and add the chicken and cook on low heat covered for 6 minutes per side. Then one the pan increase heat and cook for 2 minutes per side. Let it rest for 5 minutes and cut it into pieces. 


Wednesday, June 24, 2015

Mangochi Kadhi

Mangochi Kadhi


The first time I had Mangochi Kadi was at an event at one of the hotels in my city. I absolutely loved it. For those who do not know, Kadhi is a yogurt based curry which is made in many parts of India and varies as per the region. For me I adore the one from Punjab, thick spicy and luscious.

The one I had at the hotel was celebrating food from Delhi and since the chef is from Uttar Pradesh, a northern state of India the food was heavily influenced by food from the state. I loved the spread and this particular dish stuck with me. Firstly the yogurt based gravy is tangy with a hint of spice and the soft spongy lentil fritters soak up all the goodness of the yogurt based gravy and it is a sheer delight to have this with some Basmati rice or a variant of rice of your choice.

Making Kadhi is easy but needs some amount of patience on the cook's part. Ever since I learnt this tip from celebrity chef Harpal Singh Sokhi's videos my Kadhi has never ever split again.

And then there is the small tip on how you can get the softest spongiest pakoda (lentil fritters)

It was only when I was soaking the pulse that I realized my grandmother makes a similar dish though not yogurt based where she soaks pulse and blends it but makes koftas out of them which are not deep fried but rather grilled on a tawa on the stove top and used in a curry changing the texture of the lentil dumplings.

I did not follow a particular recipe but did take tips from here and there. In fact I have been wanting to make this Kadhi for almost a month now but got around to doing so after Ruchi from Foodfellas4U posted her recipe but then again she made a tomato based gravy and since I find the  tomatoes available during the summers and monsoons in India to be a bit bland I made Kadhi the yogurt based gravy.

For this recipe you do have to plan a bit ahead. You have to soak the pulse overnight or for a good 8 hours or so.


Serves 3 to 4

Cup used holds 210ml liquid

1 cup split moong pulse
2 green chili
1/4th tsp ginger paste

200gm yogurt
500ml to 600ml water
3 cloves
7 to 8 whole peppercorn
2 large dried red chili
Pinch of hing / asafoetida
Salt as per taste
1 large bay leaf
1 heaped tsp cumin powder
1 heaped tsp coriander powder
1 tsp chili powder

Mustard oil for frying the lentil fritters
1 tsp ghee
Pinch of turmeric
Finely chopped cilantro or coriander leaves for garnishing


Wash the pulse till the water runs clear. Now soak the pulse overnight or for 8 hours.

Drain the pulse and blend it with 2 green chilies , a pinch of salt and 1/4th tsp ginger paste till you get a fluffy smooth mixture. Do not add any water. This pulse mixture will be thinner than the pulse mixture made with soaked Urad pulse. Take this pulse mixture in a separate bowl. Do not wash the blender.

Blend 200gm yogurt in the same blender in which you have blend the pulse. The little bit of pulse mixture which is stuck to the blender when blend with the yogurt helps in thickening the Kadhi. Normally some gram flour is mixed with yogurt when making Kadhi but here that will not be required.

Now take the yogurt in a bowl. Add 500ml to 600ml water bit by bit and whisk it well. Add salt and turmeric and whisk well.

Heat oil and make little fritters from the pulse mixture. Kep a bowl filled with water near you. You have to keep adjusting the flame from medium to high to low. Ideally when you are putting the batter in the oil it should be hot and and then lower it to medium or low. It takes a bit of time and practice to master this technique. Once a batch is browned but not burnt. To prevent burning you need to keep adjusting the heat. So once the fritters are fried put them in the bowl of water. This way a lot of oil is soaked by the water so that your fritters are less oily in the end. I learnt this tip of soaking the fritters in water from Ruchi's blog.

Once all the fitters are fried pour excess oil in another bowl and reserve it to be used once again but make sure this oil is not used after the second time. Now take 1 tsp mustard oil and 1 tsp ghee and heat it and asafoetida, cloves, whole peppercorn, dried red chili and bay leaf  and fry it for a few seconds. Make sure you do not char them and then add the yogurt mixture, cumin powder, red chili powder, coriander powder and a bit of extra turmeric . Now is where you need a bit of hard work. Keep stirring the pot constantly on medium to low heat till it comes to a bowl. It takes time and it can be a bit frustrating but this is the only way to ensure your Kadhi is velvety smooth.

Once it comes to a boil gently squeeze the fritters but ensuring that you do not break them and add it to the pot where the Kadhi is simmering and simmer for 7 minutes to 10 minutes and rest for 2 minutes. Garnish with finely chopped coriander /cilantro leaves. Serve with hot rice.

Tips


  1. When making the fritters you have to keep adjusting the heat from high to medium. When you add the batter to the oil it should be hot else the fritters become hard and then adjust heat to medium to prevent burning.
  2. It is extremely important to keep stirring the pot constantly after adding the yogurt mixture to ensure the Kadhi remains velvety smooth. 


Monday, May 18, 2015

Tandoori Chicken in the Oven

Tandoori Chicken in the Oven 


I have till date avoided making kebabs because I do not own a charcoal grill and while my oven makes delicious grilled chicken I somehow cannot fathom the idea of kebabs without the smoky taste. In the past I have tried using the method where you take a piece of charcoal and heat it up and then put that in a bowl add a few drops of oil or clarified butter and put this with the food you want to smoke covering it. Well to be fair that is nowhere close to a charcoal grill.


Anyway its wonderful to have friends who know exactly what would make you happy and so when Pritha who blogs from Guilt Free gifted me the book , 'On the Butter Chicken Trail' by Monish Gujral from the house of 'Moti Mahal Deluxe' the very restaurant which has supposedly created butter chicken I was ready with my ladle , spoon and spices.


Anyway point is I am quite neurotic when it comes to spice blends. I make my own and do not recall having ever bought garam masala or spcie mix for any dish ever. Sowhen I saw the recipe for Tandoori masala it somehow clicked and then I saw the recipe for Tandoori chicken and I must say that I immediately wanted to make it.

I had all the ingredients at home and so there I was dry roasting the spices so Tandoori chicken to be cooked the next day. Not just that I do not use colour in food on principle and since the recipe did not use any food colour that was just an added excitement for me.

Now I did have to adjust the oven time quite a bit since the original recipe calls for a clay tandoor and even though the book has a method given for oven having made grilled chicken a lot of times the time given seemed way too little and so I adjusted the time and in the end it was juicy succulent spicy tandoori which I made 3 times in the span of a week and I have to say this recipe is for keeps. I did cut down the recipe for tandoori masala quite a bit and even then I have a small jar full of tandoori masala.

The Tandoori garam masala

50gm cumin seeds
50gm coriander seeds
15gm rose petals
8gm mace
8gm cinnamon
10gm black pepper powder
1 tsp green cardamom
2 whole black cardamom
1.5 tsp cloves
1/2 tsp nutmeg

Dry roast all the spices on low heat making sure it doesn't burn and then cool and grind to a fine powder. Store in an air-tight jar.

Recipe adapted from On the Butter Chicken Trail

For the tandoori chicken

Serves 4

800gm whole skinless chicken

For the first marination

1.5 tsp salt
2 tbsp lemon juice
1.5 tsp Kashmiri red chili powder

For the second marination :-

200gm curd made into hung curd
2.1 tbsp ginger garlic paste
1/2 tsp kashmiri red chili powder
1 heaped tsp tandoori garam masala
3/4th tsp kasoori methi

Melted butter or Clarified butter or mustard oil for basting

Joint the chicken making 4 pieces. Two legs + thigh and cut the breast in half  bone in . Wash , pat dry make 3 deep slits on the breasts and 2 slits on each side of the legs and 3 little cuts at the joint of the leg. Marinate with the ingredients mentioned in the list of ingredients for first marination and let the chicken marinate for 1 hour. In the meantime make hung curd from the 200gm curd by tying it up in a muslin cloth and removing the watery bit.

For your second marination marinate the chicken and leave it aside for 3 hours. In the original recipe a bit of rock salt is added but I hadn't used it for the second marination.

Preheat oven to 180C in grill mode heating both the rods .

While the oven gets preheated boil some water. Once the oven is preheated place the rack on which you are grilling the meat on the top most part of the oven and place a tray beneath is with a bowl of water on the tray. This creates steam and ensures that your chicken is thoroughly cooked. Grill for 10 minutes turning the chicken midway and then take the bowl out and increase the temperature to 230C and grill for another 15 minutes basting with the clarified butter or melted butter or mustard oil every 8 minutes and turning the chicken.

If you want a smoky flavour just heat a piece of coal and place it in a bowl , add a few drops of clarified butter or mustard oil or melted butter and put it on the tray for the last five minutes of grilling.

Let the chicken rest for 5 minutes and then serve juicy succulent delicious chicken. What I loved was how juicy and moist the chicken breast was since chicken breast is notorious for turning out too dry if overcooked.


Sunday, March 29, 2015

Shahi Tukda

Shahi Tukda 


Sometimes I make a dish quite out of the blue without any reason and this Shahi Tukda is one such dish. Basically I had milk which I had reduced by mistake and then on a lazy Saturday afternoon I was fidgeting with the idea of a dessert but I knew I did not want kheer aka Indian rice pudding and then I remembered Shahi Tukda . This is one of the first desserts which I had made for a huge dinner party while in college. 

This time I adapted the recipe given in Adil Ahmed's book 'Tehzeeb' You see I believe ghee is the answer to superior quality better tasting Indian desserts. You simply cannot get the same taste when you are using refined oil which has no flavour of its own. Not to mention the immense flavour imparted by ghee. The ghee makes all the difference along with the kewda water and using full fat milk.


The thing thing is this does not use saffron but uses Kewra water. I love saffron and love using it which is why using Kewda water was  such a  refreshing change for me and the flavour it imparts is truly amazing.


So this Shahi Tukda is royal indeed the recipe adapted from a semi royal family's cookbook

Serves 4 to 5

What you need :-

6 to 7 small slices of milk bread their crusts cut out
500ml full cream milk
130gm sugar
A few drops of screwpine ittar or a tiny sprinkle of screwpine water
A handful of pistachio blanched and chopped
You may also use raisins which I left out
6 to 8 heaped tsp of unmelted ghee

Start by reducing the milk with the sugar . When doing so add 1/2 tsp ghee. This addition of ghee prevents the milk from sticking to the bottom easily. keep stirring from time to time. Reduce it till it thickens. Takes about 30 minutes to 40 minutes. Once reduced add the screwpine water aka kewda water.

Blanch the pistachio and chop them up.

 Slice the slices of bread diagonally. Fry them till golden brown on both sides. Do this over medium to low heat lest the slices of bread burns.

Once all the slices of bread are fried arrange them on a serving dish and pour the reduced milk on top. garnish with the pistachio and chill this for a good 2 hours to 3 hours and then serve this decadent dessert which is sure to impress your guests.


Wednesday, March 4, 2015

Kesar Pista Malai Kulfi (Saffron pistachio cream kulfi)

Kesar Pista Malai Kulfi (Saffron pistachio cream kulfi) 


When it comes to traditional desserts I do not believe that a healthy version can do justice to the dish. Now I have always used whole milk to make my kulfis yet I was simply not satisfied till I tried this version. This is one of the reasons that I have not shared the recipe on my blog till now.

I have a book called the 'Classic Cooking of Punjab' by the legendary Jiggs Kalra and needless to say it contains quite a few recipes for kulfi but he adds eggs to his kulfi and since my grandmother is allergic to eggs I am not much in favour of using eggs for my kulfi.

So what I ultimately did was use his recipe as a base and after a short chat with my friend Somnath who is a food enthusiast I finally decided to give the kulfis one last shot at making it perfect for my taste buds. I had an idea of how I wanted it to taste which is smooth creamy silky .

The trick is in using the 'malai' aka extra cream


Its actually one of the simplest desserst that one might try

Makes 7 Kulfi when using the moulds :-

1 litre full cream milk
400ml cream (I used Amul cream which has 25% fat)
80gm sugar which you can change as per taste
1 green cardamom pounded well in a mortar an pestle
Half cup whole pistachios (Cup used holds 220ml liquid)
A fat pinch of saffron
1/2 tsp ghee
Ghee to prepare the kulfi moulds

Start by first blanching the pistachios and then chopping them.

Now one needs to make the rabri for the base of the kulfi.

Keep aside 1/4th cup milk and mix 200ml cream , ghee and the rest of the milk in a heavy bottomed pan (preferably aluminium or iron)

Now reduce this on low heat till it reaches half its content and then add the sugar and 100ml cream and add half the amount of chopped pistachios in the milk while you further reduce it. Keep checking every 7 minutes to 10 minutes and stir it well.

Reduce the milk till it reaches 1/3rd of its original content. In this case you are reducing 1.3 litres milk + cream which means you need to reduce it till it reaches 433ml.

This process of reducing the milk took me 1 hour 45 minutes.

Let the rabri base rest for 15 minutes and then add the saffron an mix well and add the remaining 100ml cream and gentle mix everything.

Use a tiny bit of ghee to grease the moulds and then pour in the kulfi to be frozen. Freeze it till its just about frozen (takes me 2 hours to 3 hours but the time require largely depends on your freezer and the amount of things it is storing when you are freezing the kulfi)  and then de-mould and serve garnished with the remaining chopped pistachios.


Important Note


  1. The ghee used when reducing the milk prevents the milk from sticking to the bottom of the pan keeping it smooth and silky. This is a valuable tip I have learnt from my aunt.
  2. The ghee used to grease the moulds helps you easily demould the kulfi .
  3. From my experience with ice-creams freezing it till its just about frozen gives you the most creamy and silky tasting kulfi. Excessive freezing makes it very hard in consistency and prevents you from enjoying the creaminess.  


Wednesday, October 22, 2014

Khasta Kachori

Khasta Kachori 


 The festivals bring forth the joy of celebrations and celebration is incomplete without gastronomic indulgence. For The Festival of Lights , Diwali, here is some Khasta Kachori a popular snack from North India.

While growing up I have mostly seen my own family hosting luncheons or dinner parties. The truth is even if a guest was invited over for tea they were always made to stay till dinner which is why the idea of snacks was always neglected a little bit in anticipation of the exquisite dishes prepared for the main meals.


It was only during a particular celebration, when my grandmother would make these amazing Samosas for breakfast since for that occasion everybody stayed over from morning till evening.

By the time I grew up I had developed an intense passion for cooking which borders on obsession which in turn makes my grandmother extremely happy since I apparently remind her of her mother who would churn out immaculate delicacies from the kitchen.

Sitting far away from home I dedicate this to my grandmother and can't wait to go back home and make these for her.


Makes about 8 Kachoris :-

1/2 cup Split black gram aka Dhuli Urad Dal
Pinch of asafoetida aka hing
1/2 tsp Cumin seeds
1/4th tsp saunf
1 tsp red chili Powder
Pinch of turmeric powder
Salt as per taste
2 tsp coriander powder
1/2 tsp sugar
1 heaped tsp dry mango powder
2 tbsp melted clarified butter aka ghee
2 tbsp raisins

For the dough :-

2 cups of all purpose flour (cups used hold 210ml liquid)
3 tbsp non-melted clarified butter aka ghee stored in the refrigerator for 15 minutes.
Pinch of salt
1/2 cup ice cold water
The tiniest pinch of bi-carbonate of soda

Oil for deep frying

Basically making these kachori is one of the most easy things if you understand its characteristics.

Soak the pulse for a good 6 hours and then drain it of all the water and grind it to a paste.

Start with the dough. If you have made pie shell before you would know the concept behind using a lot of fat and ice cold water. This helps in creating the flakiness. Mix the flour and ghee to form a crumb like consistency and add salt and sprinkle water to create a firm dough and wrap it in cling film and put it in the refrigerator to chill for 1 hour.

The final filling minus the raisins 

Now heat 2 tbsp melted ghee and add the asafoetida aka hing, cumin seeds, saunf and then add the pulse and add the chili powder, turmeric, salt , coriander powder , sugar and mango powder and mix really well and sprinkle a bit of water and cook on low heat for 7 minutes to 10 minutes. Make sure it doesn't burn. You'l know its done when it starts leaving the side of the pan, add the raisins and once it cools divide it into 8 parts .


Now divide the dough into 8 equal halves and then make balls out of them and then flatten them a bit with the palm of your hand and roll out a little bit in a way where the center remains a bit thick and place the filling which should be almost the same size as the balls and now roll out the edges and then dip your hands in water and fold the dough to make a pouch and flatten it out so that you create a flattened ball.


Press the flattened balls against your palm  to increase the size but make sure no cracks are formed and once you are done with all 8 of them put them in the refrigerator for 15 minutes.


Now deep fry them on low heat till it turns into a brown colour on both sides. It takes about 8 minutes on each side but do check to ensure that it doesn't burn. You should ideally keep turning them so that it doesn't burn on one side.


Important tips :-


  1. The large amount of clarified butter results in flaky crispy delightful kachoris so please do not cut down on the amount 
  2. Fry at low temperature to medium temperature controlling it  at all times else you end up with burnt kachoris
  3. When you are sealing the Kahoris make sure there are no cracks 


Serve with some sweet and sour Sonth Ki Chutney . Recipe : Sonth Ki Chutney


Tuesday, October 21, 2014

Murgh Korma

Murgh Korma 


For years I have heard my grandmother and others of her generation indulging in nostalgia about the good old days when most dishes would be prepared in Pure ghee which has been replaced with refined oil. The first time I decided to give a dish a try with ghee alone it was a big celebration where we had invited a lot of guests and I cooked a delightful recipe of Chicken in it and my guests could not stop praising it even though the recipe was of course collected. It was from then on that I realized that ghee can never be repalced by refined oil.

On any regular day I would rather use Olive oil or extra virgin olive oil for my poached or boiled or steamed chicken but on those rare occasions that I make a special preparation I stick to ghee or in some other traditional cases I use mustard oil which has a full bodied flavour of its own. So these days I only use refined oil on those rare occasions when I deep fry some item.

The influence of Mughal cuisine is quite strong in the whole of North India and even though Bengal lies in the far east it has a strong influence of Mughal because the Mughal  rule had spread out to the Far east by the 16th century which is why most Bengali families have a strong affinity for Mughali cuisine. And not that when the Nawab of Lucknow had to relocate to Calcutta he brought along with him a culinary tradition which has stayed on in the beautiful city of Calcutta currently known as Kolkata.

While growing up I have mostly seen my father prepare a Mughlai Chicken preparation which he liked to call Mughlai Murgi which means Chicken cooked in the Mughlai style.  Much later when I stepped into adulthood and had by that time developed an intense passion for cooking I read in an article about the history of Chicken Korma and realized what my father would cook was essentially Chicken Korma except that he would add that one ingredient which most Bengalis have an intense love for and the one ingredient I hate using in dishes , the humble potato . So what I did was modify the recipe to suit my taste (with influence from that article that I read) by trying to keep it as close to the original Mughal recipe as possible and the result is a lip smacking dish. Cooked in pure ghee with the resultant thick gravy coating the succulent pieces of chicken it is indeed a dish I would suggest people to try.


400gm chicken (preferably leg + thigh)
1 large onion roughly chopped
1 tbsp ginger garlic paste as smooth as possible
2 green cardamom
2 cloves
100gm thick curd
100ml milk
3 tsp non-melted clarified butter
1 large bay leaf
Salt as per taste
1 tsp coriander powder
Pinch of cumin powder
3 dried red chilies
1/2 tsp red chili powder
1 inch cinnamon
Pinch of turmeric powder
1/2 cup water

Cut the chicken into medium sized pieces. Marinate it with half the ginger garlic paste for 1 hour. Now heat 2 tsp unmelted ghee and fry the chopped onions on low heat.

First cover the onions and let it soften and then open the cover and fry it on low heat till it reaches a golden stage. Take it out and let it cool down and in the meantime add 1/2 tsp unmelted ghee and seal the juices of the chicken on high heat till its browned on both the sides and switch off the gas and transfer the chicken to a plate.

Whisk your curd . Once the fried onion cools down blend it to a smooth paste . Now add 1/2 tsp unmelted ghee to the same pan and add the remaining ginger garlic paste and the onion paste and saute on low heat  for a minute and add the dried chili , cloves, green cardamom, cinnamon , mace , coriander powder, cumin powder and bay leaf and then add the curd keeping the heat to low and now you must keep stirring it continuously to prevent the curd from splitting.

Stirring it continuously bring it to a boil. It takes patience but is the only way to prevent the curd from splitting. Once it comes to a boil, add water and then add  turmeric powder, chili powder and salt and stir on low heat and bring it to a boil again and add the chicken and keep stirring and then cover and cook for 10 minutes and then add the milk , mix well and cook till the oil separates and the gravy becomes thick and coats the chicken. Let it rest for 15 minutes to absorb all the flavour and serve with homemade wholewheat flat-bread.

Tips


  1. Covering the onion when softening it speeds up the process 
  2. Take care to fry the onion to a golden brown colour but make sure you do not burn it else it will leave a bitter taste 
  3. Stirring the gravy continuously after adding the curd is essential to prevent the curd from splitting. 


Monday, October 20, 2014

Piyau Bare


Piayau Bare 


There is a saying in Bengali, 'Chena manush ke notun kore chena' (Getting to know something we already know afresh from a different perspective) This is exactly what had happened with me while I was engrossed in Adil .I. Ahmed's wonderful book, 'Tehzeeb - Culinary Traditions of Awadh' The book is not only a treasure of this aristocrat's family recipes but it explores a by-gone way of living.


I have always known that Bengal's cuisine is greatly influenced by many culture's cuisines, Awadh being a great influence. Its not as if Benga's cuisine is exactly like Awadh's but the influences are seen quite distinctly. Take the example of Egg Halwa, an egg based halwa dish which is very popular in present day Bangladesh which was a part of undivided Bengal and it finds its roots nestled in Awadhi cuisine.

When I came across the recipe for Piyau Bare  in the book I immediately felt that I know it and it immediately hit me that we have a variation of the same recipe in Bengal which goes by the name, 'Rosh bora' meaning juicy syrupy fritters. Piyau bare is more majestic with the use of saffron and Vetivier water aka Kewra  water and is served with cream which is completely left out in Bengal.

To be fair after making this extremely easy yet delectable sweet dish I actually find the creamy version even better than the one I have grown up with and it being Diwali its the Festival of Indulgence as well.


Recipe Source: The Culinary cookbook Tehzeeb

The author credits Saba Hasan for the recipe

I have reduced the quantities to suit my audience since we are 2 people in this house

1/2 cup of Split black gram
2 cups of sugar
3/4th cup water
Fat pinch of Saffron
1/2 tsp Vetivier water aka Kewra water
Vegetable oil for frying
100ml thick cream

Soak the lentil for a good 2 hours to 2.5 hours. The longer its soaked the fluffier it will be.

Now make a fluffy paste of the lentil by first draining it of all the water and grinding it with 1 tbsp of the water it is soaked in. Make sure you scrape the sides of the grinder so that it becomes a smooth fluffy consistency. The trick to getting a fluffier batter is to grind the already ground lentil a second time with 1 tsp water.

Now soak the saffron in 1 tbsp water and make a syrup by bringing the water and sugar to a boil and simmering it for 10 minutes or so. It should be of a single thread consistency. Add the saffron and Kewra water and simmer l for a few seconds.

Now heat oil and fry the fritters. Keep a bowl of water near you and dip your fingers in the water and scoop out a bit of batter and make a ball and fry it on low heat till it reaches a golden stage. I like mine the colour of gold but you can fry it a bit longer to get a brownish hue. Remember to never increase the heat else the fritters might burn. keep adjusting the heat between low to medium.

Once fried use a kitchen towel to absorb extra oil and soak the fritters in the syrup for about 10 minutes and take it out and then serve it topped with cream.

If you like your cream thick like I do whip it with a fork for 1 minute and put it in the refrigerator when you soak the pulse  so that by the time you serve it it is quite thick.


Enjoy a not so popular but exquisite dessert

This is part of Kolkata Food Blogger's Ongoing Event, 
Deepavali Festival of Lights with Sweets n Savouries 


Sunday, October 5, 2014

Nawabi Paneer

Nawabi Paneer 


Some dishes are celebratory dishes and this Nawabi Paneer which I make for special draws heavily from Nawabi chicken. It is a rich decadent creamy nutty gravy and is fit for the royalty indeed .

I made this when my mother-in-law's visit almost came to an end and since she loved it as did my husband and brother-in-law I am sharing this extremely easy recipe.


Serves 3 to 4

1 litre full cream milk
1.5 tbsp vinegar diluted with 2 tbsp water

2 tsp ginger garlic paste
Onion paste made from 1 medium sized onion and 2 green chilies
50gm cashew nuts
1/4th of a coconut
1.5 inch cinnamon
1 large bay leaf
2 cloves
Pinch of saffron soaked in 2 tbsp milk
Pinch of nutmeg
2 blades of mace
1 tbsp crumbled khoya (In case one doesn't have khoya one can use 1/2 cup cream)
Salt as per taste

2 heaped tsp ghee

Start by making your paneer. Simply bring the milk to a boil and then lower heat and add the diluted vinegar and wait for 5 minutes for the paneer to form. You know its done when the white paneer clumps flat around in a green liquid called the whey. Switch off the gas and cover and leave for 5 minutes and then strain the paneer in a cheesecloth or muslin cloth and reserve the whey . Hang the cheesecloth for 15 minutes and then press it on a flat surface to make a slab with the cloth around it and place a plate on top and a mortar and pestle or a heavy book on the plate and leave for 45 minutes. You will have the softest paneer ready to be used.

Soak the khoya, cashewnuts and coconut in 1/2 cup reserved whey while the paneer is being made. Soak the saffron in the milk.

Now make a smooth paste of the ginger and garlic and then reserve it and make a smooth paste of onion and green chilies with 1 tbsp of reserved whey. Make a smooth paste of the soaked khoya, cashew nuts and coconut. Use extra whey if required.

Heat the ghee and saute the ginger garlic paste and then add the bay leaf and the onion paste and saute till the raw smell goes away and add the cinnamon after crushing it well and then add the crushed cloves. Now add the Khoya cashewnut coconut paste and mix well and add 1/4th cup whey and bring to a slow boil and add salt  , crushed mace and the nutmeg and the paneer and then simmer covered for 5 minutes to 7 minutes. make sure you check from time to time and give it a stir if it shows sign of sticking to the bottom of the wok. Once done the gravy should be velvety smooth and thick but not extremely  dry. Add the saffron , mix well and serve with hot rice.


Tuesday, September 30, 2014

Creamy Potato Spinach 'Aloo palak malaiwale'

Creamy Potato Spinach 'Aloo palak malaiwale' 


There here are some dishes which you anyway know are going to be delicious because butter and cream makes everything extra delicious. Now normally I don't even bring in fresh cream in my house because the thought of those extra kilograms hanging from everywhere on my body  is not something I relish thinking about but then there are those special occasions when you can actually indulge and my mother-in-law's visit is reason enough to make a creamy lip-smacking Aloo Palak Malaiawale aka Creamy Potato Spinach.


Now before I share the this recipe let me tell my readers from before that any substitution of the ghee or cream used here will not render the same results at all. In case you want to not use ghee the only other substitute for ghee can be mustard oil but even that cannot give it that delicious taste that ghee gives .

Anyway moving on to the recipe

Serves 3 to 4

4 medium sized potatoes cubed into medium size
1 large bunch of spinach
1.5 tbsp minced garlic
1 inch ginger chopped julienne
1 green chili julienne
Salt as per taste
4 cups of water
4 heaped tbsp fresh cream
2 heaped tsp clarified butter 'ghee'
Pinch of asafoetida 'hing'
Garam masala made with 1/2 black cardamom, 1 green cardamom, 1 tsp cumin seeds, 2 tsp coriander seeds, 1 blade of mace, pinch of nutmeg, 1 bay leaf , 1/2 inch cinnamon, 3 cloves
3 to 4 green chilies
Dollop of butter

Start by dry roasting the ingredients for your 'Garam Masala' and then grinding it to a fine powdery consistency.

Now ever since I read this Italian chef's tips on maintaining the green colour of spinach I have never had  trouble with maintaining its colour. Its simple actually. Wash the spinach well. The easiest way to make sure you get rid of all the dirt is to fill a bit pan with water and then chopping off the end of the spinach and soaking the leaves in the water and rubbing them and cleaning them. This mostly gets out all the dirt.             Bring the 4 cups of water to a boil. Now add the chopped spinach leaves and let it boil for exactly 2 minutes and immediately take out the spinach and there you have boiled green spinach. Reserve the water in which you have cooked the spinach.

Cube the potatoes and heat the ghee and add the asafoetida 'hing' and when it splutters add the minced garlic, ginger and chili  and saute till softened and add the potatoes and cook on medium heat to saute the potatoes and add the reserved spinach water and bring to a boil and add salt and then simmer covered till the potatoes are mostly cooked. It might take anything between 10 minutes to 15 minutes.

In the meantime make a paste of the cooked spinach and 3 green chilies.


Now add half the garam masala and remove the cover and cook till the curry dries up. Add the spinach paste and mix well and then add the cream and mix well and simmer for 2 minutes . taste and add salt if required. Serve with a dollop of butter on top with soft chapatis or hot fluffy rice.


Sunday, September 28, 2014

Paneer Butter Masala

Paneer Butter Masala 


I usually like trying out different versions of the same dish so that I might eventually find a recipe which suits my taste buds perfectly. Such was the case with Paneer Butter Masala also known as Paneer Makhani. Lets face it the name itself suggests it must have copious amount of butter but then the recipes I have had till date did have butter and a lot of ingredients yet there was something which was missing.


Now Butter and I go long back. My Dima 'maternal grandmother' would always compliment the Punjabis due to their use of butter in most dishes. All throughout my growing up years I was fed a meal of hot steaming rice with a good 50gm of butter and numerous boiled and mashed vegetables. Lucky for me my parents had got me admitted to swimming and till I  was involved in some pretty heavy exercise which kept my weight in check. Anyway coming back to the dish, now I know that everyone wants to be healthy and that's great. In fact on any regular day you'l find me with a bowl of steamed vegetables or a raw salad and some boiled egg or poached chicken but when it comes to certain dishes you cannot just try and make them healthy. It takes away the entire essence of the dish. Exercising and balancing your diet on every other day is how you stay healthy not by trying to make a dish named Butter Masala healthy.


Anyway back to the recipe. I had discovered the lovely robust chef Harpal Singh's videos quite by chance and after my tremendous success with his Kadhi I naturally knew whom to turn to for the Paneer Butter Masala. So here goes the recipe. I did use homemade paneer and believe me when I say that once you have made homemade paneer there is no looking back. You can use store bought paneer if you are not much inclined to making your own paneer .

Chef Harpal Singh Sokhi's Paneer Butter Masala

Serves 3

For the paneer :-

1.5 litre full cream milk
1.5 tbsp vinegar diluted with 2 tbsp water or 2 cups leftover whey

For the tomato gravy

6 medium sized tomatoes roughly chopped
6 green cardamom
3 blades of mace
100gm butter
1 tbsp minced garlic
1/2 cup fresh cream (I used Amul Cream but do use double cream if you have access to it )
Salt as per taste
1/2 tbsp sugar
1/2 tsp Kashmiri chili powder

For the final gravy

Ginger the size of half your little finger cut into julienne
2 green chilies de-seeded and cut julienne
1/2 tbsp butter
The freshly made tomato gravy


The final paneer made at home 
Start by making the paneer. Simply bring the milk to a roaring boil and then add the diluted vinegar or whey and lower the temperature and let the milk for the cheese and when you see the green coloured whey with the cheese floating around switch off the stove and cover and keep for 5 minutes . Strain the cheese but reserve the whey and tie the cheese in a cheesecloth or muslin cloth and drain it for 15 minutes to 20 minutes and then flatten it out with the cloth and put in on a plate and put another plate on top with a mortar and pestle or a heavy book on the plate and leave for 1 hour or so. Cut the slab into cubes and there you go , you have soft fresh paneer.

Store the whey in the refrigerator for future use. If you knead your dough for chapatis with whey the chapatis turn out extra soft, used in vegetable curries it enhances the flavour and if used for the next batch of paneer you will get the softest paneer ever.

Final tomato gravy 

Now start off with your tomato gravy. Melt 1 tbsp butter and add the chopped tomatoes and cook over medium to low flame till its mushy (covering and cooking gives faster results) and add the mace and cardamom and cook till it forms a paste and add the Kashmiri chili powder , add salt and cook for another minute . Let it cool down and blend it smooth .

Now mince the garlic. Melt 1 tbsp butter and saute the garlic and add the tomato paste and cook of medium flame , stirring continuously for 3 minutes and add 75gm butter and mix well and cook for 1 minute and add half a cup of cream and cook on low flame for another 2 minutes and your tomato base is ready.

Now melt 1 tbsp butter and saute ginger chopped julienne and the green chilies and add the paneer cubes and saute well. When the paneer turns golden add the tomato gravy and mix well and simmer for 3 minutes and serve with hot chapati or butter nan or Basmati rice.


Tuesday, August 12, 2014

Rajma

Rajma 


Truth be told I don't know when I fell in love with Rajma. It might have been that time when we passed through Delhi or in that beautiful place in Punjab whose name I cannot remember since I was 7 years old or 8 years old. At home my father would make Rajma but it was nothing like the delightful Punjabi ones. He always added paneer for one thing and would sometimes make this delicious dish with meat added to Rajma but by the time I reach my teenage years and had a taste of some good rajma in this Punjabi Dhaba I knew I loved it and it would always be my comfort food.


Over the years I have followed a couple of recipes all of which were delightful yet I kept trying different recipes which means somewhere in my heart I was not fully satisfied and then last year I came across this beautiful blog run by a Punjabi Kudi as she calls herself and tried out her recipe and I knew it was the right one for me. It was thick and hot and was deliciously tasty with the minimum use of spices. I follow this lovely lady's blog.
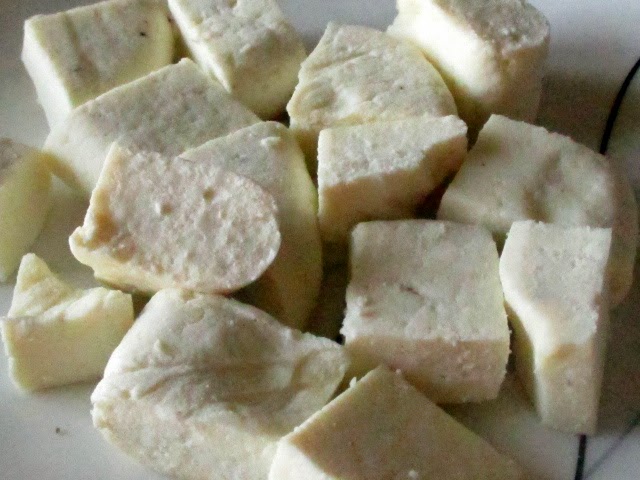


Before I move on I must say I always keep some homemade Punjabi garam masala at home which gives the dish that special flavour. This garam masala differs from household to household in Punjab . I basically use this recipe given by a wonderful friend of mine from the land of five rivers and it needs  Black cardamom,  Cloves, cumin seeds, coriander seeds and bay leaves and peppercorn.

So here goes the easy recipe

Makes 3 to 4 servings

1 cup of rajma washed and soaked overnight
1 large onion
1 tsp coarsely chopped ginger
1 tsp coarsely chopped garlic
1 large tomato
2 green chilies slit lengthwise
1 tbsp finely chopped coriander leaves

Spices

1 tsp cumin seeds
1/2 tsp turmeric powder
1 tsp red chili powder
1/2  tsp garam masala
Salt as per taste

3/4th tbsp ghee

1 tbsp butter (optional)

Wash and soak the rajma and then pressure cook it over low heat till its soft and well cooked.                        In the meantime coarsely chop the onion, garlic and ginger and blend it smooth in a blender. Chop the tomatoes and finely chop the coriander leaves.

Now heat the ghee and add the cumin seeds. When they splutter add the onion ginger garlic paste and keep stirring till the raw smell goes away and add the tomatoes and green chilies  and cook on high flame for 50 seconds and lower heat and keep stirring till you get a nice paste and the paste seems glossy . Now add the rajma , salt, turmeric, red chili powder and garam masala. Bring to a boil and simmer for 10 minutes.

Serve with plain basmati rice.  You may or may not add the butter once the rajma is cooked. I usually leave it out for a normal day serving.


Sunday, August 10, 2014

Rogan Josh (No onion no garlic)

Rogan Josh (No onion no garlic) 

Tribute to the Kashmiri pandits 


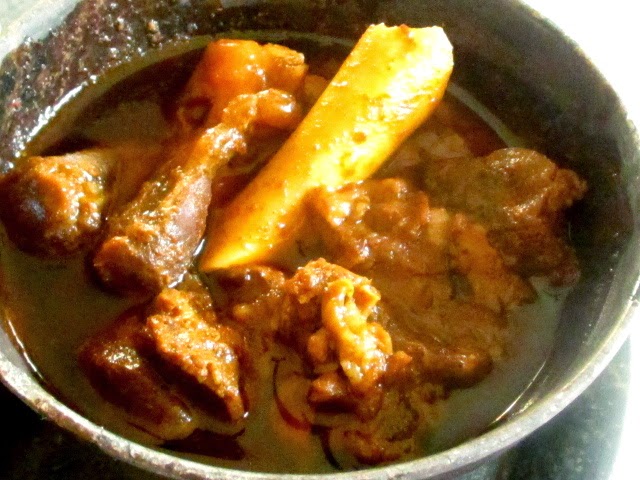
I was rummaging through my folders for a delightful recipe for gosht and I decided on some Mutton Rogan Josh. Now I have these recipes collected a good 10 years ago. A 16 year old me knew that I would one day want to cook all of them. Over the years out of the many collected Kashmiri dishes I have stuck to 3 of them but I realized I must try my hands on the forgotten ones and hence my decision to make Rogan Josh. What put me in a dilemma at first where these two recipes for Rogan Josh that I had. One used onions and garlic and cockscomb flower and the other didn't use any onion or garlic and used curd.


I immediately searched the internet for more information on Rogan josh and thankfully there is a very nice article on Wikipedia which clearly states that the Kashmiri Pandits make it sans onions and garlic and uses curd to cut down the heat while the other version uses onions and garlic and sues cockscomb flower.  To be fair I went through some of the recipes given and most recipes use way too many spices. To be fair both my recipes were simple and I decided to stick to them because I personally feel the same spices used for all curries mars the distinct taste. I chose the recipe used by Kashmiri Pandits , well at least the recipe I have on my hands because meat without garlic and onion has always fascinated me.


Before I move on to the recipe I have a confession to make. I do not enjoy  mutton unless and until it has a melt in the mouth texture but in way should it be too soft and disintegrate with the gravy. Over the years I have tried two methods of achieving this soft delightful texture. I abandoned my former method of slow cooking for 3 hours on low heat with a faster method which also involves slow cooking but uses a pressure cooker and saves time and fuel. As someone who switched I have to say it yields the exact same result but you must use the lowest heat possible even with the pressure cooker.


So here goes the recipe.

Serves 4 to 5

1 kg of goat meat from the legs
1 teacup of whisked curd (cups which hold 200 ml liquid)
3/4th  cup of mustard oil (cup which holds 200ml of liquid)
5 cloves
1 tsp cumin seeds
Pinch of asafoetida
3 cups of water
2 tsp dried ginger powder
2 tsp aniseed powder
4 to 5  green cardamom roasted and crushed
1 tbsp ghee
Pinch of saffron soaked in water
Salt as per taste - I needed 1.5 tsp
1 tsp turmeric
1 tsp sugar
1.5 tbsp kashmiri chili powder

Start by marinating the meat in the curd and leave it aside for 1 hour. Now heat the oil in a large wok and bring it to smoking point , lower heat and add the meat and immediately turn up the heat to seal the juices and keep frying and stirring for 2 minutes and then add the cloves , asafoetida  and cumin seeds and keep stirring till the oil separates and then add 1 cup of water , Kashmiri red chili powder , turmeric , salt and sugar and mix well and then simmer for 10 minutes.

Now take a big pressure cooker and put the meat in it. Add 2 cups of water , the dried ginger powder and aniseed powder, close the pressure cooker and cook on the lowest heat possible till the first whistle. Immediately turn off the stove after the first whistle and let the steam come out on its own.

Once it is ready open the lid and check the meat with a fork if the meat falls apart then take out the meat and put the gravy in the wok and bring to a boil adding the green cardamom , saffron dissolved in water  and ghee and then simmer for 10 minutes and add the meat and mix well and serve with hot rice .

In case the meat is not tender enough for you after you open the lid of the pressure cooker put the gravy and meat together in the wok and add the cardamom, saffron dissolved in water  and ghee and bring to boil and simmer for 7 minutes to 10 minutes. There you have melt in the mouth beautiful Rogan Josh .


Watch this space for the other version of Rogan Josh which is coming very soon for you