Showing posts with label Tea-Time Accompaniment. Show all posts

Tuesday, September 9, 2014

Potato Cutlets

Potato Cutlets 


To be fair these Potato cutlets which I made on a particularly lazy Sunday without the internet in-between back to back episodes of Til' Death was mainly for the husband. My husband loves eating in which should be a boon for a cooking enthusiast such as myself but then at times his want to eat at home bites me hard. It was one of those days when I knew was going to be those overly lazy ones so I decided instead of going out for Dosas I would be prepared with ingredients for a quick snack.

In Bengal the easiest snack that I was served as a child was puffed up rice with the beautifully aromatic green mango and chili flavoured mustard oil and lots of fried potatoes. Now as much as I love fried food I am trying to avoid it these days and so I decided for the husband who suddenly becomes a fry obsessed maniac on holidays I would boil potatoes and make something.

I was about to make the Indian potato cutlets 'Aloo Tikki's which is one of my favourite Indian snacks but then I simply cannot imagine Tikkis without the fiery Green chutney hara bhara chutney and sonth ki chutney (a sweet and tangy sauce) and because I was feeling lazy I ditched the idea of Indian potato cutlets and simply made potato cutlets

Serves 2 (In our case my husband gobbled up 1.5 serving :) )

Here is what you need :-

2 big potatoes
Half a large onion finely chopped
2 large cloves of garlic finely chopped
Salt as per taste
1.5 tsp Fresh Thyme leaves
1 tsp Freshly ground pepper
1 tbsp cornflour

Olive oil for shallow frying

Simply mash everything except the oil together and make 4 cutlets and let them rest in the refrigerator for 15 minutes. This helps them harden up a bit and hold shape when frying.

Heat oil and shallow fry on low heat till its golden brown on both sides. Enjoy by itself or team it up with some mustard.


Monday, July 7, 2014

Chocolate chunk banana bread

Chocolate chunk banana bread 


I have heard of people using ripe bananas to make banana bread but I somehow had the spirit of the banana bread cling on to me till today. You see , I wanted to make banana bread a good 3 days ago and all these years I have seen plenty of blackened bananas lying around our house but ah ha just when I wanted to make a banana bread there were good bananas which were hardly ripe. So I waited for my bananas to overripe while keeping an eye out for possible attack on the bananas. It happened yesterday when my grandmother reached for a speckled one and I almost jumped up towards her and she was baffled. To her overripe bananas are good for nothing . Well well clearly she has not tasted a banana bread. Well I am still not clear why this particular baked goody is called a bread, for one its more or less like a cake and secondly most recipes do not use yeast.


Anyway coming back to my banana bread, for a lovely result you need a lovely recipe. After looking here and there I went back to the one man whose recipes has always yielded a 100% superb result, The great Dan as I like to call him. Mr. Dan Lepard is a genius. His recipes yield perfect result and they are the most easy ones out there with explanation of a step which might seem puzzling.

I myself raised my eyebrows at the prospect of melting butter and whisking it with sugar and flour but ah there was the explanation: This yields a super soft and super moist loaf.

Anyway I made my chocolate chunk banana bread and well I didn't use too much of chocolate chunk because you see chocolate has the most overpowering taste, delightful but it can overpower all other tastes so I kept it to a minimum because I was eager to get the 'bare' taste of banana loaf as put by Mr.Lepard himself .

And once I sliced the loaf and took a bite I was transported to a  world of moistness with ultra soft crumbs. I bow down once again to the genius Dan Lepard.

Recipe source : Dan Lepard

What you need for a loaf which can serve 7 to 8 people

200gm overripe banana pulp
250gm all purpose flour
1 tbsp lemon juice (15 ml)
1 cup castor sugar (cups whcih hold 250ml liquid)
200gm butter (I used salted butter)
4 large eggs
3 tsp baking powder
50gm to 70gm chocolate chopped into very very fine pieces else you may also use chocolate chips

Preheat oven to 160 C. Start by first lining your loaf tin with butter paper and then go on to mash  the bananas with a fork and then blending them away to a smooth paste. You should have 3/4th cup to 1 cup of pulp. Now melt the butter and then whisk ti well with the castor sugar and add 100gm (1/2 cup) flour. Whisk well to create a smooth mixture and add the eggs one by one and whisk well to create a smooth emulsion and then add the lemon juice and then the banana pulp and whisk away and then sift the flour and baking powder together and re sift it again in the wet mixture and then whisk only till everything is well mixed and pour half of the batter and sprinkle some chocolate chunks and pour the rest of the mixture and sprinkle the rest of the chocolate chips and bake at 160 C for an hour. Once done test with a toothpick. Insert the toothpick in the center of the loaf and  if it comes out clean you are done. Take out the tin loaf and wait for 10 minutes. After 10 minutes run a palate knife around the edges and transfer the loaf on a wire rack but you must wait till the loaf cools off completely before slicing else your slices will break easily. Enjoy these super soft , super moist slices with a cup of tea or coffee


Tuesday, February 4, 2014

Strawberry Jam


The Simplest of Strawberry Jams 

Of Fruit preserves, Jams and Jellies 


Most of us , well at least most people I know have at some point in their lives started their days with a table laden with fresh slices of bread, a bowl of softened butter and a variety of those delicious fruity delights. Why silly? The jams and jellies of course. Of course it is through these meals that one might have gotten her ears pulled for using the butter-knife in the jam jar or worse licking the spoon of jammy deliciousness and trying to put it back in the jar.

Of course then we suddenly grew up and at some point cornflakes suddenly started dominating the breakfast table and soon enough the elaborate affairs of breakfasts were reduced to a quick but filling start of the day with muesli because well we all want to be healthy so how could sticky fruit preserves win over healthy muesli. It came to a point where Jams became a part of special occasions say the spread for the Victorian Sponge Cake, the rare picnic or carried for treks.

To be fair I usually stay away from Jams because of the quantity of sugar that goes in it. I mean sure one can use honey but it would not be the same. Honey has this ability to impart its flavour to anything it is used in and I would hate for my peachy preserve to have a similar taste of my Strawberry Jams.


They say curiosity kills the cat . In recent times shelves of many a store is lined with confusing labels. So it is not enough that there are Jams and Jellies now there are conserves and preserves and compotes as well. While curiosity did not kill me , it certainly made me a bit confused. You see I have need to know everything there is to know about a dish I cook and so my first step was to know the difference between Jams, Jellies, Conserves, preserves etc.

While the difference between Jams and jellies and marmalade  is the easiest. In very simple terms Marmalade means citrus fruits alone, Jellies use the juice of fruits alone and so Jams should naturally mean something which has fruits. Low and behold that is not that simple.

While good Jellies have been described as "clear and sparkling  and has a fresh flavour of the fruit from which it is made. It is tender enough to quiver when moved, but holds angles when cut" Marmalade is 'fruit preserve made from the juice and peels of citrus fruits"  but Jams , they are supposed to have a "soft even consistency without distinct pieces of fruit , a bright colour, a good fruit flavour and a semi-jellied texture that is easy to spread but has no free liquid" but a conserve is a "whole fruit jam'.

So to my understanding a Jam must not have any pieces of fruit once cooked but a conserve will have pieces but then searching for a recipe for Strawberry jams it is astonishing that most uses fruit pieces which after cooking leave behind little cooked pieces as well. Now even if you have never made Jams I am sure you must be knowing how you like your jam. I personally prefer mine to be less sweet , firm and thick with little pieces of fruit.

So here comes the simplest of strawberry jams or preserves recipes


You need

1 kilogram of Strawberry
750gm of sugar
Juice from 1.5 small sized lemon

Soak the whole fruits in water to remove all dirt 

Now before you get started there are just a few things to be kept in mind:-


  1. Jams need pectin for its setting which doesn't mean you have to use any store bought pectin. Fruits usually have a certain amount of pectin which works with the acid (lemon ) to give you that set Jam
  2. Choose unripe or just ripe strawberries since overripe strawberries have lesser quantity of pectin


Start the night before. Wash the fruit by soaking it in a bowl of water to remove all dirt . Remove stalks of the fruit and chop them in small sized pieces. Make sure to discard any soft fruit and if a fruit has marks on the body slice it and throw that part away.


Put them in a large , heavy bottomed pot and mix 500gm of granulated sugar with the pieces of fruit and simply let it rest covered for the night.                                                                                                          When making the Jam the next day the first thing you must do is put a plate made of steel in the freezer to test the Jam when it sets and then mix the rest of the sugar and juice of lemon with the fruits which by now will be in a mass of liquid and slowly heat it (low heat) till all the sugar dissolves and then bring to a roaring boil and then keep boiling for the next 20 minutes  checking every 10 minute and remove the scum(foam) that forms on top. Do not overcook your Jam else you loose flavour. So you should never cook the Jam over a total of 40 minutes.

All the scum must be removed

At 25 minutes check if the jam has set by simply dropping a spoonful on the plate from the freezer and wait a few seconds and touch with your fingers. If the jam wrinkles on your touch it has set and you have to simply cool the Jam for 25 minutes before spooning it in sterilized Jars else keep boiling for another 10 minutes. It personally took me 35 minutes for the Jam to reach its setting point and of course another 25 minutes of cooling .


Enjoy this lovely Jam with fresh bread, sponge cakes or buns


Source of information: Wikipedia , BBC
                          

Thursday, January 30, 2014

Chatpata Mix chat


I believe the little changes in your dietary habit can help you a lot. Now as someone who loves potatoes I advocate the use of potatoes. It is a complete misconception that this nutritious carbohydrate is fattening. It is your method of cooking which usually determines a dish's calorie etc. So deep fry it and you murder it of all its nutritional value but boiled or baked at 77 calorie for 100gm this is one of the healthiest snacks or food items ever.

Now healthy eating means you have to plan extra carefully to appease your taste buds. A wise man once told me that no diet would ever work if your taste buds remain unsatisfied. Having said that a little change helps a lot. For instance if you crave some mushy potato on any given afternoon or anytime that you want to have snacks replace the french fries or aloo tikkis (a famous spicy potato patty dish from Northern India) with some chaats made with boiled potatoes. The recipe I follow is nothing new. I add a little bit of extra virgin olive oil for extra health and to suit my taste. Try it for a quick snack session.

This mix chat takes me back to my school days as well. Those were the days when the street food hawkers would line up in front of every school luring children with lip smacking dishes. While most of my childhood was spent in longing for them since my parents never ever allowed me to have street food with logical fear for my health because tasty they are but lets be honest most of these items aren't that hygienic. Of course the moment I started getting my pocket money it was a different issue altogether. I would gorge on these delectable snacks throughout school, college and university. In those times it felt as if the chatwallahs had some magical potion. I later realized you can make the same stuff at home. The magic was the work of spices. So I hereby present by spicy chatpata meaning lip smacking snack. I have given it a healthy minty twist. You can even have this as a salad for a main course in which case you shall probably need to double or tripe your portion of salad.


Serves 4

You need

2  large potatoes
3 medium sized firm tomatoes
1 large onion
1 cucumber
2 tbsp finely chopped mint leaves
1 tbsp finely chopped coriander leaves
Juice from Half a medium sized Indian lemon
Rock salt as per taste
1 tsp cumin powder
1 tsp coriander powder
2 tsp dried mango powder
1 tbsp extra virgin olive oil
1 green chili de-seeded and finely chopped


Boil the potatoes and if you are in a hurry simply drain them and place them in a bowl of ice water. It shall cool down in no time. Peel and cube them in bite sized cubes. Cube the tomatoes, onions , cucumber after peeling it. Mix the vegetables and potato with the extra virgin olive oil , spices , lemon juice , herbs and green chili. Enjoy your lip smacking snack.

P.S. You can always increase the number of chilies used. 

Monday, December 2, 2013

Butterly cheesy fish finger


Utterly butterly cheesy fishy: Recipe courtesy my dearest friend A


So I meet one of my best friends dearest "A"  after a month and it anyways seems like years and we giggle and laugh, tease each other and almost cry out laughing but did I mention how well she cooks. And all she says is "I cannot cook that well , you can cook so well." Or "Everyone can make these things"


Of course if you see what she does with her needle and hands you would be amazed. Anyways cook she does brilliantly well but they are always on the high side of Indian spiciness and so when she served these delicious fish fingers I was eager to simply bite into them and ooh what a surprise I was in for. Mild , delicate yet so delicious that it knocked my socks off.  I immediately declared that I was going to make them the next day itself and was even more surprised to learn that this required 4 ingredients, Rui fish (a fresh water fish with bones), butter, cheese , salt and rolled oats. This was one of the most innovative dish I have ever tasted with such less ingredients. P.S. The very next day she came over and was treated to "Lahori Murgh Chole" a spicy delicacy of chickpea and chicken from the grand city of Lahore and orange milk pudding and upside down orange cake. I tried them on Sunday and the result was magnificent with the evening tea. Instead of mayonnaise I did use my homemade thick garlic sauce made with hung curd which has that punch provided by black pepper and red chilies soaked in red wine vinegar.


Its basically very easy

Take four pieces of Rohu /rui fish which comes up to a weight of say 190gm to 200gm
Salt as per taste
4 tablespoonful of butter
Mozzarella cheese about 50gm

Use salt to marinate the fish in. Use the salt  cautiously since if you do use salted butter it woudl add tot he salt content. Shallow fry the fish in butter. Remember that the only flavour you get it mainly from butter so use it sparingly. Once, cool enough to handle smash it as well as you can. You have to use your hands to get the bones out of the mashed fish. Finely chop the mozzarella and work it with the fish to make a smooth paste. Then take rolled oats on a plate and shape your fish into fingers and roll them around int he oats to make sure it is all covered and shallow fry it.


Serve with a condiment. A spicy condiment works best for this such as herb mayonnaise or garlic sauce. if the condiment is homemade the taste would be superior and fresh.

You can try this Creamy chili garlic dip


Wednesday, November 13, 2013

Madeira Cake


Back to the basics of cakes , 

The Tribute to Madeira 


 Everybody is baking these days. Sugar butter flour everywhere. With so much of baking I am sure each homes is filled with a fragrance which is delightful. Not only are people baking but they are creating artistic cakes. So artistic that it amazes everyone.

Now I will completely express my personal views. It is the truth and absolute truth but is  nonetheless just my personal view . Let me begin with a rhetoric question. Why this fuss over cakes in the shape of shoes, cakes in the shape of bags and any object found on the surface of this wide wide wide world. While the work makes me have the greatest of respect for artists who spend hours creating them there is some mixed feeling. This excessive demand for over the top decorations is destroying our taste buds through and through. It is as if we actually are eating with our eyes. Have our taste buds become so challenged that we cannot appreciate so many cakes in this world? I stirred the hornet's nest on a particular social media and clearly there were two groups, a) the ones who make such cakes and b) the majority who eat them. Now here is my question. Try searching a little bit and you shall find billions of unexplored desserts . Are they not delectable enough? Some argued for unnatural decorations with the metaphor of dressing up for parties. Why do the cakes not dress beautifully and classically and why need they put on layers and layers of make up is what I wonder. As with cosmetics the look you create is completely in your hands. You can look au natural and glamorous and a true classic or slap on enough make up for you to look well artificially nice. Of course beauty lies in the eyes of the beholder  but how is a cake in the shape of say a house or worse shoe more desirable than a Dobostorte , Sachertorte or a beautifully made butter cream frosting baffles me. Anyways moving on,

Well so I have challenged myself to explore research and find out about desserts from around the world and try making them one by one. That would be enough for a whole lifetime.

For my first dessert I picked up the most basic of cakes, the tea time accompaniments of course. The great Madeira cake from Great Britain with a light yet firm texture , the perfect accompaniment to tea . Why Britain you ask? Well, I am from Calcutta , believe me there is the connection .

Anyways everyone is baking but how are they baking. Why do we undervalue the basics of cake making so much , why should nonprofessionals use electronic whisks without first learning the old fashioned hand held whisk is beyond me. Well I'm amazed at how strongly opinionated I am but nevertheless I shall try and give as many tips as i can for making cakes right from scratch.


Here is what you need for a Madeira cake. I followed James martin's recipe and the result was a beautifully light firm perfect cake . The lemony taste was truly the "icing of this cake".

200gm of flour
175gm of unsalted butter
175gm of sugar
3 medium eggs
Zest of 1 lemon
3 tablespoon of milk (adjust as per the batter) I ran out of milk but had a bowl of cream and used cream :)
Less than half a teaspoonful of baking powder. Practicing would make you realize exactly how much to be put it.
Candied lemon peels for decorations

Begin with the candied lemon peel a day ahead. Peel the lemon and then slice them real thin.


Wash them well and blanch then at least thrice. It is very important to blanch them thrice to remove all unwanted bitterness. Spread out and dry till bone dried. 

Begin with 3 tablespoonful of water and 4 tablespoonful of castor sugar. Bring to a slow boil making sure it does not burn and add the dried peels. Cook them and well when working with sugar you cannot juggle other things. Let it get reduced to the point where each strand is coated well and then dry for 2 hours and spread out each peel. 

When you start with a cake there are some rules which be followed thoroughly if you want your cake to be perfect 

Before beginning sift your flour well with less than half a teaspoonful of baking power. Remember that too much baking powder renders your cake bitter and too less prevents the cake from rising. 

These are :

  1. Begin with creaming the butter. It is especially important that you cream fresh , as fresh as you can get in the market fresh unsalted butter. Do not use a bowl too big or too small. You can use a whisk or a big spoon though I personally have never tried the spoon method. 
  2. Slowly add your sugar bit by bit mixing real well , if sifted it would be fluffy to an extend which makes you cry in joy. While creaming butter you arms will pain and if you make cakes quite often there isn't a chance that you ever are stuck with chicken wings. Of course the other hand needs some extra exercise for making up. 
  3. Now preheat you oven to 180C 
  4. When properly creamed the butter should be of a fluffy creamed consistency without any visible grains of sugar. It should be a delight to even look at it. Add your eggs 1 by 1 and keep whisking for a smoothness which is a delight to watch . Now slowly add your sifted flour through a sieve. This twice sifting of flour makes the cake airy and light. Your final consistency should be such that it fall after a long time from a spoon. 
  5. Fold in the lemon zest with a spatula . You should never whisk the lemon zest or over-mix cake batter. That disturbs the baking as well. 
  6. Fold it in your already buttered and floured cake pan and bake for 1 hour. even though Mr.martin suggest 40 minutes the problem is with an  Indian kitchen the conviction oven is the only option and baking temperature not only varies from oven to oven but form brand to brand as well. So I suggest to first bake it for 45 minutes and insert a toothpick in the center to check whether it  is done and if not then add another 10 minutes. You shouldn't even open the oven door by mistake before the 45 minutes else your cake will fall faster before you can even close your eyes. 
While it is baked observe the cake and you know it is going to be perfect if :

  • The bubbles on the surface are not too big
  • The middle does not puff up too soon before 30 minutes. 
  • It slowly and steadily rises 


Once the toothpick is clean let it rest in the oven till the fan works itself and only after that do you get to take it out and cool the cake on the wire rack for at least 10 minutes. Do anything else and your cake will crumble. 

Once cool decorate with candied lemon peels and serve with a cup of Darjeeling tea or any tea of your preference. I am no chef but these basic points make everything possible 


Important tip :

Use a 6 inch to 7 inch cake pan 


Wednesday, November 6, 2013

Roast papad

The best of the crispy Papads and it is completely Healthy 


We, Indians  have all had our share of experiences with Papad. This flattened piece of snacks is a common affair in India. We have it fried, roasted and even as a curry. Anyways the fondest memories I have is munching on fried papads during rathyatra. In Bengal we have a saying that in 12 months we have 13 festivals and well this one is extra special for little kids because they get to buy a chariot and decorate it with flowers and then put Jaganath, Balaram and Subhadra the two brothers and sisters and pull it for fun and once back at home are treated to an array of sewets but the specialty of the days have always been the fried papads.


There is enough variety of papads which to confuse anyone, there are the plain ones made with pulses, ones made with rice flour, some have spices some are non spicy. Its a whole lot out there but deep frying is probably a big catch and so Papads have been pushed away. Well am I correct? No because there is always the roasted variety but then  roasting it takes a lot of skill. Most roasts would have even if the mildest ones but the little blackened marks from roasting over the flames. I for one haven't ever managed a roasted Papad which only has little bubbles on them without even a little black spot and then today after I finished by 1.5 hour long , yes I have increased the time form 1 hour to 1.5 hours :) evening walk and was sweating and puffing and hungry I found a packet of plain papad. I was thinking of ways to it healthy yet without having to eat evena  little bit of burnt taste  and was immediately was struck with an idea of grilling them. Now I usually do not use the microwave mdoe or microwave cum grill mode but then I needed a quick snacking with tea  so that I could quickly get down to work and well somehow the idea of plain papad was not quite appealing and so I decided on the spicy version with onions, tomatoes and assorted spices.

All I did was gather 1 onion, 1 tomato (medium size), 1 wedge of lemon , rock salt and my homemade green chutney and mixed it well.

Ingredients for the fresh relish

1 onion
1 tomato
Homemade green chutney
1 wedge of lemon
Rocksalt as per taste


The papad was simply microwaved grilled at 600W for 2 minutes and was turned on its other side after 1 minute. The result was a fantastic success if I may say so without sounding like a pompous ass.

It was perfectly done and so specks of burnt bits got inside my mouth to create unpleasantness. Try it, its healthy, its tasty, its wonderful. You can also dip it in other condiments.


Monday, November 4, 2013

Onion fritters


The story of the Spicy Onion fritters
 our very own Peyaji, Bhajji or Pakodas  


So it has been a crazy 3 days with the onset of Diwali. There was menus to be prepared, analysis to be completed and attention to be given to my four legged darlings. Saturday was the Bengali Diwali, Kali puja. We have this feminist outlook in our blood. The biggest festivals celebrate powerful Goddesses and Goddess Kali is the angry version of the graceful Durga.

Anyways so I am awake from 6 juggling the analysis and paying a visit to the market , reducing milk for kulfi and then pouring them in moulds making luchi, aloor dum and chanar dalna for lunch. By the time I sleep for an hour I am bone tired.

It is 5 p.m., and I still have work to do. Here I was handling whole milk and all purpose flour and clarified butter and soft homemade cottage cheese , we in Bengal call them "chana" , though why we do so has ever baffled me. You see there is 'kukur chana (puppies)  , beral chana (kittens) , chana pona (children) ,actually chana in that context means chidlren) and then there is the soft chana - the cottage cheese and there I was writing about brakes and averages and mileage. Two different world indeed.

Anyways I put the kettle on boil. A cup of Darjeeling tea settles my mind but then I realized that I was hungry like a wolf. You see she who cooks need not always get time to eat at times. I wanted something to go with my hot cup of tea and then realized that I had a left-over batter from the previous day's aubergine fritters and immediately set upon some onion fritters.

In Bengal these crispy, crunchy onion fritters are called peyajis. usually it is chopped finely and then batter dipped and fried so that you get a cluster of thinly sliced onions inside your mouth , but I decided I wanted things different. Why you ask em , well you see I like variety and well ever since I started blogging I have begun putting a bit of though for presentation. So the onins were chopped in circular shapes and the rings taken out.

All that goes in are : Now here is my catch with measurements. An old old lady had once told me, "If I give you every little detail even with measurements then how is it that you are using your skills' That was when I was in school and till date I am very bad with measurements. Other than some specific items I strongly believe it is here that one's culinary skills come out and not only culinary skills taste and preference as well. Let me talk about my friend A, someone whose needlework is magical and someone who is very good in her kitchen as well. Now A loves things extra spicy and oily , so as delicious as her chicken might be it is full of extra robust spices and is very oily, delicious nonetheless. I like mine subtle full flavored with the right balance of spices (now right is a wrong word in the gastronomical sense. One man's meat is another man's poison') So please use spices as per your taste and liking. Taste appeal is a very subjective matter. I have nonetheless tried to give a rough measurement.

2 onions chopped in circular patterns to create rings
4 tablespoon masoor pulse
4 tablespoon rice flour
7 tabselpoon of gram flour
1 heaped teaspoon of cumin powder
1 tsp coriander powder
mango powder as per taste
chili powder
rock salt
Chopped chilies


To the previous batter of masoor pulse, rice flour and cornflour , in went some besan (gram flour) and somehow I wanted things spicy so in went cumin powder, chili powder and coriander powder.

What I did first was dust the onion rings with cumin powder , mango powder and salt so that the insides become as tasty as the crispy outside.

Then you make a batter of a thin flowing consistency and add the chopped chilies . The thicker the batter is the less crispy the rings would be. Then the resultant fritters have a very hard and thick coating which is unacceptable.

Dip the onions and fry them. One can use three to four circles of onions  at the same time. Serve it hot with  piping hot tea and you have some very happy people sipping on tea and taking crunchy bites of their fire-cracker onions.

P.S.

The rice flour adds the extra crispiness :)
Remember to always fry these on low to medium heat , so that the insides get cooked and the outsides don't turn blackish brown and then turn up the heat before taking them out for a few seconds for its crunchiness.


Friday, November 1, 2013

Aubergine fritters / Beguni

Beguni/ Aubergine Fritters 

A Classic Bengali Snack 


Its a mad, mad day. Swamped with work I am trying to juggle work with designing my blog while two hungry cats with their ever growing appetite demands attention . I felt tired and at the same time excited. Why excited you ask? Tomorrow is Kali Puja. Now Diwali is most often celebrated a day after Kali Puja. In Bengal we are born feminists and so most of our religious celebrations center around Goddesses. Now, I might not care too much about the religious part but a festive day means working my mind at the recipes to be cooked the next day and then came the lovely afternoon hours. The sun was kissing goodbye and my cats were howling when I realized I need a strong cup of coffee, and then when you have your father back from a surgery demanding delicious meals you cannot but oblige.


While my coffee brewed I sliced my aubergines. Here there is a catch, the thinner you slice them , the crunchier it would be and the less time it would take for frying. Use a bit of salt for taste.The secret to my extra crunchy beguni 'muchmuche beguni' is Ssshhh keep reading please.

When you make the batter , remember it has to be a bit thinner than the thick dropping consistency because thick batter renders  a thick coating which is not acceptable to us Bengalis and if the batter is thick your fritters won't be crunchy .


So all you do next is to fry them in Mustard oil. You can always use refined oil but then there will a lack of the special flavour that mustard oil adds.

Ingredients 

Aubergines sliced thinly and longitudinally
salt and turmeric  to be smeared on the aubergines

For the batter  I used 

The cups hold 210ml water

3/4th cup chickpea flour/besan
1/4th cup rice flour
Salt as per taste
A tiny bit of turmeric
Pinch of nigella seeds
2 tbsp raw mustard oil
More or less 1 cup of water

Mustard oil for frying


Simply slice the aubergine and marinate with salt and turmeric, In the meantime make a smooth batter out of besan, rice flour, mustard oil, nigella seeds, salt and turmeric . Add the dry ingredients bit by bit and a bit of water to make sure the batter is evenly mixed without lumps. Once you have a smooth batter heat the mustard oil and add a spoonful say 1 tbsp of the oil in your batter. This age old step yields crunchy fritters.

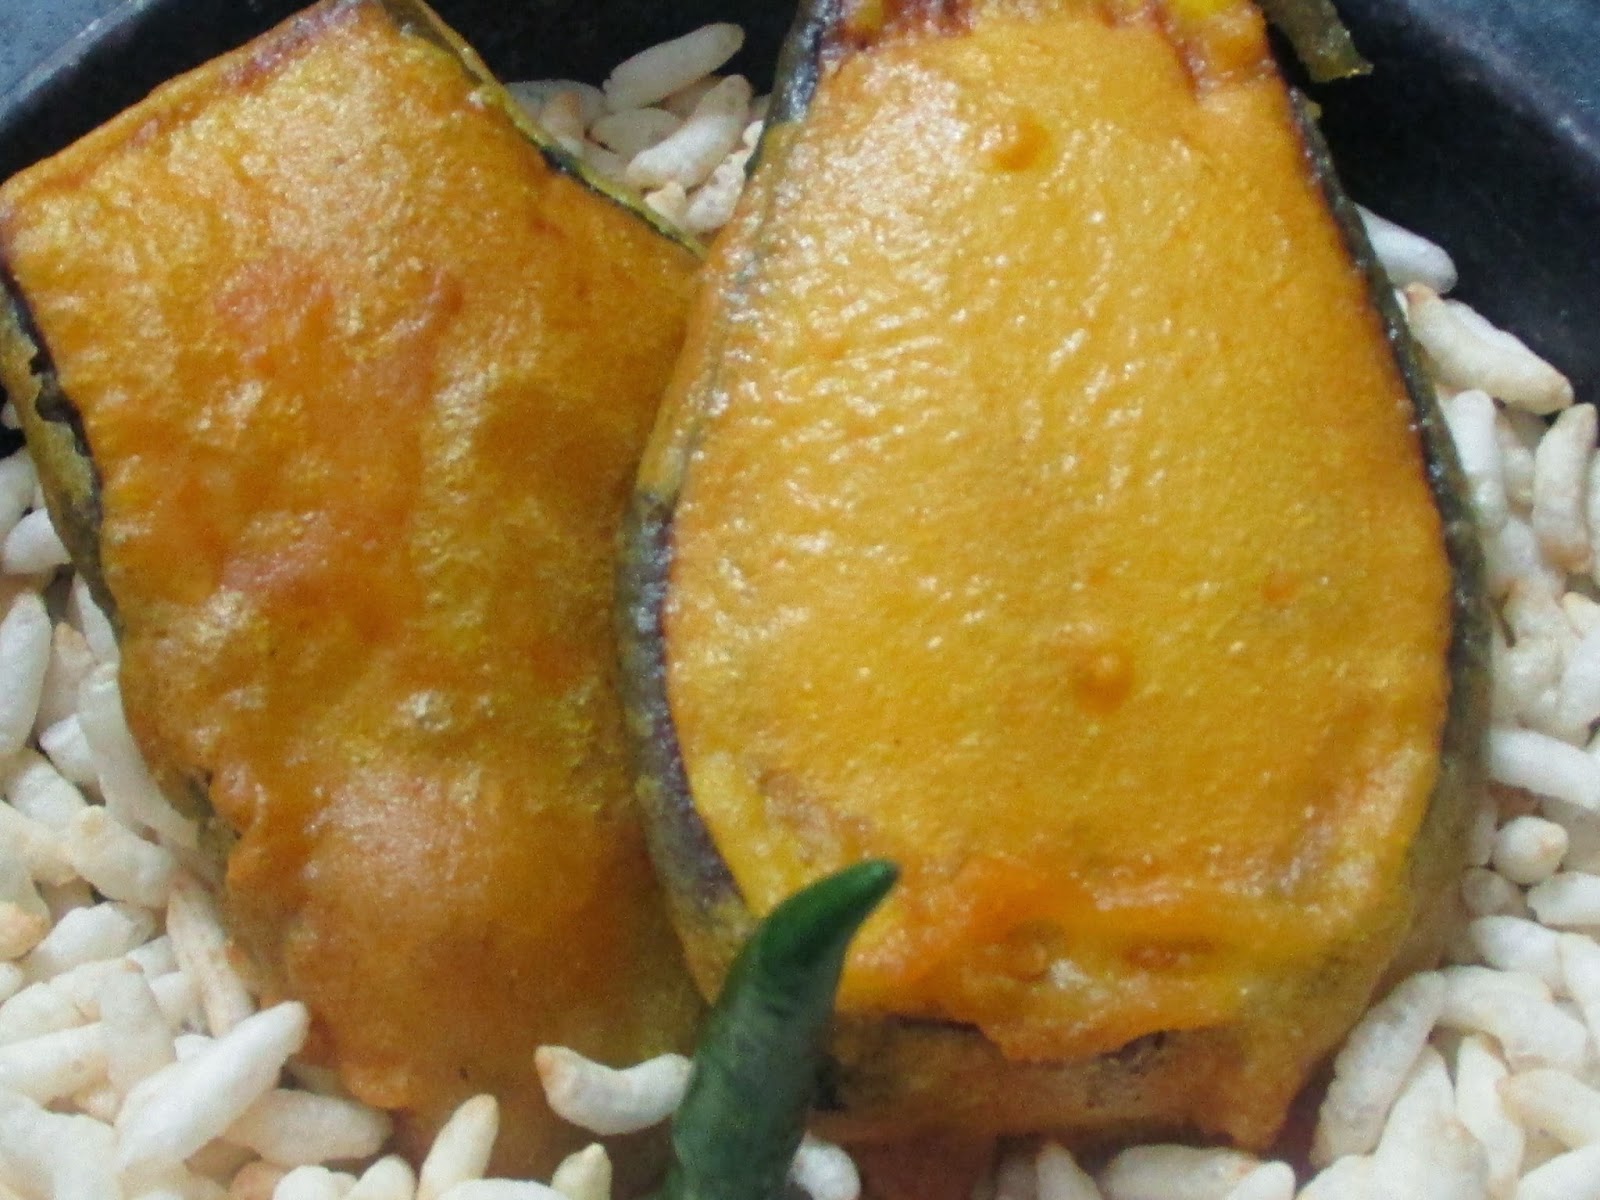
Heat mustard oil and dip the aubergine in the batter and fry on low heat till a golden colour on both sides. Turn it after a whole when frying. Enjoy with puffed  rice and a green chili with some hot tea or coffee.


Saturday, October 26, 2013

The Versatile Muri


The versatile yet humble puffed up rice. Have it with milk and chopped fruits and you have your very Indian breakfast cereal, spice it up with an array of spices and you have the spiced muri known as the jhalmuri, have it spiced with sauces and spices and there is the bhel-puri. Well its talent is mainly constricted to the snacking area - you can have it plain with chops or fritters. 

With the seductive weather of Calcutta, today it was dry roasted puffed rice with a wee bit mustard oil , very finely chopped onions and chilies and fried potatoes along with Darjeeling tea. It is as healthy as it is tasty, one always has the option to omit the potatoes completely but well that would just murder its taste, so why not exercise so that we have the fun of indulging in these delicious evening snacks. This is an old favourite of mine. As a moderately fussy eater I refused Horlicks as a child which my family anyways has no affinity for and so this was a frequent evening snack for me P.S. Dry roasting the puffed up rice on slow heat is a must for the delightful warmth it provides .


For this muri what one need sis 

4 cups of puffed up rice 
1 onion chopped finely 
1 to 2 chilies chopped finely (as per the level of hotness your palate likes) 
Pinch of salt 
2 teaspoonful of mustard oil 
Potatoes chopped thinly and fried (It should not be too crispy else it does not give the perfect balance with the crunchy puffed up rice so it is best to fry the potatoes an hour or so before preparing the muri) 
Pinch of cumin powder 

Start off my dry roasting the puffed up rice on low flame. This is essential for giving it the warmth which makes it even more delicious and gives it a touch of freshness. One mixes everything together and enjoys it with a cup of black tea. I have seen that somehow this mix becomes a bit too hot for coffee or milk tea but then each one of us have an unique palate. 


If not using fried potatoes one can simply have the mix with fritters of any kind or make a mix with peanuts ,coconuts and chanachur (a typical  hot salted spicy mix from Bengal) 


Friday, October 25, 2013

Victorian Sponge Cake


Tribute to Queen Victoria ,

 the humblest yet one of the best Cakes

Before you read this post I have to say that my Victorian Cake has remained the same over the years but what has changed is the quality of the photographs 


 The Classic Cake 


I have observed that in recent times there is a craze for artistically crafted cakes. So the rage is to be a Michelangelo in baking but I personally still fail to understand the charm of fondant coated cakes over so many delicious pastries. We all have our personal likes and dislikes. I believe this diversity ultimately unites us but for me the allure of  traditional baked goodies would always  win over artistic cakes which really need artistic hands but the taste , well is too sugary, for what is fondant or other cake decorative items but unhealthy masses of sugar, almonds and other ingredients.


I have gone back to the basics. This cake is said to be famous from Queen Victoria's times. Legend has it that the Queen herself would enjoy this delicious cake with rich whipped cream and tea every afternoon.          

 Rich, buttery and delicious , it is a perfect tea-time accompaniment. The smell is intoxicating and the ingredients are so basic that it is probably the first cake that an amateur should take a shot at. A very old baker once told me that a baker's quality can be best tested with the kind of Victorian sponge cake also known as pound cake one makes. Simple yet not to be unjustly not given due respect. The only thing to be kept in mind is that all the ingredients should be of an equal amount. You can make a loaf or the classic round cake.


I have seen that the quality of ingredients is the key to any good dish. It does not matter if one does not have access to some exotic ingredient but freshness and good quality are the only secrets which maketh or breaketh a dish. I have found that in Calcutta the unsalted butter from J.Johnson's is fresh and creamy and renders the best of cakes.


Serves 4 to 5

Pan size to be used - 6 inch to 7 inch pan

The basic ingredients are:

125 gm unsalted butter + 1.5 tsp for buttering the cake pan
125 gm all purpose flour + a 1 tbsp for using on the cake mould. (If you are using a cup which holds 250ml liquid then use 1 cup of the flour minus 1 tsp since a cup which holds 250ml liquid holds 128gm of flour)
125 gm castor sugar
Baking powder (Now for this please do read the package to know how much to use) I personally require half a tsp
2 large eggs

For the filling and topping for round cakes

250ml double cream (I would always recommend the dairy cream )
170gm strawberry
100gm castor sugar
1/4th of juice from a lemon


Start with the strawberry compote.

First mix the sugar and 120 gm (leaving 6 strawberries for decoration) strawberry together and let it sit for about 1 hour and then use the juice of lemon and bring to a boil and then simmer till ti reaches a soft sticky consistency. Whip you cream and keep it ready in the refrigerator.

The first thing to do is to butter the baking mould  ( 6 inch to 7 inch)  and dust it with flour. Timing is everything for baking. You should have your cake pan ready.

One should begin by sieving the all purpose flour and baking powder together. While one mixes the cake batter one should pre-heat the oven to 180 C. From my experience in the area of baking, the best cakes are the ones baked over a long period on medium heat. Too much heat would make the outer parts crispy and the inner parts uncooked.


Once you have started the process of preheating you need to be a bit quick because a  batter which sits out  for too long is a ruined batter. The Victorian sponge cake is one of my favourite cakes and so I have not only made it numerous times but have learnt to improve upon it overtime and only recently did I learn that using a wooden spatula yields the best result. So use the wooden spatula to soften the butter and then cream the butter by using the spatula against the wall of the bowl till its fluffy and add the sugar bit by bit to fluff it up to a point where all the sugar has melted and you are left with something which tastes light as air. Then add the eggs one by one and it is now that you should use your whisk to fluff up the batter and then reject the whisk again when you add the flour and switch to the wooden spoon and finally fold the flour and baking powder sifted from before by sifting it a second time . Your batter should be light and have a dropping consistency. (Remember that extra baking powder would invariably result in a cracked top and zinc like taste so be very careful about it)

 Seasoned bakers say that  the batter should never be over mixed.

Then all one needs to do is to pour the batter in the baking pan and bake it for  40 minutes to 50 minutes  in case one is using a convection oven or 30 minutes to 35 minutes for regular ovens. Do not open the door at any cost during this period. For a fool proof recipe (wrap a tea towel around the cake pan because when you use an aluminium pan the sides tend to heat up faster and as a result your sides often get overcooked, besides this might also lead to cracked tops so a tea towel ensures slow even baking)


Now patience is the key to success. So once done do insert a toothpick to check if its done. If the toothpick comes out clean your cake is ready but first it needs to sit in the pan once you take it out from the oven for 10 minutes. Run a knife around the edges and then flip it over a rack and flip that back and let it cool for another half an hour before slicing it in half for the whipped cream and strawberry compote to be applied. Apply a thick layer of whipped cream and strawberry compote and then place the other half of the cake on top and then apply a generous amount of whipped cream on top and decorate with strawberries. Enjoy this classic cake with a cup of steaming hot tea


Here are a few tips which might help in achieving that light firm yet airy Cake.


  1. Never over mix the batter 
  2. Creaming the butter and sugar to a fluffy airy consistency is a must 
  3. Once you start making your batter be as quick as possible 
  4. Once you have transferred the batter in the cake pan, wet your hands and gently press the batter. This helps in achieving an even top. 
  5. B every careful about the amount of baking powder since even a tiny pinch of  extra baking powder would lead to a cracked top. 
  6. If you double the recipe use 2 , 8 inch pans