Wednesday, April 30, 2014

Chocolate ice-cream


Chocolate ice-cream 


The truth is I have always had this particular obsession inside of me where I have the compulsory need to make things from scratch and while some things cannot be made at home some others with a bit of research or rather extensive reading will prove to you how you can give a run to those big companies for their money. It was way back in 2008 when I tried my first homemade ice-cream. Needless to say as a 19 year old I searched for recipes and found that most of them required an ice-cream maker and then searched for recipes for ice-creams without an ice-cream maker , made ice-cream which was not bad but the problem of ice-crystals almost defeated me even with hourly churning for 6 hours and then freezing it. Quite frankly I had decided that making ice-cream at home isn't worth the trouble without an ice-cream maker but then this was before I became Mr.Blanc's fan. A few episodes on BBC and I realized this man is a real magician of the kitchen. He effortlessly showed a recipe for a frozen dessert which is basically what English speaking people would call an ice-cream and low and  behold there was no ice-cream maker involved. I was overjoyed and what followed was a immensely successful batch of ice-cream but more importantly I decided to read up as much as possible about this one dessert which most people cannot stop loving.


I was surprised to know that ice-creams in Europe in fact used raw egg yolks or even whole eggs for that decadent creamy silky texture and many a recipe doesn't even require a machine because there are other tricks. For instance Raymond's recipe uses a fruity wine or some other alcohol to prevent ice-crystals. After many a batch of successful ice-creams which included flavours such as vanilla, Blanc's coffee flavoured parfait. Parfait is the French word for a dish which is perfect and usually frozen and indeed his recipe is perfect but then again once you get the gist of a dish, that is you understand its characteristics and truly understand it you have already entered into a magnificent relationship with the dish and you can whip up a successful version of your own.


While I have usually stuck to coffee flavoured ice-creams or glace or parfait if you would like to call it and have followed Blanc's recipe changing the flavours between vanilla and coffee but this was the first time I made my very own glace or ice-cream and  it sure was creamy and delicious and here is why. My recipe does not use alcohol but the secrets in the butter,well not dairy butter but cocoa butter. All that fatty goodness makes it decadently silky smooth and creamy and then there are the yolks working magic but I have made this without eggs as well and while I wouldn't suggest leaving out the yolks for people who eat eggs for those who do not there is the other option as well  .


Makes about 6 large scoops of ice-cream

What you need :-

500ml double dairy cream (Non dairy will not work)
5 egg yolks /If you do not eat eggs substitute it with 2/3rd cup homemade condensed milk made from 500ml of full fat milk
130gm of dark chocolate
7 to 8 heaped tbsp cocoa powder . Now here is the deal, I like my chocolate to be bitter , I mean normally I like mine 85% dark so I suggest you adjust the cocoa powder and I will show you how
3 heaped tbsp icing sugar


Start by chilling the cream in a big bowl and whipping it and then using a second large bowl to melt the chocolate on a double boiler and take off the heat and add the yolks or if you are using the condensed milk use that and whip very hard. Don't let the eggs scramble so keep whipping and when you have a glossy texture slowly start adding the sugar and cocoa powder and a bit of cream to make a smooth texture when mixing. Here I suggest adding the sugar and cocoa powder bit by bit and tasting it so that you know when to stop. Now simply fold in the whipped cream to make a smooth mixture and then freeze in an air-tight container. The trick to not getting any ice-crystal is to serve it as soon as it freezes which can take somewhere between 3 hours to 5 hours.

Here are a few  very useful tips :-


  1. We often find the ice-cram to be too hard and it stubbornly refuses to come out as a nice round scoop. Here is what you do. Simply warm water and plunge your ice-cream scooper in it and then try creating a smooth ball, You will be amazed , at least I was.
  2. Remember that serving the ice-cream as soon as it freezes over gives you ice-crystal free smooth ice-cream. 


Two cheese pasta

Two cheese pasta 


There are times when you feel cheesy. Well no pun intended but surely when you have two varieties of cheese at home sometimes you end up using both for a delicious treat even if the cheese isn't a apart of the cuisine from where you have taken your inspiration from but then again if the end result makes you feel happy does it really matter? After all you aren't really calling it with a particular name from the cuisine. So here I am presenting my two cheese pasta


Serves 1 - 2 (depending on appetite)

2 cups whole wheat penne (yields 3.5 servings of pasta)
3 ping pong ball sized tomatoes
1 large garlic clove + 1 medium garlic clove
1 tbsp olive oil
1 tbsp balmasic vinegar
1 tsp dried basil
1 tsp dried red chili
2 tbsp grated cheddar
2 tsp heaped crumbled feta

What you do is cook the pasta as per instructions on the packet. Now simply heat the oil and add the minced garlic and then add the tomatoes and use the balsamic vinegar and cook on high heat for a few seconds and add the herb and chili and add the pasta toss around and add the shredded cheddar , let it melt and add the crumbled feta before serving.


Grape Cooler


Grape Cooler


Fancy some healthy grape cooler to cool you down?

Here is what you do :-
Take enough ice so that you can fill half a drinking glass with the crushed ice
Take about 20 black grapes and blend it well
Just pour the grape juice over the crushed ice and slurp away. You can add sugar and strain the grape juice if you like. Me? I like to get my dose of fiber and hold the sugar for me please
Ah but do not start slurping till you have added a squeeze of lemon and some rock salt.
Stay Cool lovelies


Spaghetti with sun dried tomatoes

Spaghetti with sun dried tomatoes 


So give me the simplest of Pasta recipes and I am a happy girl. You see unlike what many people think Italian food doesn't always require a lot of cheese or heavy sauces. Of course the meatball sauce is to die for but the pasta dishes I like best are so simple that when during the worst of the summers or for that matter even the pleasant winters its a real treat for people who enjoy individual flavours but likes keeping it simple. In fact I once came across a recipe for Spaghetti which simply used breadcrumbs and anchovies. Hard to believe but true.

While we are almost getting sun dried with this terrible weather in Calcutta I decided it was time to sun dry some tomatoes and 3 days of glorious basking in the sun led to a jar of flavoured delights . Once my sun dried tomatoes were ready I was only to excited to use them and then what I did was simply use it with my favourite pasta Aglio Olio peperoncino. Now many a restaurants will have you believe that Aglio Olio has a host of ingredients with olives chopped in , herbs , Parmesan but the simple truth is all it needs is garlic, chili peppers, salt, olive oil and Spaghetti or any other pasta. So this is simple, all I did was add in some Sun dried tomatoes  and a bit of herb and my pasta was bursting with flavours .

Here is what you need for each serving of this pasta dish  :-

100gm of Spaghetti
2 medium sized garlic cloves
2 ripe chili pepper
6 to 7 Sun dried tomatoes
1 tsp dried or fresh basil (With the scorching temperature most of my fresh herbs are quickly drying out and I simply grind them to make dried herbs)
1 tbsp oil from the jar of sun dried tomatoes (This bit makes the dish unbelievably tasty)
Salt as per taste

All you need to do is cook the pasta as per instructions and if you like it al dente as I do cook it one minute less than the given time on the packet. Drain the water. meanwhile heat 2 tsp of the flavoured oil and add minced garlic and let the aroma fill your kitchen and immediately add minced chili peppers and then salt and the cooked Spaghetti, add the basil and toss around and before serving drizzle with 1 tsp flavoured oil and the sun dried tomatoes and you are in for a treat if you like things simple yet bursting with flavours.


Monday, April 28, 2014

Sun Dried Tomatoes


Sun Dried Tomatoes 


When I saw Rhea Mitra Dalal from Euphorea's post about Sun dried tomatoes on the culinary group Chef At Large I knew I had to make the best of the sun which can probably wrinkle and dry me and so a kilogram of tomatoes were chopped and thus began that incredible journey.


Sun -drying tomatoes in places where you get plenty of sun is easy but in a tropical country like our's here are a few points you might find useful which I am sharing from my experience . While you can use any herb or make it any way I am giving you the exact measurement and ingredients which I personally have used

Mixing everything


So basically what you need is :-

1 kilogram of plump red tomatoes. I used the medium sized ones
1 tbsp paprika
1 heaped tsp dried thyme
Salt as per taste but here I would like to point out that salt is a preservative and so using a bit of extra salt wouldn't be a bad idea. I used 1 heaped tsp + 1 dessertspoon of salt.

Dried after 3 days


Chop the tomatoes in small pieces and mix all the ingredients and place preferably on a flat colander or just a big plate. Let it wrinkle up. It might take any number of days from 3 days to 2 weeks. It took me 3 days. Once done the texture will be dry and leathery . Now simply store in a  jar and fill the jar with olive oil, I used 5 to 6 dried cloves of garlic and 1 whole sun dried red chili pepper for extra flavour. let it sit for 2 days and enjoy the amazing flavour. use on pizzas, pastas , salads or even on bread


Here is an idea of what can be done with these gorgeous beauties. Spaghetti with Sun dried tomatoes.


Points to remember :-


  1. Place the tomatoes side by side leaving a bit of space between them 
  2. Once the sun goes down immediately put your colander in the refrigerator else it might form moulds in a  Tropical country like India. i did a test and put out one slice outside and put the rest inside and the one slice developed mould within 1 hour. 
  3. Use a screen to ward off birds 
  4. If living in a  dusty area use a muslin cloth on top but make sure it doesn't touch the tomatoes . use bricks on four sides. Remember our Grandmothers making pickles and drying stuff before pickling  


Saturday, April 26, 2014

Mishti Doi / Sweetened Curd

Mishti Doi / Sweetened Curd 


The truth is sometimes we have the ideas in our head but until and unless we get 'proof of the pudding' from someone else we are too afraid to take up the challenge. You see I have always made thick curd at home. My trick, well its simple I thicken the milk a bit and strain it to remove all that unwanted layers of cream which does interfere with the curd's smoothness. I have often thought of adding sugar or jaggery to the curd while setting it but then backed out because I was not sure. Now there are a lot of recipes for the typical Bengali sweetened curd out there but most of them require you to bake it and that is perfectly logical but somehow I have a mental blockage. You see having been born and brought up in Calcutta I literally grew up with numerous sweetmeat shops around me and baking curd is not an option followed by any sweet shop in Calcutta and then I came across Swati Burman's recipe which simply used sugar and then set it like one would with normal curd. Simple enough for me. I did reduce the quantity of milk and what I ultimately had after overnight setting and 4 hours of chilling is thick luscious sweetened curd. I do use those big hot pots which keeps food warm.


Serves 5 to 6

Recipe Courtsey : Swati Burman from Ranna-Bati

So this is what I  required :-

1 litre of full fat milk
1 tbsp of store bought thick curd . In Calcutta I relied upon my local famous sweetshop which makes curd thick enough for one to confuse it with clotted cream
4 tbsp sugar , now the original recipe did call for 4 tbsp sugar for 2.5 litres of milk but that seemed a tad too less for me and so I did increase the amount of sugar
2 tsp clarified butter

So you begin by reducing the milk to half its quantity on low heat after you have added the clarified milk before you begin reducing. Please check notes. I took 35 minutes. Add the sugar after 15 minutes of reducing the milk. Now use a spoon and cream the curd in the bowl in which you are setting the curd.  I usually use a stainless steel bowl. You can only use the milk when it reaches a lukewarm stage, slowly add the milk bit by bit after straining it and keep mixing well with a whisk or spoon. I used a spoon, then cover with a steel lid and put it in a warm place. I put it in my hot pot and let it set over-night. In the morning it was a pot of thick luscious curd. I chilled it well and served it.

To be fair I did buy some of Bengal's famous 'Mishti doi' sweetened curd to just compare and found that the sweet shops use some more sweetener but the amount of sugar I used worked perfectly for me.


Note :Using the clarified butter does ensure that your milk does not stick to the bottom of the pan. I have heard that Earthen pots help you set the curd well. Since I have not used an earthen pot I cannot confirm this bit of information but to be fair all sweet shops in Bengal does serve the curd in earthen bowls.


Healthy Egg Chicken Sandwich in Whole wheat bread


Healthy Egg  Chicken Sandwich in Whole wheat bread 


To be fair I am a firm believer that what you make at home tastes best. Sure that jar of mustard, that bottle of hot sauce is superbly tasty but anything that comes out of a jar is something I do not use. My point is, if our grandmothers could then we can as well.


So on a day when I overslept while taking my afternoon nap I got up and realized that I hadn't really eaten much that day thanks to the oppressive heat which anyway kills your appetite at times. Lucky for me I had a freshly whole wheat bread sitting in my kitchen, a jar of homemade  hot sauce , a jar homemade mustard , some boiled chicken waiting to be made into a sandwich.

So my basic aim is to be keep this as healthy as possible and if you do not have homemade sauces do use the ones you buy from outside :) but what I firmly will say is there is no mayonnaise or butter involved. Ultimately the healthy sandwich was delicious enough for me to turn it into dinner.


Serves 2 as a snack and 1 for a meal

So this is what you basically need : -

4 slices of whole wheat bread . If you want the recipe for wholewheat bread , here it is
Roughly 1/2 cup of shredded boiled chicken.
1 boiled egg
Half a red bell pepper chopped into bite sized pieces
2 tsp Mustard sauce.
2 tsp hot sauce . If you want the homemade version here it is
1.5 to 2  tbsp olive oil
2 fat cloves of garlic sliced paper thin
1 tsp paprika
Pinch of salt
1/2 tsp rosemary leaves

Heat the oil and saute the bell pepper and garlic with the chicken and rosemary and keep aside. Make thin slices of your boiled egg (I made 4 slices) . Now in the same pan toast the bread till it attains a light brown colour but make sure it doesn't brown too much. Now simply assemble the sandwich by placing some sauteed vegetable chicken ,placing two slices of eggs add some mustard sauce and hot sauce some more sauteed chicken vegetable and top up with a slice of bread. To make sure everything stays in place, place a heavy stone utensil on top of the last slice after assembling the sandwich, this way when you eat it everything would not come out. Enjoy a healthy snack or a healthy meal.


Friday, April 25, 2014

Sesame Chili Grilled Chicken


Sesame Chili Grilled Chicken 


The truth is I get these strange cravings at times. I mean I literally can taste the imagined taste that I crave in my mind and then until I satisfy my taste bud's cravings I feel very uncomfortable. So last evening, I had this particular craving for something spicy. Well, coming from the land of spices one might be confused when I further say that for me its more so a craving for hot food and not just any hot food but succulent juicy chicken with a dominant flavour of red chili.


So at 8 in the evening I went to marinate some chicken and what followed amused me. I was going to make my favourite marination where I basically throw in Garlic, apple cider vinegar, whole red chilies and olive oil when the jar of sesame seeds caught my attention. You see I have this incredible love for sesame and what I particularly fondly remember is my favourite blogger from Lebanon writing about a marination for a kebab where out of many ingredients sesame seeds and cumin were my favourite and the ones readily available to me. So ultimately this is what happened , I created this dish which can be part of no cuisine yet has its inspiration from the Middle East but writing down the recipe is for the lovely people I interact with on Chef at Large. You see when I posted the pictures for my chicken I seriously did not expect that some love members would want the recipe for my chicken where I threw in things would which isn't part of any cuisine. Well these indeed are the small yet delightful joys of life.

What you need for the recipe

200gm chicken with bones - I prefer the legs and wings

For the marination

4 large cloves of garlic
1 tsp cumin seeds
3 tbsp sesame seeds
4 whole red chilies (The spiciest variety you can find)
I used my homemade hot sauce but in case you don't have homemade hot sauce increase the number of whole red chilies to 8
1 tbsp apple cider vinegar
2 tbsp olive oil
Salt as per taste

Simply blend everything from the marination to a smooth paste and marinate the chicken for at least 2 hours or overnight and grill it. I use a Convection Oven from Samsung in India and I grilled it in the grill mode for 20 minutes on one side and 11 minutes on the other. My chicken was soft succulent, juicy and melt in the mouth .


P.S. When blending everything a few sesame seeds might refuse to become part of the marination , don't worry about it simply marinate the chicken with everything 

Wednesday, April 23, 2014

Egg wrapped Chicken Wine Rice

Egg wrapped Chicken Wine Rice 


One of the pleasures of my life is to follow step by step elaborate recipes and the other joy is to create quick fix meals when I am swimming in a lot of work. To be fair Minced meat rice is something which I have been eating since I was a child. You see I was not fond of the usual fare cooked at home and would refuse most of the food and so my grandmother would lovingly prepare this Chicken minced meat rice which I would happily eat since it was so delicious. Of course she would add peas and the Indian spice mix 'garam masala' and later when I grew up I realized this is one of the easiest recipes I can make when in a hurry. Of course I use herbs and throw in my ideas but basically its a very easy recipe.

The wine rice 


Now new ideas always attract me and so when Sayantani Mahapatra , a fellow blogger from Kolkata Food Bloggers which I am a proud member of posted this picture of Omurice I knew I had to make it even though I have to admit I didn't quite find the time to read her recipe, but this idea of a thin omelette with rice filling got me excited. I wanted to know what Omurice is and as per the information over  the internet its basically a Korean westernized dish with Japanese influence and usually has ketchup on top. Now I am not a fan of ketchup so I just made up my own recipe but it looks pretty enough and well the taste is probably going to be interesting for you if you like wine, chicken, herbs and eggs.


What you need for 2 servings to 4 servings (depending on your appetite and food intake)

4 eggs
2 tbsp olive oil

Chicken wine rice

1 cup basmati rice or any long grained rice
1 tsp butter
6 tbsp fruity white wine . I used Chenin Blanc
1 heaped tsp oregano
4 large cloves of garlic
2 tbsp apple cider vinegar
15 whole black peppercorn
2 whole dried red chili
Salt as per taste
3 tbsp olive oil
150gm to 200gm minced chicken

Start by washing the rice and using butter to mix with the rice . This step ensures that your rice stays fluffy and separate. Now soak the garlic, whole red chilies, oregano , 1 tbsp oil and black peppercorn in the vinegar. After 15 minutes soak it in 2 cups of water. Soak for another 30 minutes to 1 hour and then bring the rice with the water to a boil and immediately simmer covered for 10 minutes. If your pan is toop small then the foam might try to escape in that case leave a little gap till all the water gets absorbed and then cover. You know its done when it appears all fluffy. let it rest for 10 minutes and transfer to a colander else it will stick together. Now blend the vinegar with the garlic and other ingredients soaked in it to create a beautiful emulsion .


Now heat the rest of the oil and fry the minced chicken on high heat for 1 minute , keep stirring else they will form a big lump and add the spice emulsion you have created and keep stirring and then add 3 tbsp white wine and keep cooking on medium flame stirring continuously till it dries up and the oil comes out a bit.

The Omelette 


Now take a deep bottomed vessel and put one layer of rice, 1 tsp of wine and some cooked minced chicken and keep layering and leave it alone for 15 minutes. Use a splash of wine from the top.


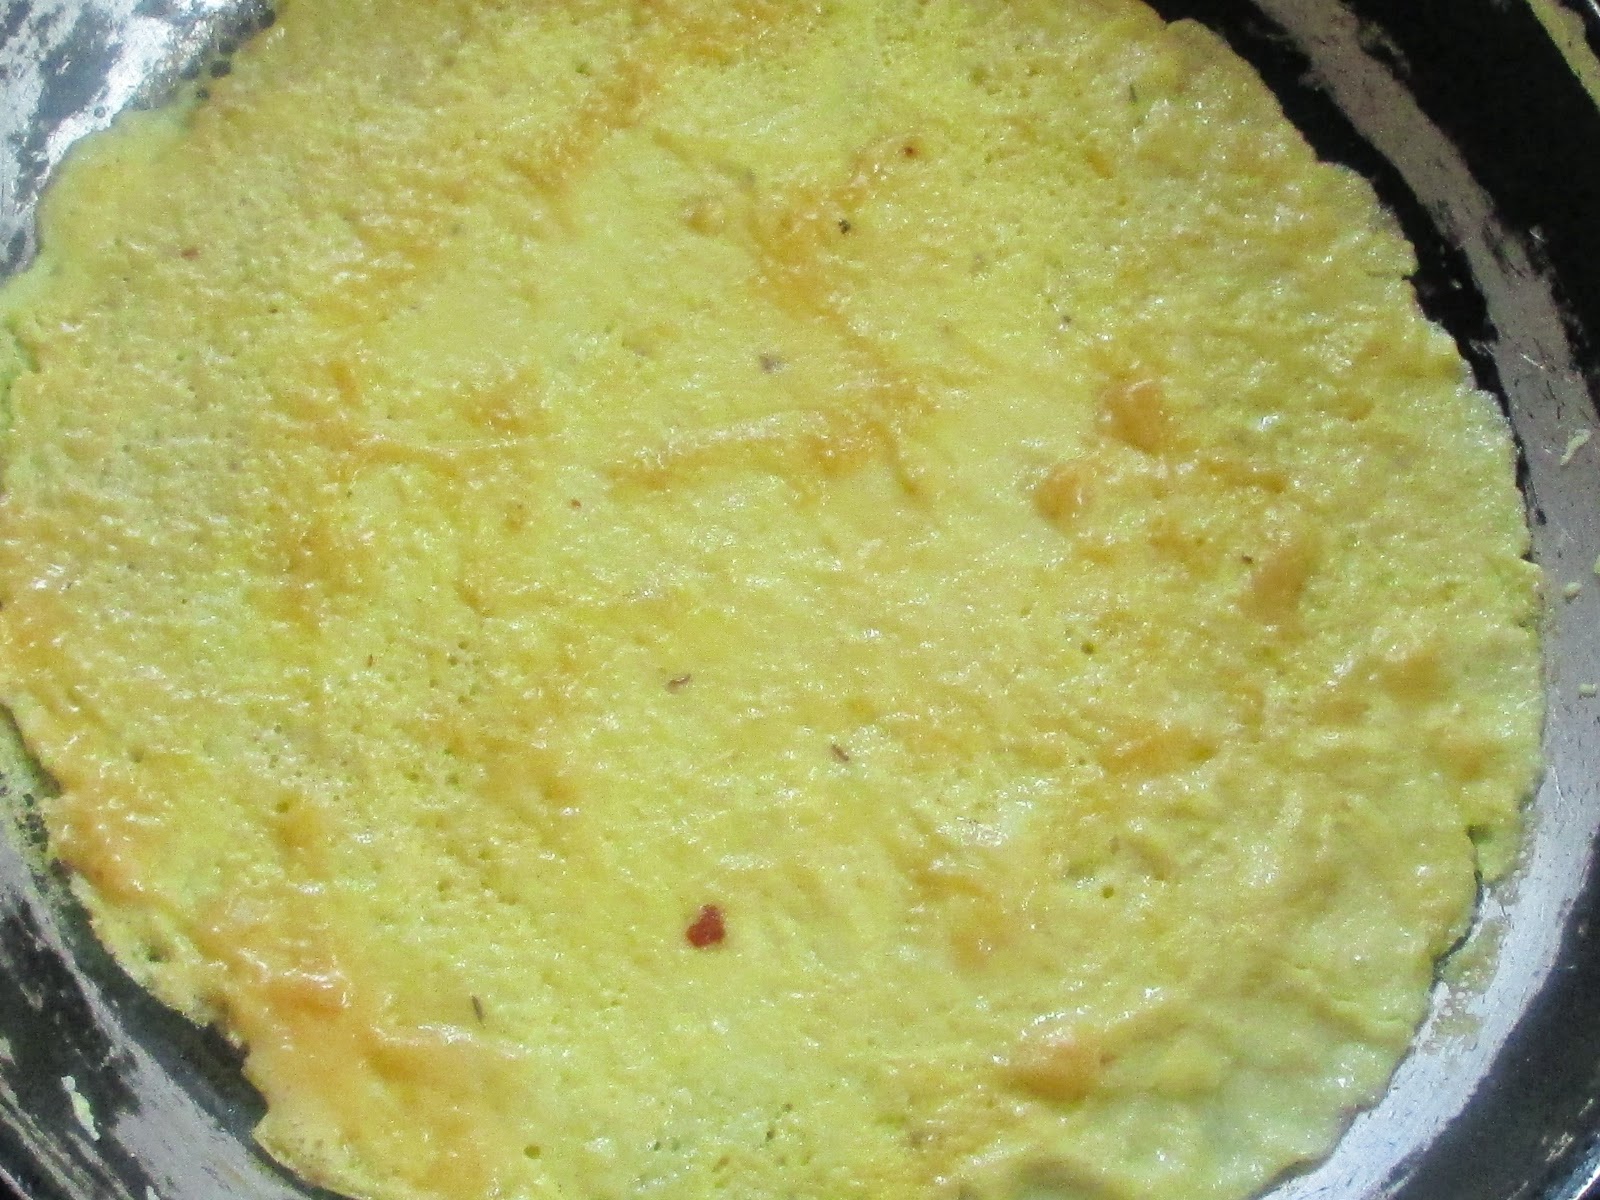
For the eggs whisk them well and use a large skillet to make a thin omelette. Make two omelettes one after the other .Wait till you are able to handle it with your hands and then place it on a big board and place some rice on the omelette and wrap it carefully.You have to have patience else it breaks. Cut it in half and serve it. You might find some extra rice after you have wrapped the eggs. Serve the rice on the side.


Milk Bread

Milk Bread 


My father has always maintained that no other bread tastes as good as the humble milk bread. While I do not accept his thoughts on bread because I love whole wheat bread and some other breads as well on a hot summer's day I make a batch of milk loaves for my father who loves fresh soft milk bread with copious amount of butter spread on it and sugar sprinkled on it. And it becomes a heavenly  treat with fresh cream on top


The truth is that, once you start making bread it is only through your experience that you come to know of certain important aspects which no recipe talks about.


For instance the first time I had baked a bread I had thoroughly searched the internet for recipes and most of them scared me until I stumbled upon Dan Lepard's artisan bread. It was well explained and my bread had come out perfect, yet after my experience with a couple of other breads it was only practice which made me realize that while the success of a bread baked at home depends largely on the right recipe so does some other factors. So, most people face a problem of the bread not rising but did you know that is bread is proofed beyond requirement it will rise and then start expanding but you need not worry because there is a solution. You simply punch it down knead and let it rise :)


Milk bread is one of the easiest breads one can bake and the ingredients are very easily available and stocked by most homes and so it usually saves you the trouble of going out to gather ingredients.

Here is what you need for the recipe :-

For the recipe I followed Dan Lepard's recipe to the tee but cut the recipe down to suit my requirements

312 gm all purpose flour + a little extra for kneading
1 tsp instant yeast
50ml cold water
188 ml warm milk
38 gm salted butter
13g castor sugar or honey (I had used honey)
Extra butter for greasing and kneading
1 tsp salt
Though not mentioned in Lepard's recipe I used extra milk to brush the tops before baking

Start by bringing the milk to a boil and letting it cool down to a lukewarm stage when you add the cold water and the yeast. Remember that the liquid must not be of a high temperature else it shall kill the yeast.

Next mix the flour, castor sugar or honey, salt and then melt butter and pour in in the dough. Use your clean hands to knead. Remember it will be sticky but you must not add extra flour else your bread will come out hard. keep kneading the sticky dough for 10 minutes and then let it rest for 10 minutes covered with a wet cloth. After 10 minutes grease your hands with butter and knead it till it forms a super soft dough and let it rise for the next 45 minutes to 1 hour.

Before the final rise 


Here is the tricky part. Dan Lepard works in a cold country and I stay in a tropical one , so my bread was done in 50 minutes and then I punched it down and added flour to knead it and shape it. I  divided it in three balls and shaped them like sausages by rolling them and placed them side by side. I covered it with the cloth and let it rise for the next 20 minutes.

Ready to be baked 


Now preheat the oven to 180 C and bake for 40 minutes to 50 minutes in a well greased tray or a loaf pan. Do not forget to brush the dough with milk before baking it for a beautiful brown yet soft crust else your crust will blacken.


It is important to let the bread cool completely before slicing it up. It takes a bit of practice to get it out of the tray. Simply use a blunt knife to gently but firmly bring it out after 10 minutes and cool on a wire rack.

P.S. When baking the bread always use a tray of boiled water beneath the rack on which the bread is beign baked. This keeps the bread moist while it is baking.

Enjoy the soft slices buttered well . Indulgence is a luxurious necessity. In the end my father might have shown his mock anger and said, 'The daughter is doing nothing but baking . Why don't you open a  bakery?' but his chewing on the buttered slice of milk bread said otherwise . Now I can happily go off to sleep and wake up to a delicious breakfast :)


Sunday, April 20, 2014

Neni Qualiya

 Neni Qualiya 

(Gohst ka Qualiya) 


This recipe takes me back a good 9 years when a 16 year old who disliked mutton decided to take it upon herself to prepare a dish but she did not want it to be made the normal way with garlic, onions and tomato paste as is usually made in most homes from the region she comes from. So she checks the internet for recipes and this Kashmiri recipe catches her attention because it neither uses garlic nor onions ,nor tomatoes and yet it has ingredients which sound mysterious to this girl who has never heard of those ingredients being used in any other recipe. She follows the recipe and uses her own little trick to make sure the meat is succulent and melt in the mouth so that her critical father is left with no scope for criticism and even without words of appreciation as the base for understanding the success of the dish the helpings makes her sure ti would be a hit dish with anyone who loves goat meat. Over the years she has prepared it for many people all of whom simply helped themselves to multiple helpings which was enough for this girl to keep serving this dish while she grew up from a girl and stepped into womanhood.


What more the name itself seems so close to home. In Bengal we have something called kalia , a rich gravy and here the name Qualiya seemed mighty similar. We use saunf and mustard oil and so does this recipe.


I have divided the ingredients as per the steps one follows to prepare the dish So lets prepare some Qualiya shall we :-

Step 1

800gm mutton
2 tsp dried ginger
1.5 tsp salt
1.5 tsp turmeric
1.5 tbsp saunf
1 tsp kashmiri mircha (red chili powder from Kashmir)
2 big black cardamom
Pinch of asafoetida
800ml water

Step 2

200ml of whole milk
200gm of thick curd
1 tsp ground saunf
dried ginger powder 1 tsp

Tempering

4 tbsp mustard oil
1 tsp cumin
2 cloves
Pinch of asafoetida

Final stage

3/4th tsp garam masala
8 green cardamom
1/2 tsp shah jeera


Simply take the ingredients of step 1 in a container with a capacity of 3 litres to 4 litres. I used a heavy bottomed pressure cooker and bring everything to a boil and then simmer covered without the pressure for 45 minutes.


Now simply strain the meat and discard the whole spices reserving the stock. Whisk the curd and milk together and then slowly whisk it with the stock and then bring to a boil in the pressure cooker while continuously stirring and simmer and add the pieces of meat.


Now heat oil in a separate wok and add the ingredients for tempering and let them splutter but make sure to not char them and add it to the pressure cooker which is cooking the meat and then close the lid and cook on low heat till it whistles. After 1 whistle let the steam come out on its own. Now open the lid and check the consistency. You should have melt in the mouth soft meat by now. Bring everything to a boil and add the ingredients from the final stage and simmer for 5 minutes. Serve piping hot with plain rice also called 'bata'. If serving later you should bring to a boil just before serving and then add the ingredients from the final stage because the dish is to be served piping hot .


Thursday, April 17, 2014

Two cheese salad


Two cheese salad 


Summers and cool salads go hand in hand. One of my favourite ways of cooking in the unbearable tropical summer heat is to simply chop some salad and chill it and then make a dressing and that's that. You see while I love spending as much time as I can in the kitchen during the summers it becomes almost unbearable so here is a simple salad and if you have it by itself its quite healthy even with the cheese in it and if you are having it as a side might I suggest sharing it a bit :) This time I wanted a creamy salad and the cranberries which I added in the end on a whim provided that much delightful tangy delight. So here goes my recipe for a creamy cheesy salad 


Serves 1 

2 cups shredded iceberg lettuce 
1 large cucumber 
handful of dried cranberries 
28gm edam cheese cubed in tiny bite sized cubes 

For the dressing :-

3 tbsp feta 
2 tbsp extra virgin olive oil 
1 tsp oregano 
Salt and pepper as per taste 

Simple cube the cucumbers and mix your salad and chill. Whisk the dressing together to get a smooth creamy dressing and pour over your salad and enjoy. Do not ever add your dressing when chilling because it leads to a lot of water coming out making the salad soggy.